10 11
NLHUUKESDE
1.6 ADJUSTING THE DV12K FOR USE
The DV-12K is now ready for use; we only have
to adjust the time.
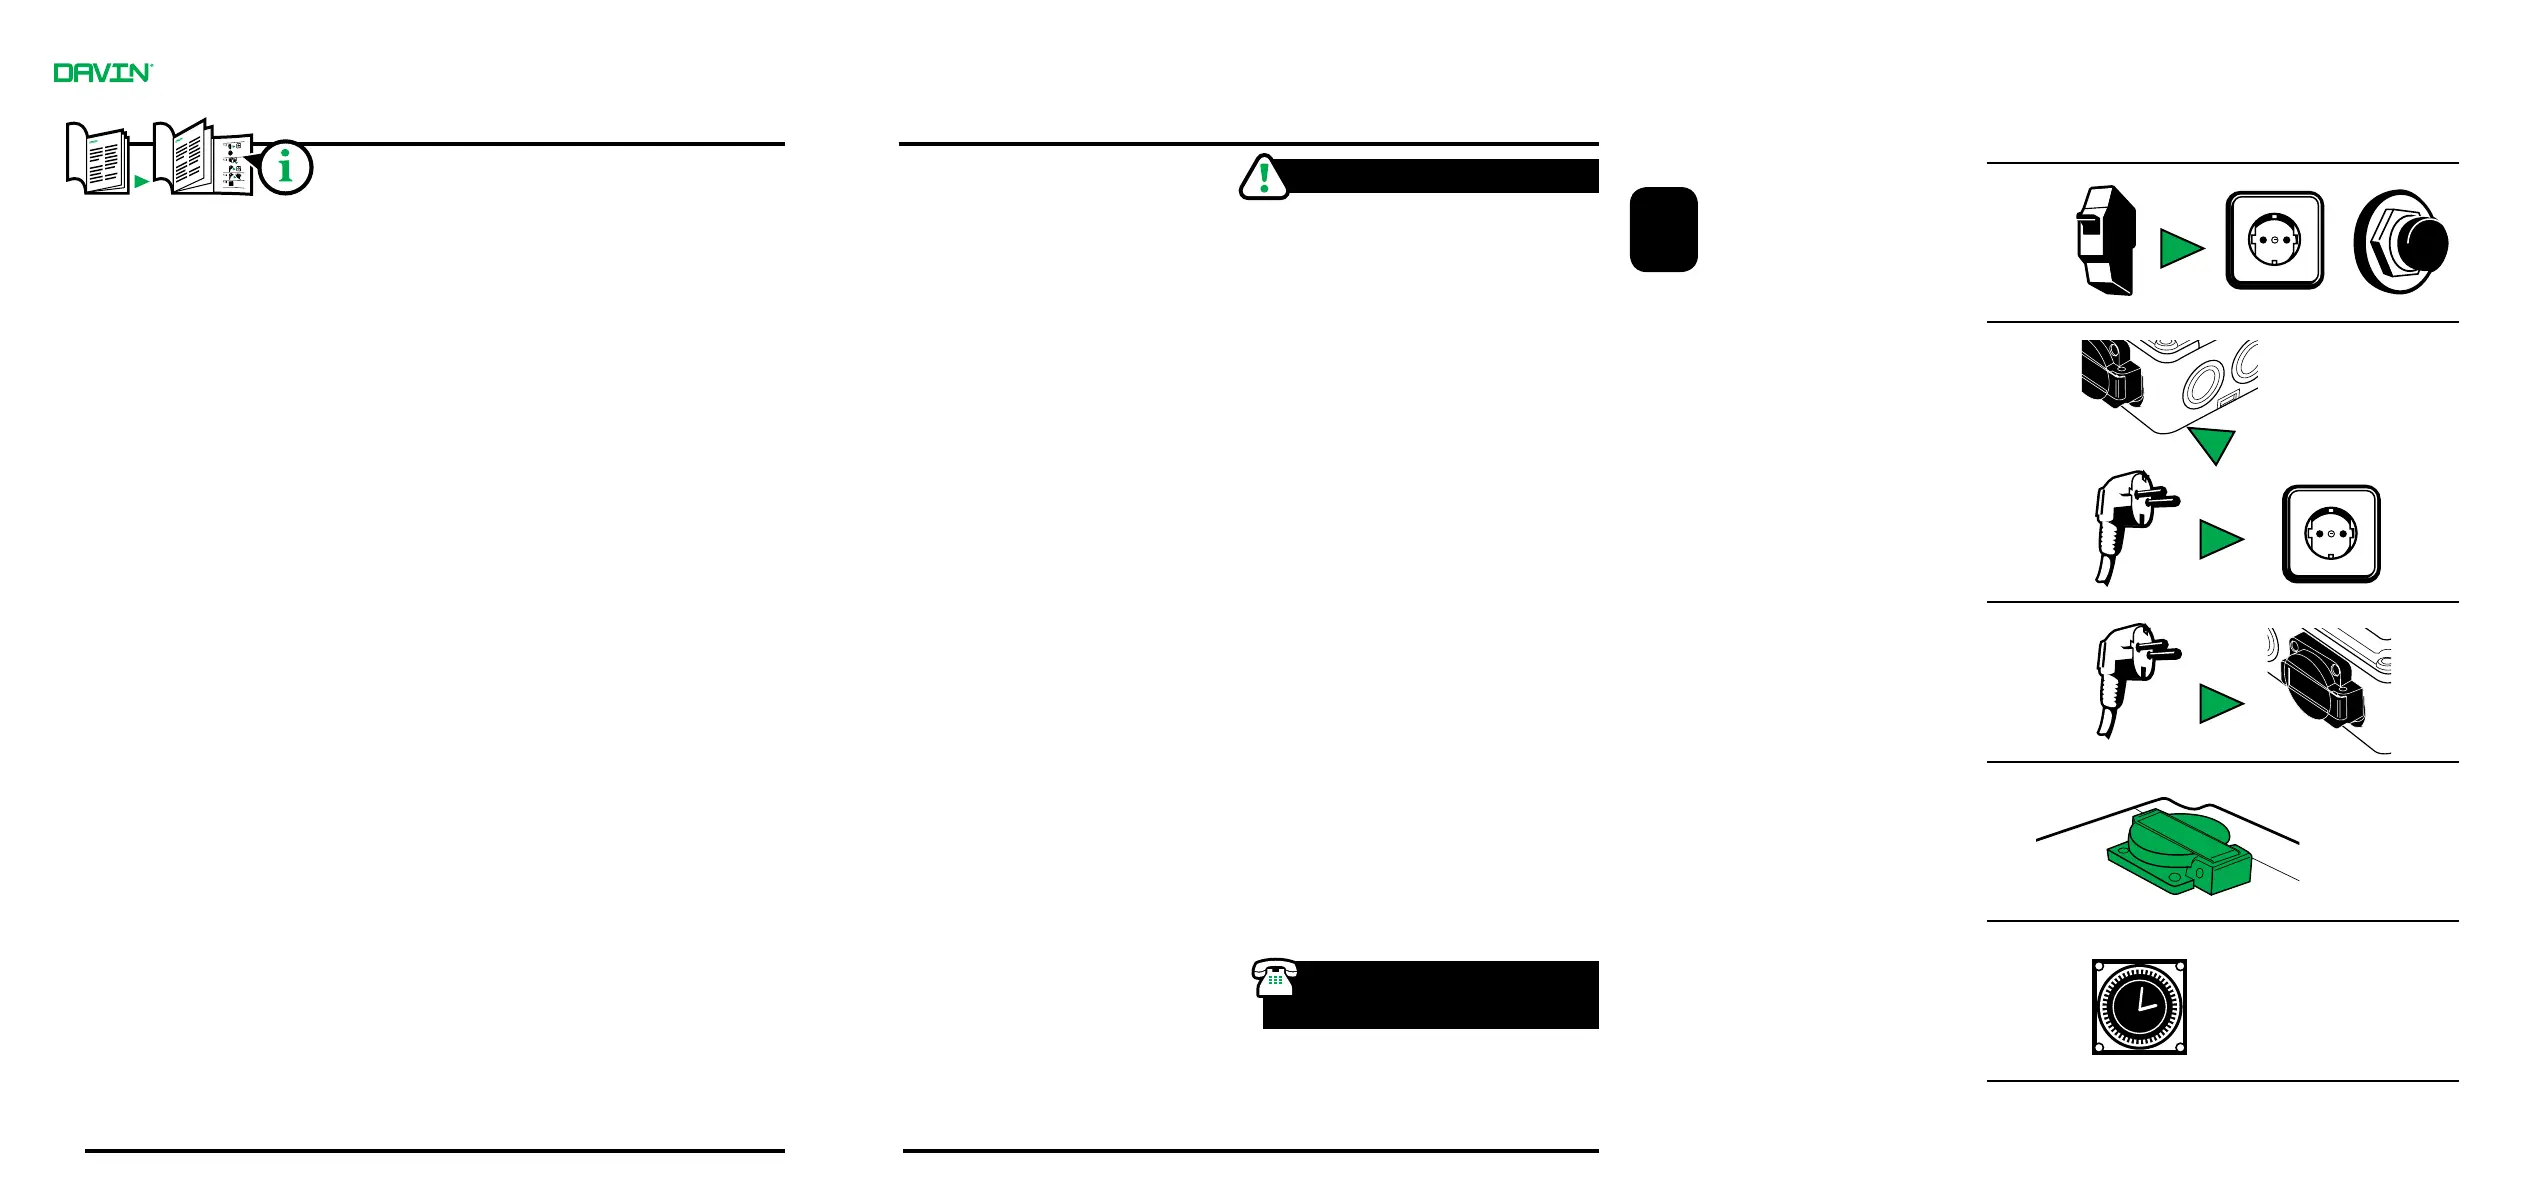
• Removetheplasticcapofthetimeswitch.
Ontherightsideoftheclockyouwillnda
3-position switch.
1 = Continue ‘ON’
0 = Everything ‘OFF’
2 = The DV-11 switches at the set times.
• Putthe3-positionswitchontheclock(2)
• NowwehavetodeterminewhentheDV-12K
needs to be switched ‘ON’ and ‘OFF’.
• Therefore,thepins(thesocalled‘running
weights’) that are around the clock need to be
pushed out.
ArethepinspushedINWARDS;Theclockwill
switch ‘OFF’.
ArethepinspushedOUTWARDS;Theclockwill
switch ‘ON’.
• Tohavethetimerswitchbetween2times(the
‘ON’ time, and the ‘OFF’ time), ALL the pins
between those 2 times need to be pushed out.
• Theshortestswitchpositionoftheclockis15
minutes.
• Whenyouhavedeterminedthe‘ON’and‘OFF’
times, turn the clock slowly (manually) clock-
wise to make sure everything is correct.
• Ifyouaresurethateverythingswitchesatthe
right time, the DV-12K is ready for use.
1.7 FOR YOUR SAFETY
• ThecorrectoperationoftheDV-12Kisonly
guaranteed, if you observe this manual.
• AlthoughitispossibletoinstalltheDV-12K
yourself, we recommend to have this done by
acertiedinstaller.
• BeforeinstallingtheDV-12K,the220v.voltage
MUSTbetakenoffthepowerpoint(Check
this!)
• ThisguideshouldonlybeusedfortheDV-
12K.
• DAVIN
®
products are covered by a 1-year war-
ranty.
• Toqualifyforthiswarranty,youarerequired
to return the DV-12K to the point of sale.
• IfchangesaremadetoDAVIN
®
products
without the express and written prior permis-
sion of the manufacturer, the warranty will
become void.
• TheDAVIN
®
warranty will also become void
with improper installation of the DV-12K.
• Neitherthemanufacturer,northeimporter,
nor the retailers of the DV-12K are liable for
damages arising from the use of the DV-12K.
SERVICENUMBER/HELPDESK:
+31 (0)6 – 14 813 447
Manual DV-12K
1.0 GENERAL
The DV-12K is a time controlled relay box with
whichamaximumof2x600wattttingsor2x
400wattttingscanbeswitched.Nexttothis,
the DV-12K has an outlet for a heater.
1.1 TECHNICAL DATA
Dimensions : 110 x 210 x 70mm.
Requiredvoltage :230Vac/50Hz.
Max. Output : 6 Amperes.
Max. output heater : 6 Amp.
Isolation level : IP-44
1.2 REQUIRED ACTIVE VOLTAGE DV12K
To connect the DV-12K you will preferably need
a ‘clean’ group of at least 6 Amp. A ‘clean’ group
means that this group will only be used by the
by the DV-12K. If you do not have a(n) (extra)
‘clean’ group we advise you to have the DV-12K
installedbyacertiedinstaller.
The DV-12K has a 6 Amp thermal fuse.
This fuse turns off the DV-12K automatically in
case of an overload and / or a short circuit.
1.3 THE INSTALLATION OF THE DV12K
At the back of the DV-12K there are 2 mounting
brackets. This allows you to mount the DV-12K
onto a (flat) surface.
CAUTION!
The analogue timer is a sensitive part of the DV-
12K, and is not resistant to hard shocks.
• PlacetheDV-12Kclosetoyour‘clean’group.
AtthebottomoftheDV-12Kyouwillnda
grounded (230v.) connection cord
• Install,ifneeded,agroundedoutletontoyour
‘clean’ group.
• Plugthecordintotheoutletofyour‘clean’
group.
• YourDV-12Kisnowconnectedtothemains
voltage.
1.4 CONNECTING EQUIPMENT TO THE DV12K
Youcanconnect2x600wattor2x400wattt-
tings to your DV-12K.
In steps 1.2 and 1.3 you have;
• ConnectedyourDV-12Ktoa‘clean’group,
• Mounteditontoaatsurface,
• Connectedittothemainsvoltage.
Nowtheelectricalballasts(ttings)willhave
to be connected to the DV-12K. Please read the
installation manual carefully before you connect
the electrical ballasts, in order to connect them
properly.
If the electrical ballasts have been properly con-
nected there will be a 230v. cord on each of the
electrical ballasts. Plug both cords of the elec-
trical ballasts into the power outlets (sockets) on
thesideoftheDV-12K.Younowhaveconnected
2 electrical ballasts to the DV-12K.
1.5 THE HEATER OUTLET
AtthefrontoftheDV-12Kyouwillnda(green)
built-in power outlet (socket) for the electrical
heater of max. 6 Amp. This is where you can
place your heater.
Manual DV-12K
1.2
1.3
1.4
1.5
1.6
 Loading...