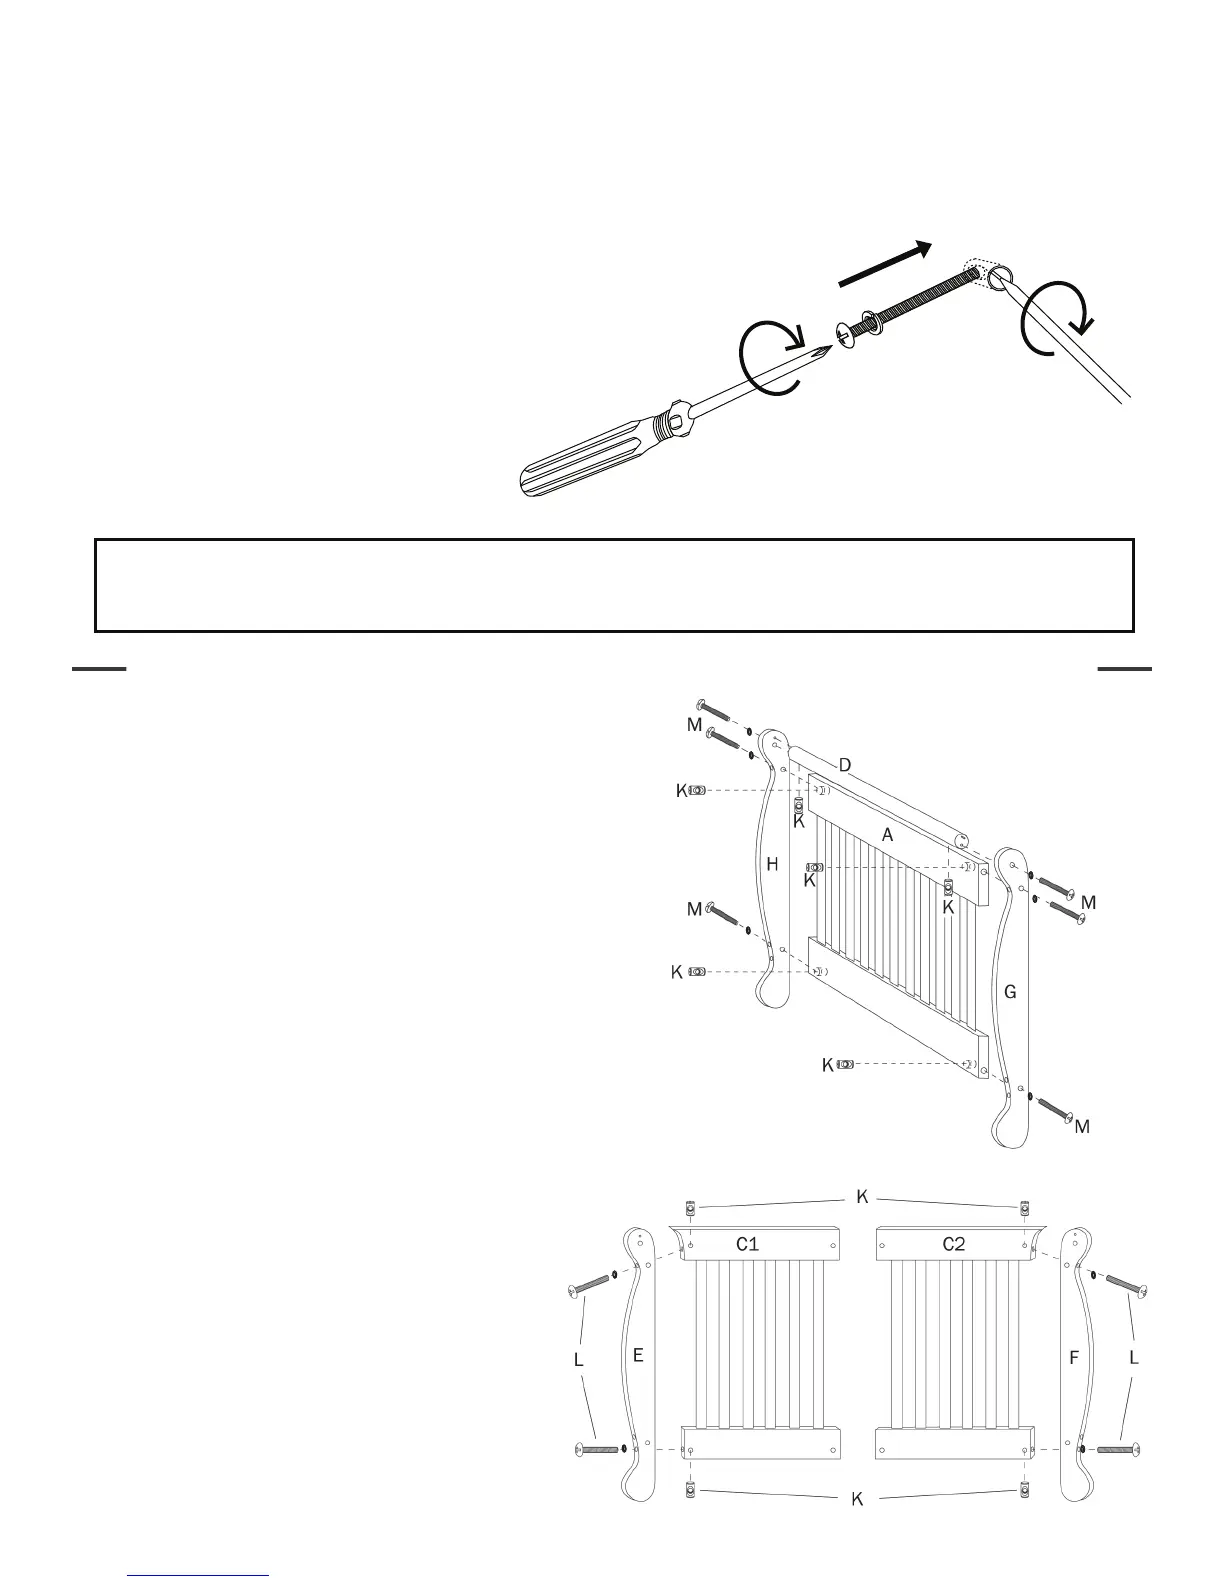
Attach the right (H) and left (G) rear legs, headboard
(A) and cross bar (D) using 6 Phillips head bolts (M),
barrel nuts (K) and big lock washers (R).
Tighten the bolts securely.
Attach the left (E) and right (F) front legs to the
side panels (C1) and (C2) using 4 Phillips head
bolts (L), barrel nuts (K) and big lock washers (R).
Tighten the bolts securely.
Fixer les pieds arrières droit (H) et gauche (G) au
grand dossier(A) et une traverse (D) en utilisant 6
boulons Phillips (M) et 6 écrous à portée cylindriques
(K) et des grande rondelle de blocage (R).
Serrer les boulons solidement.
Fixer les pieds antérieurs gauche (E) et droit
(F) aux panneaux latéraux (C1) et (C2) en
utilisant 4 boulons Phillips (L) et 4 écrous à
portée cylindrique (K) et des grande rondelle
de blocage (R).
Serrer les boulons solidement.
R
R
R
R
R
R
R
R
Please follow the rest of the instruction steps in the instruction manual to complete the assembly.
Veuillez suivre le reste des instructions du manuel pour terminer l’assemblage.
Flat Screwdriver
Tournevis plat
Phillips Screwdriver
Tournevis cruciforme
N. Mattress board
mounting bracket
left (2) and right (2)
N. Support de fixation
du support du matelas:
N. Mattress board
mounting bracket
left (2) and right (2)
N. Support de fixation
du support du matelas:
* The bolt may not be able to screw through the barrel
nuts smoothly. It is suggested to use a flat screwdriver
to stabilize and adjust the direction of the barrel nut.
* Il est parfois difficile de visser correctement la vis
dans l’écrou. Vous pouvez utiliser un tournevis plat
pour corriger l’orientation de l’écrou cylindrique et
l’immobiliser.
Please use an Allen wrench to screw the bolt with the
lock washer straight into the threaded nut until it is tight.
À l’aide d’un clef Allen, vissez la vis avec une rondelle
de blocage dans la partie filetée de l’écrou et serrez.
3
ASSEMBLY INSTRUCTIONS • INSTRUCTIONS D’ASSEMBLAGE
1
2
page 4