Mounting the Anemometer Transmitter Page 11
3. Swivel the anemometer until the arm is pointing north.
4. Using an adjustable wrench or 7/16" wrench, tighten the nuts.
If the anemometer arm is not pointing north, follow the instructions in
Appendix C in your ISS manual.
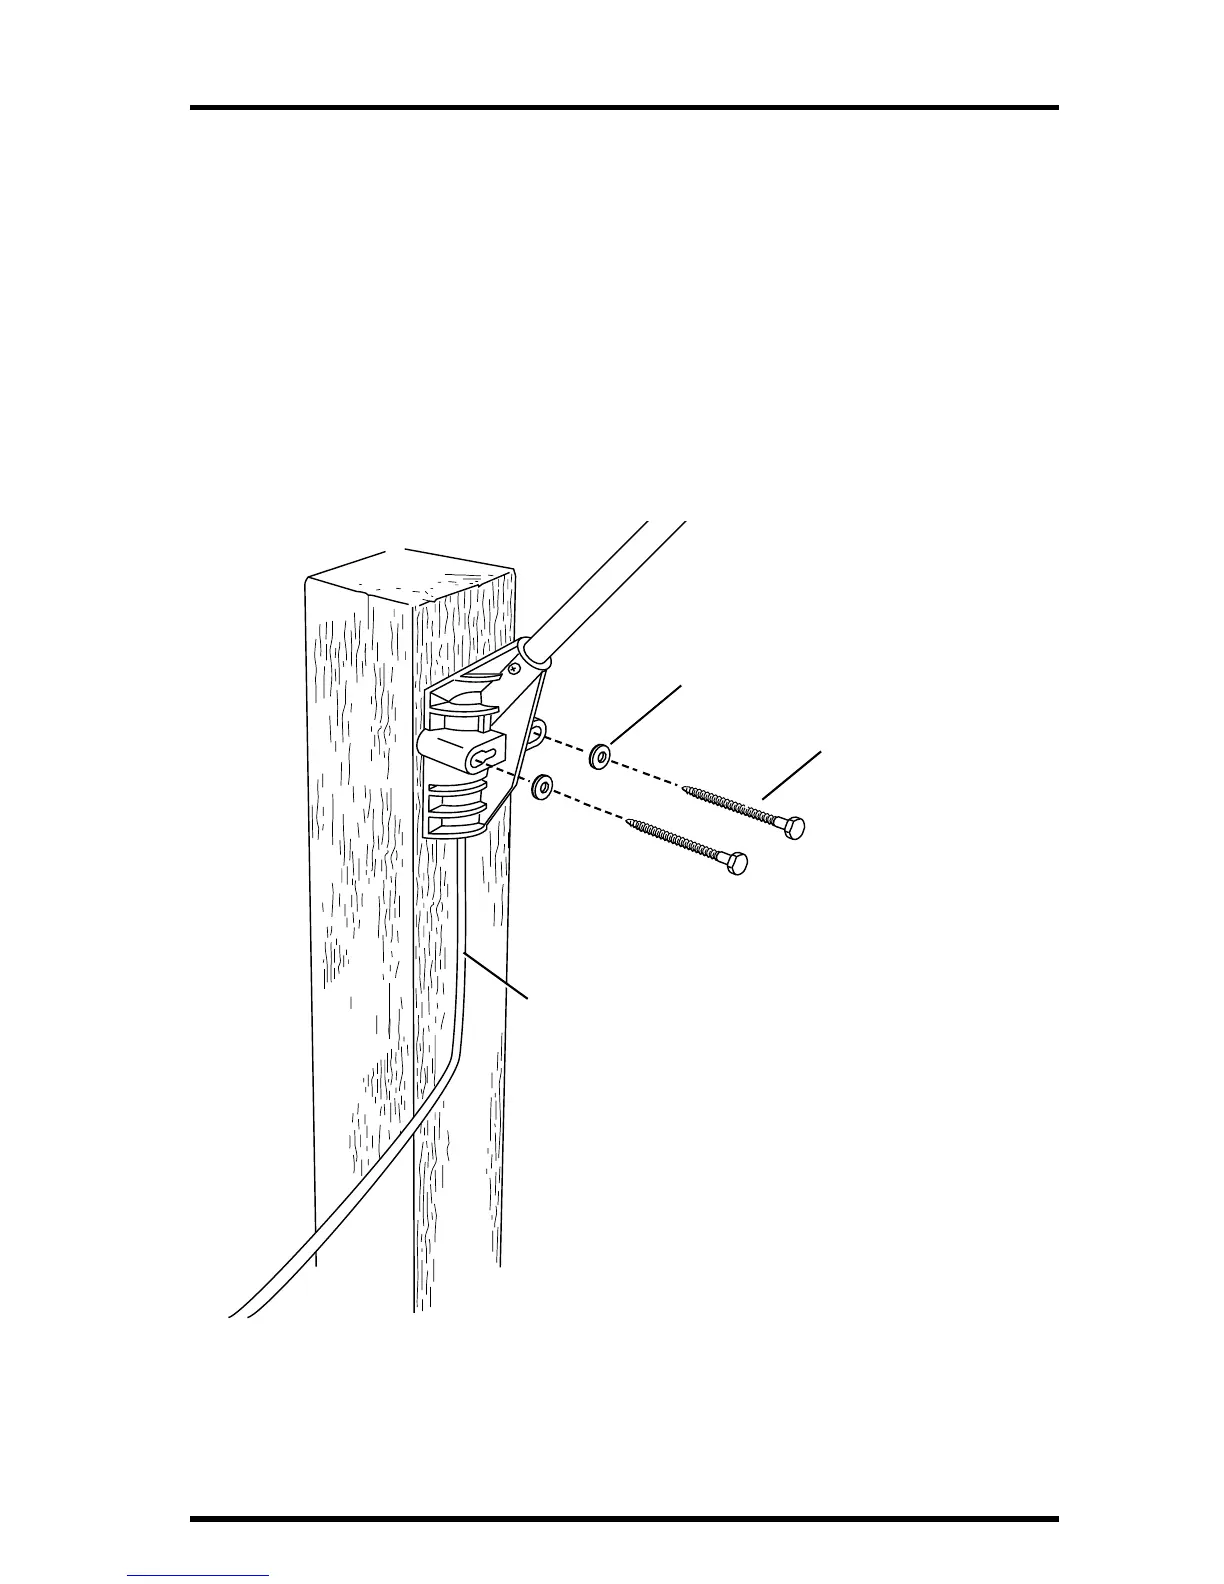
Mounting Anemometer on a Vertical Surface
1. With a 3/16" (5 mm) drill bit, drill two holes approximately 2-1/8" (54 mm) apart. Use a
carpenter’s level to ensure the holes will be level.
2. Insert the 1/4" x 3" lag screws through the flat washers and the holes in the mounting
base into the post.
MOUNTING ANEMOMETER ON A VERTICAL SURFACE
3. Using an adjustable wrench or 7/16" wrench, tighten the lag screws.
If the anemometer arm is not pointing north, follow the instructions in
Appendix C in your ISS manual.
1/4" Flat Washers
1/4" x 3" Lag Screws
40' of Anemometer Cable