3
WALL MOUNTING INSTALLATION
Important:
Mounting hardware required will vary depending on the surface
of the wall the Clothesline will be mounted to.
When mounting to concrete, brick or masonry walls we recommend
Daytek 8mm Marine Grade Anchor Bolts (Sold separately).
For wood or other specialised materials please consult your local
hardware store or professional for advice.
Never attach clothesline to mortar between brickwork. Ensure fixing
surface is structurally sound. Install away from Heating or Cooling Units.
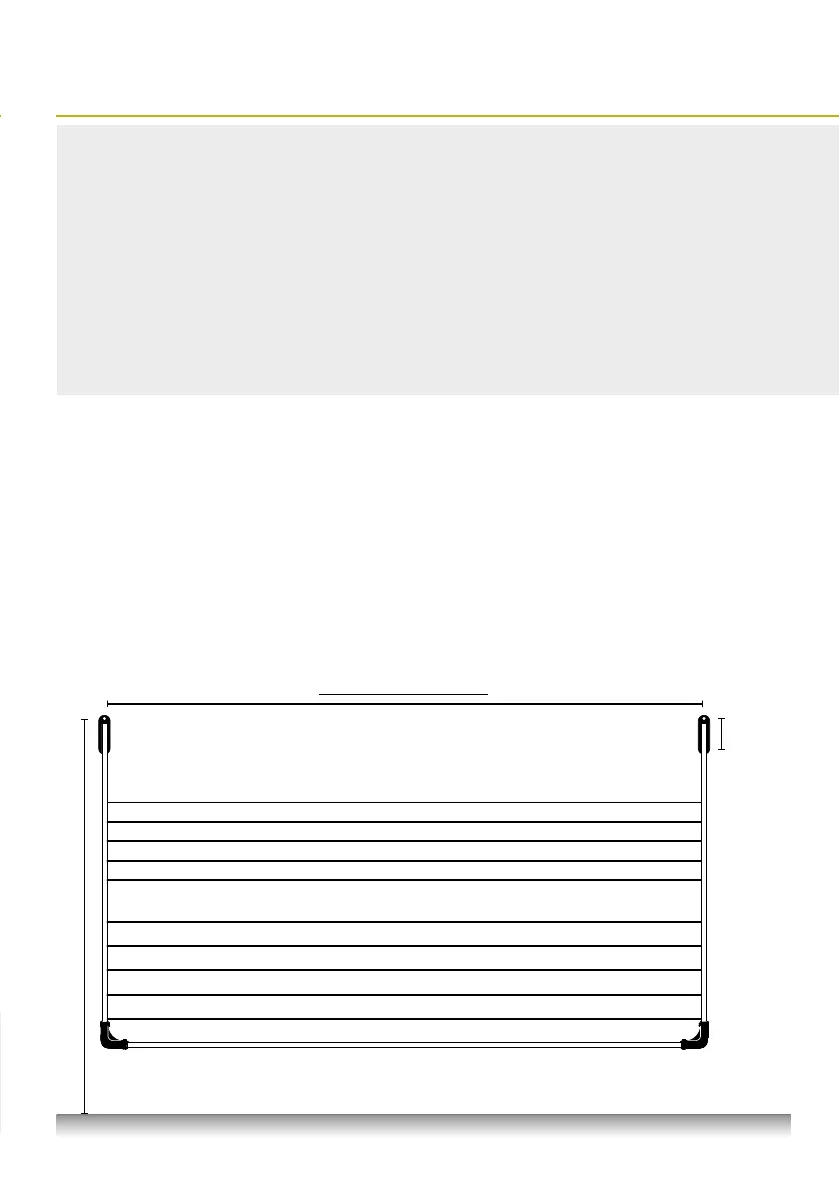
MINI FOLD DOWN 1.52m
SLIM, SINGLE & TWIN FOLD DOWNS 2.22m
CUSTOM MADE – refer to custom size wall bracket centres position
WALL BRACKET CENTRES
GROUND LEVEL
Note: Clothesline shown in fold down position
Figure 1
Users
Height
+
100mm
170mm
Distance
between
mounting
holes
Tools required for installation:
•
Measuring tape and pencil
•
Hammer Drill
•
Socket set and adjustable wrench
•
Hammer
•
Scissors
•
Hammer drill
•
Spirit level
MOUNTING LOCATION
For best drying results, select a location that receives maximum
sunlight and airflow. Ensure that the area has sufficient clearance
around the clothesline. We recommend 100mm clearance each side
and 500mm in front of clothesline frame when open.
Mounting Width – Centre to centre fixing points
MINI Fold Down 1.52m
SLIM, SINGLE & TWIN Fold Down 2.22m
CUSTOM MADE – refer to custom size wall bracket centres position
Mounting Height – The recommended
mounting height for the top hole in the
wall bracket is:
User height +100mm
Minimum mounting height is 1.5m
Note: always consider the main users
height and the length of the items you
plan on drying.