GENERAL OPERATION
7
A. Mark the position of the mounting screws on the wall using a pencil.
B. Drill the screws directly into the marks that you have made on the wall and leave
approx. 0.3 inches length to hook the sound bar.
"Ê/TSÊSGDÊRNTMCÊA@QÊNMSNÊSGDÊLNTMSHMFÊRBQDVRÊ,@JDÊRTQDÊSGDXÊ@QDÊȭQLÊ@MCÊRS@AKD
NOTE: The indicators also function as a volume indicator. When the volume + / -
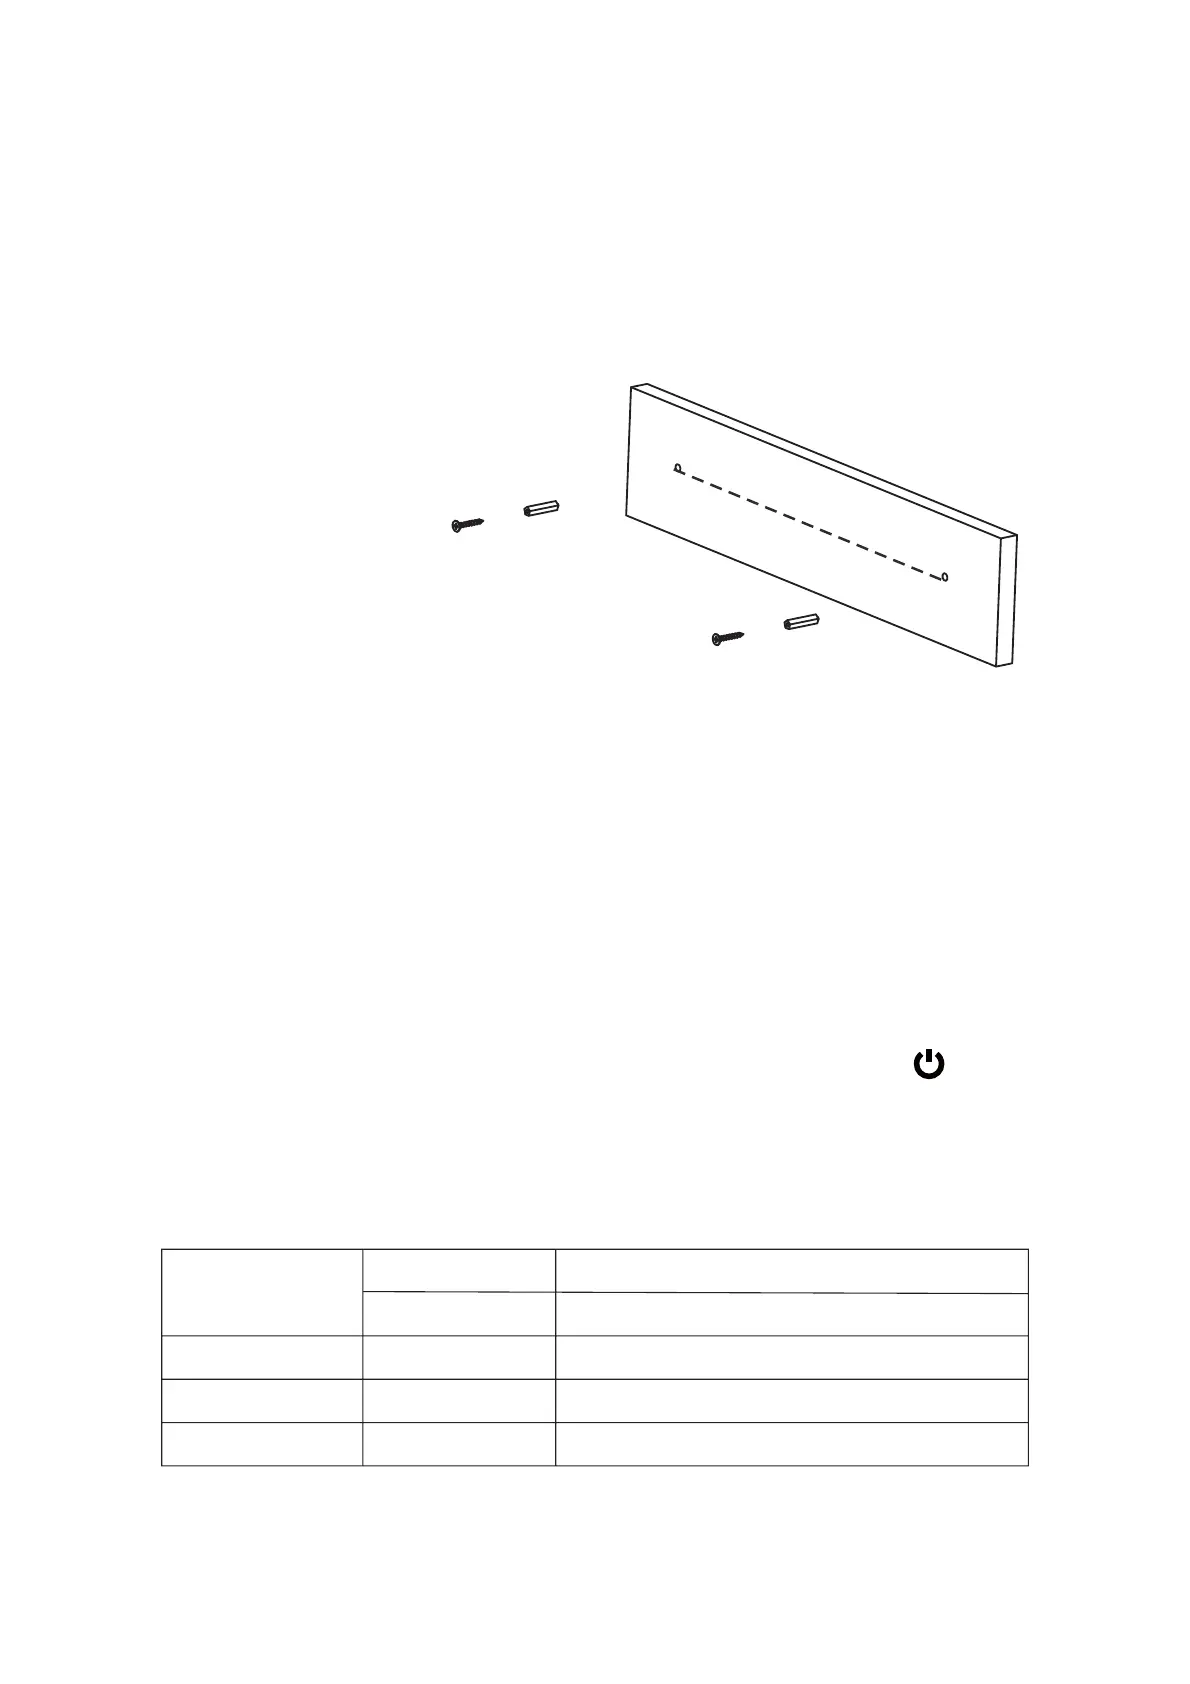
A. Mark the position of the mounting screws on the wall using a pencil.
B. Drill 2 holes on wall with a powerful electric drill.
"Ê(MRDQSÊSGDÊȭWHMFÊOKTFÊ@MCÊG@LLDQÊHMSNÊSGDÊGNKDR
#Ê2DBTQDÊSGDÊRBQDVRÊHMSNÊSGDÊȭWHMFÊOKTFÊ@MCÊKD@UDÊ@OOQNWÊÊHMBGDRÊKDMFSGÊSNÊGNNJ
the sound bar.
$Ê/TSÊSGDÊRNTMCÊA@QÊNMSNÊSGDÊLNTMSHMFÊRBQDVRÊ,@JDÊRTQDÊSGDXÊ@QDÊȭQLÊ@MCÊRS@AKD
1. Connect the Adapter to the unit and wall outlet. The red indicator will light.
2. Press and hold the STANDBY/SOURCE button on the unit or press the button
on remote control to power on the unit.
3. Press the STANDBY/SOURCE button on the unit or press the SOURCE on remote
control repeatedly to switch to desired mode. The color of the mode indicator will
turn to:
2.2 Mounting to brick wall
RBQDVRÊ@MCÊOK@RSHBÊȭWHMFÊOKTFÊ@QDÊMNSÊHMBKTCDC
19.3 inches
Bluetooth Indicator
Flashing Blue Not paired to any Bluetooth device
Optical Mode
Line in Mode
Aux in Mode
Paired
Solid Blue
Solid Indigo
Solid Green
Solid Violet
Optical Indicator
Line in Indicator
Aux in Indicator