EasyManua.ls Logo

DC SXD45 - User Manual

DC SXD45
2 pages
Print Icon
To Next Page IconTo Next Page
Loading...
SERVICE CALLS TO RECTIFY FAULTS CAUSED BY `THE LACK OF ROUTINE MAINTENANCE` WILL BE CHARGED FOR
AND YOUR WARRANTY MAY BE AFFECTED
www.directcatering.co.uk
OPERATING AND MAINTENANCE INSTRUCTIONS
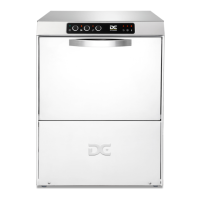
SXD45 / SXD50
OPERATION
 REMOVE ALL DEBRIS FROM THE ITEMS TO BE WASHED, BEFORE PLACING THEM INTO THE BASKET. SELECT THE CYCLE TIME ,2 MINUTE OR 3 MINUTE.
 CLOSE THE DOOR - PRESS THE CYCLE START SWITCH - THE CYCLE LAMP WILL COME ON.
 AT THE END OF THE CYCLE THE CYCLE LAMP WILL GO OUT - OPEN THE DOOR AND PULL OUT THE BASKET.
 ALLOW EXCESS WATER TO RUN OFF BEFORE REMOVING.
PREPARATION
 CHECK THE DRAIN PLUG IS PUSHED FIRMLY IN PLACE AND THE FILTER BOWL IS POSITIONED INTO THE OUTLET HOLE.
 CHECK THE DETERGENT ( RED ) AND RINSE AID ( CLEAR ) SUPPLY TUBES - WITH FOOT VALVES - ARE SUBMERGED IN SUFFICIENT PRODUCT.
 CHECK THE DOOR IS CLOSED AND PRESS THE POWER SWITCH - THE POWER LAMP WILL COME ON.
 ALLOW 30 mins FOR THE MACHINE TO FILL WITH WATER AND REACH THE CORRECT WASHING TEMPERATURE.THE MACHINE READY LAMP WILL COME ON.
ROUTINE MAINTENANCE
 AT THE END OF A SESSION TURN OFF THE POWER SWITCH. DO NOT REMOVE THE FILTER BOWL AT THIS STAGE.
 REMOVE THE DRAIN PLUG - THE WASH TANK WILL EMPTY. MACHINES FITTED WITH DRAIN PUMP WILL AUTOMATICALLY START TO PUMP THE WATER OUT.
 COLLECT THE DEBRIS AND REMOVE FROM THE WASH TANK.
 CLEAN AROUND THE WASH TANK - DOOR SURROUNDS AND HINGES WITH AN 'ADDIS'’ TYPE WASHING UP BRUSH.
 DO NOT USE CHLORIDE CONTAINING BASED CLEANING SOLUTIONS OR ABRASIVES WHEN CLEANING THE WASH TANK.
 TAKE OUT THE FILTER BOWL - CLEAN THOROUGHLY AND REPLACE.
 DO NOT ALLOW DEBRIS TO GO DOWN THE OUTLET HOLE AS THIS MAY DAMAGE YOUR MACHINE.
 REGULARLY CHECK RINSE JETS AND WASH JETS ARE CLEAR OF DEBRIS OR LIME SCALE - REMOVE IF NECESSARY BY UNSCREWING THE RINSE ARM NUT
THAT HOLDS THE RINSE ARM IN PLACE - REMOVE THE RINSE PIN THAT HOLDS THE WASH ARM IN PLACE - CLEAN BOTH THOROUGHLY AND REASSEMBLE.
FOOT VALVES FOR
CHEMICAL
CONTAINER TUBES
DRAIN PLUG
FILTER
BOWL
OUTLET HOLE
WATER SOFTENER
 REMEMBER TO REGENERATE THE EXTERNAL WATER SOFTENER IF FITTED REGULARLY. ENSURE THAT THE WATER VALVES ARE TURNED BACK ON
TO SUPPLY THE MACHINE WITH FULL MAINS PRESSURE SOFTENED WATER.
RINSE ARM NUT
RINSE JETS
WASH JETS
RINSE PIN
RINSE ARM
WASH
POWER
SWITCH
CYCLE START
SWITCH
MACHINE
READY
LAMP
(OPTIONAL)
DRAIN PUMP
REMOVE DRAIN
PLUG AND SWITCH
THE MACHINE OFF
TO START THE
AUTOMATIC DRAIN
PUMP CYCLE
CYCLE TIME
SWITCH
2 MINUTE ~ 3MINUTE
CYCLE
SELECTION
LAMP
CYCLE LAMP
POWER LAMP
Question and Answer IconNeed help?

Do you have a question about the DC SXD45 and is the answer not in the manual?

Summary

Preparation and Operation

Routine Maintenance Procedures

Water Softener Integration

Installation Safety and Location

Water Supply and Waste Management

Gravity Waste Connection

Connect waste hose to outlet, ensure P-trap for odor control. Waste outlet level should be below machine water level.

Pumped Waste Connection

Connect waste hose to stand pipe, open to air, using high loop. Hose should be kink-free and not crushed.

Electrical Setup and Testing

Dosing, Commissioning and Operation

Overview

This document describes the SXD45/SXD50 series of warewashing and ice-making systems, focusing on their operation, maintenance, installation, and commissioning.

Function Description:

The SXD45/SXD50 is a professional warewashing machine designed for commercial use, capable of washing and rinsing items such as dishes and glasses. It operates through a series of automated cycles, ensuring items are cleaned and sanitized efficiently. The machine features a wash tank and a rinse boiler, with separate temperature controls to optimize cleaning and rinsing performance. It also incorporates dosing pumps for detergent and rinse aid, which are crucial for achieving effective results and preventing issues like spotting or foaming. The system can be configured for either gravity waste or pumped waste, depending on the installation requirements.

Important Technical Specifications:

  • Electrical Connections: The machine requires a 30amp or three-phase 3P+N (3x13A) or above electrical supply, as specified by the machine's identification plate. A suitably rated mains on/off switch must be fitted close to the machine.
  • Water Supply: It connects to a mains cold water hose (3/4 BSP) via a shut-off tap. For areas with hard water, an external water softener is recommended, requiring an additional hose connection.
  • Waste System:
    • Gravity Waste: Requires a waste outlet with a "running trap" or "P trap" to prevent odors. The trap level should be approximately 100mm below the machine's water level for proper drainage. The hose must be kink-free.
    • Pumped Waste: Connects to a waste standpipe approximately 400mm above the wash tank water level. The waste hose must be inserted using a high loop hook and should not be sealed into the standpipe, maintaining an "open to air" connection. A "running trap" or "P trap" is also required.
  • Temperature Controls:
    • Rinse Boiler Thermostat: Adjustable from 0-90°C, with a recommended setting of 86°C.
    • Wash Tank Thermostat: Factory set to 55°C.
    • Safety Overload Surface Thermostat: 110°C (normally closed).
    • Wash Tank Fitted Surface Thermostat: 42°C (normally open), connected only to the machine ready lamp.
  • Cycle Times: The machine offers selectable cycle times of 2 minutes or 3 minutes.
  • Dosing Pumps: Peristaltic dosing pumps for detergent (red tube) and rinse aid (clear tube) are adjustable to optimize chemical delivery.

Usage Features:

  • Preparation: Before operation, users must ensure the drain plug is firmly in place, the filter bowl is positioned correctly, and detergent and rinse aid supply tubes are submerged in sufficient product. The door must be closed, and the power switch pressed. The machine requires 30 minutes to fill with water and reach the correct wash temperature, indicated by the "Machine Ready" lamp.
  • Operation Cycle:
    1. Remove debris from items before loading them into the basket.
    2. Select the desired cycle time (2 or 3 minutes).
    3. Close the door and press the "Cycle Start" switch. The "Cycle Lamp" will illuminate.
    4. At the end of the cycle, the "Cycle Lamp" will turn off.
    5. Open the door and pull out the basket.
    6. Allow excess water to run off before removing items.
  • Controls: The front panel features a "Power Lamp," "Cycle Lamp," "Cycle Selection Lamp," and "Machine Ready Lamp" to indicate machine status. It also includes a "Power Switch," "Cycle Start Switch," and "Cycle Time Switch."
  • Dosing Pump Adjustment: The detergent adjustment is typically set to (4-5), and rinse aid to (2-3). The goal is to achieve 4mm to 6mm of foam on the wash tank water surface at the end of a wash cycle. Incorrect adjustment can lead to poor results, damage to the machine, foaming, cloudiness, or streaks.

Maintenance Features:

  • Routine Maintenance (End of Session):
    1. Turn off the power switch. Do not remove the filter bowl at this stage.
    2. Remove the drain plug to empty the wash tank. Machines with a drain pump will automatically pump out water.
    3. Collect and remove debris from the wash tank.
    4. Clean the wash tank, door surrounds, and hinges with an "Addis" type washing-up brush. Avoid chloride-containing cleaning solutions or abrasives.
    5. Remove, clean thoroughly, and replace the filter bowl. Prevent debris from entering the outlet hole.
    6. Regularly check and clean rinse jets and wash jets for debris or lime scale. This involves unscrewing the rinse arm nut and removing the rinse pin that holds the wash arm in place, then cleaning both thoroughly and reassembling.
  • Water Softener Regeneration: If an external water softener is fitted, it must be regenerated regularly. Ensure water valves are turned back on to supply softened water to the machine.
  • Service Calls: The manual explicitly states that service calls to rectify faults caused by a lack of routine maintenance will be charged for, and the warranty may be affected. This emphasizes the importance of adhering to the maintenance schedule.
  • Installation and Servicing: All installation and servicing must be carried out by qualified catering engineers trained for this type of machine to prevent electric shock risks and ensure proper operation.

DC SXD45 Specifications

General IconGeneral
BrandDC
ModelSXD45
CategoryDishwasher
LanguageEnglish

Related product manuals