As semb ly I nstructions
8
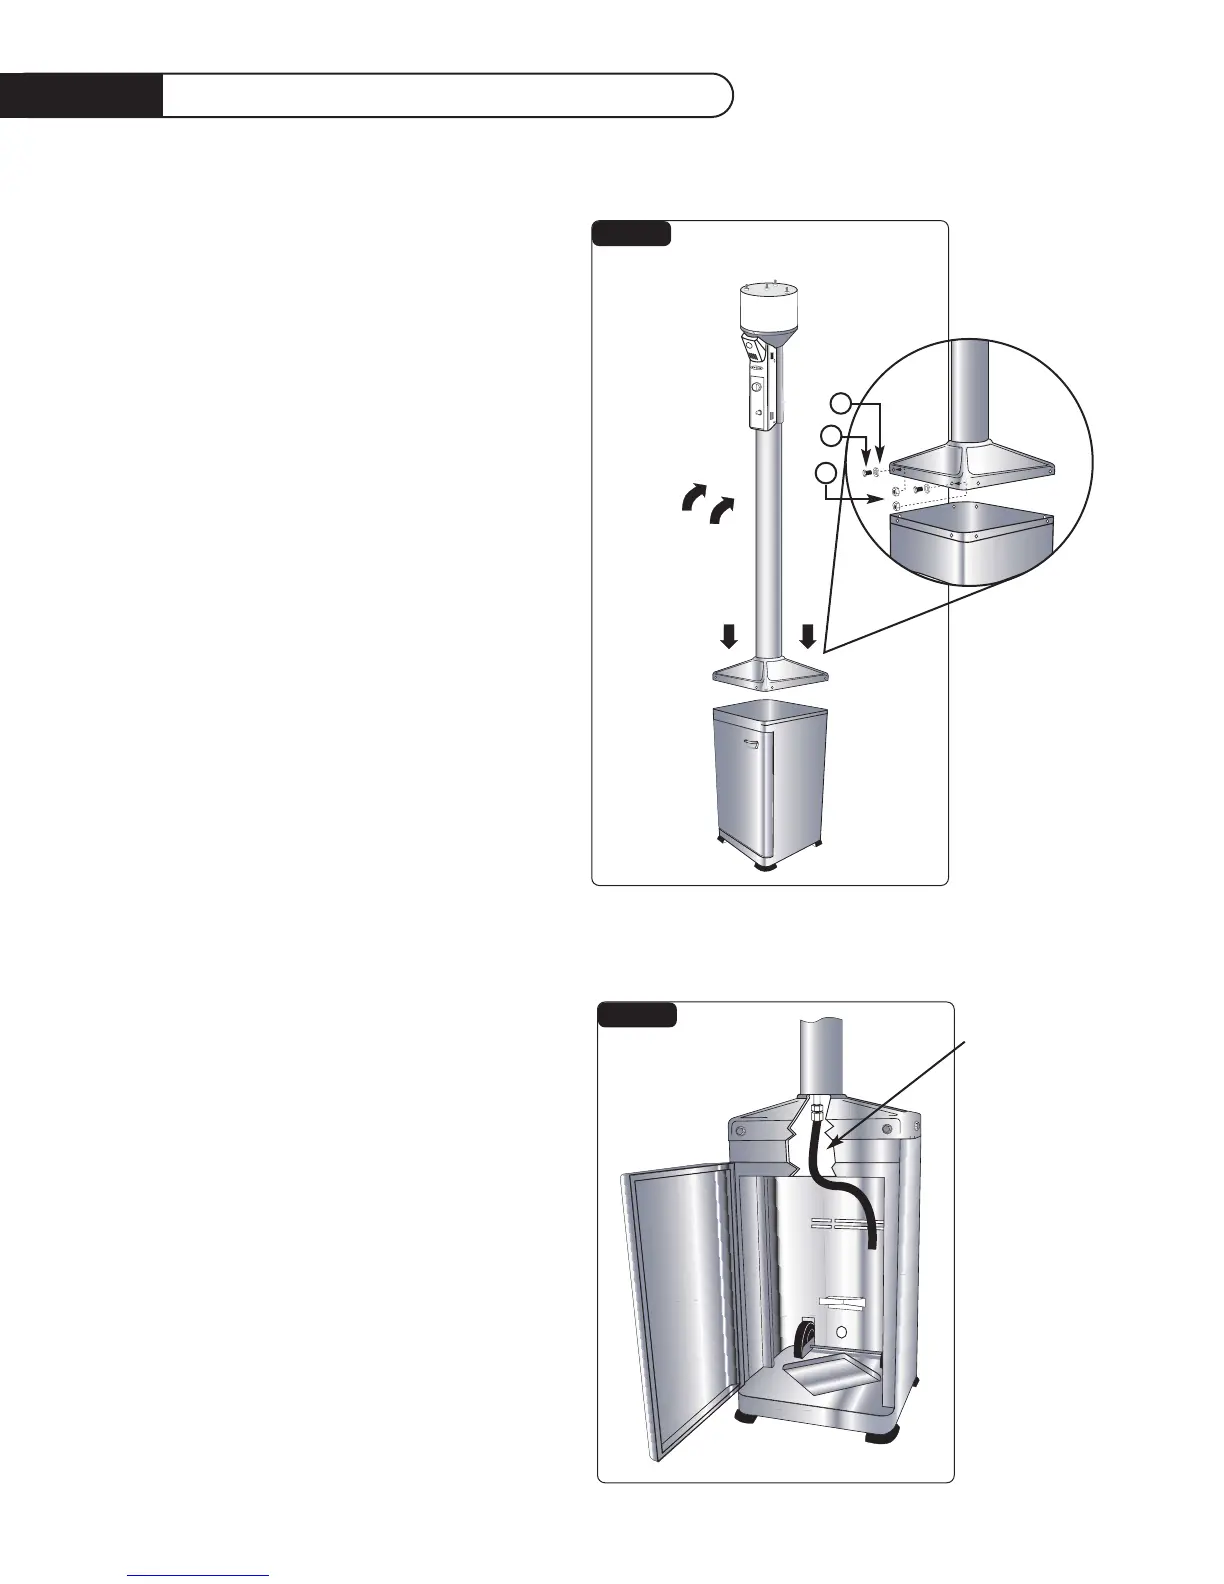
STEP 6
To join the post assembly with base cabinet
you will need to place the base upright on the
floor and lift the post assembly and place it
onto the cabinet with the burner panel facing
the same side as the door. Tighten the (8)
nuts and bolts at the bottom of post assembly
to the top of the cabinet base. Replace valve
panel utilizing step 2 in the reverse order.
HARDWARE USED
1) P/N 15003-05 1/4-20 Bolts (8)
2) P/N 15005-08 Washers Nylon (8)
(Painted Models Only)
3) P/N 15021-09 1/4-20 Keps Nuts (8)
STEP 7
Hold the reducer fitting with a 15/16” wrench
and tighten the hose / regulator assembly onto
the reducer fitting. (See page 20 items 7 & 8)
STEP 8
Do not attach the reflector shield until all
leak testing has been completed.This unit is
tippable once the post assembly is fastened to
the cabinet base and could damage or misshape
the reflector shield prior to use.
FIG.06
FIG.05
3
2
1
HIGH
PRESSURE HOSE
 Loading...