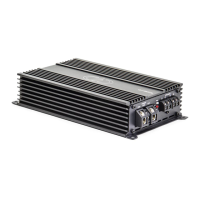
The DD Audio Class D Monoblock Amplifier, available in DM500a, DM1000a, DM1500, and DM2500 models, is engineered for high-performance low-frequency car audio reinforcement. These amplifiers are designed to deliver clean, powerful audio, serving as the core of a bass-heavy audio system. They feature compact chassis, strong power output, logical controls, and an efficient design, utilizing high-speed controller chipsets, efficient power devices, precise thermal management, and the latest IC technology.
Important Technical Specifications:
The DM Series amplifiers offer varying levels of continuous and dynamic wattage, catering to different power needs.
-
DM500a:
- Continuous Wattage: 210W (4 Ohm), 380W (2 Ohm), 500W (1 Ohm)
- Dynamic Wattage: 800W
- Max Current Draw: 80A
- Frequency Response: 10-200Hz
- S/N Ratio: >80dB
- Damping Factor: >150
- RCA Input Voltage Sensitivity: 4V-0.1V
- Power Wire Gauge In: 4
- Speaker Wire Gauge Out: 12
- Dimensions: 7.87x4.92x1.85 inches (200x125x47 mm)
-
DM1000a:
- Continuous Wattage: 470W (4 Ohm), 770W (2 Ohm), 1000W (1 Ohm)
- Dynamic Wattage: 1500W
- Max Current Draw: 150A
- Frequency Response: 10-200Hz
- S/N Ratio: >80dB
- Damping Factor: >150
- RCA Input Voltage Sensitivity: 4V-0.1V
- Power Wire Gauge In: 4
- Speaker Wire Gauge Out: 12
- Dimensions: 11.8x4.92x1.85 inches (300x125x47 mm)
-
DM1500:
- Continuous Wattage: 581W (4 Ohm), 1006W (2 Ohm), 1500W (1 Ohm)
- Dynamic Wattage: 2300W
- Max Current Draw: 230A
- Frequency Response: 15-200Hz
- S/N Ratio: >85dB
- Damping Factor: >150
- RCA Input Voltage Sensitivity: 4V-0.1V
- Power Wire Gauge In: 0
- Speaker Wire Gauge Out: 10
- Dimensions: 13.38x6.88x2.16 inches (340x175x55 mm)
-
DM2500:
- Continuous Wattage: 813W (4 Ohm), 1413W (2 Ohm), 2500W (1 Ohm)
- Dynamic Wattage: 3000W
- Max Current Draw: 300A
- Frequency Response: 15-200Hz
- S/N Ratio: >85dB
- Damping Factor: >150
- RCA Input Voltage Sensitivity: 4V-0.1V
- Power Wire Gauge In: 0
- Speaker Wire Gauge Out: 10
- Dimensions: 17.71x6.88x2.16 inches (450x175x55 mm)
All models operate within a 8.5V-16V working voltage range, with optimal performance between 9V and 16V.
Usage Features:
The DM Series amplifiers incorporate several design features for enhanced performance and user control:
- MOSFET Power Supply Amplifier: Ensures efficient power delivery.
- Double Sided Through Hole PCB: Contributes to durability and signal integrity.
- Variable 24dB/Oct. Crossovers: Allows for precise frequency tuning.
- Strappable Connection (DM1500/DM2500): Enables two identical amplifiers to be linked for increased power output, operating as a single output section with a minimum speaker impedance of 2 Ohm. In this mode, one amp is designated as MAIN and controls the audio signal for both.
- RCA Pass-Through (DM500a/DM1000a): Facilitates sending the audio signal to another amplifier.
- Remote Gain Control with Low Voltage Indicator and Clipping Indicator: Provides convenient control and monitoring of amplifier status.
- 5-Way Protection: Safeguards against speaker short, thermal overload, high/low voltage, and DC offset.
- 8.5-16V Working Voltage: Ensures stable operation within typical vehicle electrical systems.
Pre-Amp Panel Controls (DM500a/DM1000a):
- INPUT (RCA): Connects to the source unit's preamp signal cables.
- OUTPUT (RCA): Pass-through for sending signals to other amplifiers.
- GAIN: Matches the output voltage of the source signal to the amplifier's input section.
- SUBSONIC (10Hz-50Hz): Controls the high-pass cutoff point for speaker outputs, eliminating extremely low frequencies that can waste power and damage subwoofers.
- REMOTE: Port for connecting the remote subwoofer control.
- LPF (20Hz-200Hz): Controls the low-pass cutoff point for speaker outputs.
Pre-Amp Panel Controls (DM1500/DM2500):
- INPUT (RCA): Connects to the source unit's preamp signal cables.
- PWR LED: Indicates amplifier is grounded and receiving +12V and REM power.
- PRO LED: Indicates a general malfunction (speaker short, thermal, overload, high/low voltage, DC offset).
- GAIN: Matches the output voltage of the source signal to the amplifier's input section.
- SUBSONIC (10Hz-50Hz): Controls the high-pass cutoff point for speaker outputs.
- REMOTE: Port for connecting the remote subwoofer control.
- LPF (20Hz-200Hz): Controls the low-pass cutoff point for speaker outputs.
- MAIN/STRAP Switch: Enables STRAP mode for connecting two or more DM Series amplifiers.
- IN (RCA): Used when strapping two DM Series amplifiers; connects to the OUT RCA terminal of the other amplifier.
- OUT (RCA): Used when strapping two DM Series amplifiers; connects to the IN RCA terminal of the other amplifier.
Power Panel Controls:
- GND: Connects to a ground wire directly to the vehicle's chassis. Minimum cable size is 0 gauge (DM1500/DM2500) or 0 gauge (DM500a/DM1000a).
- REM: Connects to a switched +12V cable for remote turn-on.
- +12V: Connects to a fused positive cable from the battery. Minimum power cable size is 0 gauge (DM1500/DM2500) or 0 gauge (DM500a/DM1000a).
- PWR LED (DM500a/DM1000a): Indicates the amplifier is grounded and receiving +12V and REM power.
- PRO LED (DM500a/DM1000a): Indicates a general malfunction due to speaker short, thermal, overload, high/low voltage, or DC offset.
- SPEAKER OUTPUT TERMINALS: Connects to the speaker's + and - terminals. Minimum suggested speaker cable size is 12-10 gauge. DM Series amplifiers are monoblock with two + and two - terminals for easier connection of multiple speaker cables. Minimum impedance is 1 Ohm.
Remote Subwoofer Control:
- POWER LED: Illuminates when the amplifier is grounded and receiving +12V and REM power.
- LO-VOLT LED: Illuminates or flashes to indicate insufficient power supply voltage. Operating the amplifier in this state can lead to reduced performance or damage.
- CLIPPING LED: Illuminates or flashes when the amplifier is being over-driven. Operating the amplifier in this state can lead to reduced performance or damage.
- MIN-MAX: Indicates the gain level.
Installation and Maintenance Features:
- Mounting: The amplifier should be mounted in a dry, well-ventilated environment. Ensure the mounting location and screw placement do not interfere with vehicle cables, wiring, fuel lines, hydraulic lines, or other systems. Securely mount the amplifier to prevent movement during collisions or jolts. Avoid mounting on areas with excessive vibration (e.g., subwoofer box) and consider vehicle safety equipment.
- Powering: Ensure the vehicle's charging system is adequate for the amplifier. Insufficient current or voltage supply can lead to reduced output and potential damage, which is not considered a manufacturer's defect. Professional testing of the charging system is recommended.
- Wiring:
- Disconnect the negative cable from the car battery.
- Connect the +12V wire directly to the positive (+) battery terminal with an in-line fuse holder (not included) as close to the battery as possible. The fuse ampere rating should not exceed the amplifier's total maximum current draw. Route the power wire carefully to avoid shorts or damage.
- Connect the ground wire directly to the vehicle's chassis, ensuring a clean, low-resistance connection (<0.5 Ohm). Avoid using seat belt bolts for grounding.
- Run the REM Turn-On wire from an ignition-controlled +12V source.
- Run RCA cables or make high-level signal connections.
- Run speaker wires to the speakers, leaving extra length for adjustments.
- Connect power and ground to the amplifier, ensuring correct polarity. Install the fuse at the battery only after this step.
- Connect the remote wire from the head unit to the amplifier. Turn on the amp to verify proper operation and absence of protection mode.
- Turn off the amp, then connect speaker wires, paying attention to polarity to avoid phasing issues.
- Connect RCA cables or high-level harness.
- Double-check amplifier control settings.
- Turn on the system, set amp gain to minimum, and head unit volume to ~75%.
- Tune the amp gradually, making one adjustment at a time. Monitor battery voltage and recharge if necessary, as low voltage can affect performance.
- Re-tuning may be necessary if new speakers are installed, due to their break-in period.
Troubleshooting:
- No Power: Check GND connection, +12V and REM terminal voltage, and fuses.
- No Sound (No Output): Check cable routing for shorts or faulty connections, verify speaker operating condition, and ensure amplifier controls (Gain, Crossovers, Master/Slave Switch) are set properly.
- Protection Mode: Possible causes include overheat (thermal) or short. The amplifier will automatically reset once the temperature drops. Ensure proper airflow. An external fan may be needed in some cases. The amplifier will not operate if voltage is below 8.5V or above 16V.
- Distortion/Poor Bass Response: Check speaker cables for reverse polarity of one channel.
- Buzzing Sound: Check amplifier and head unit ground connections. Replace or reroute RCA cables away from power cables if necessary.
- Whining Noise: Engine noise can be caused by poor grounding of amplifiers, head units, signal processors, battery, or alternator. Remove signal cables from the amplifier to determine if the noise is generated by the amplifier or an external grounding issue.
For further assistance, contact DD Audio technical support.