11
5
12
10
Rudder Servo
8
2 x 8mm Screw
2
NF: 1021 Clevis
4
2 x 16mm Screw
2
NF:1020 Control Horns
2
1.5 x 25mm Rod
25mm
L
R
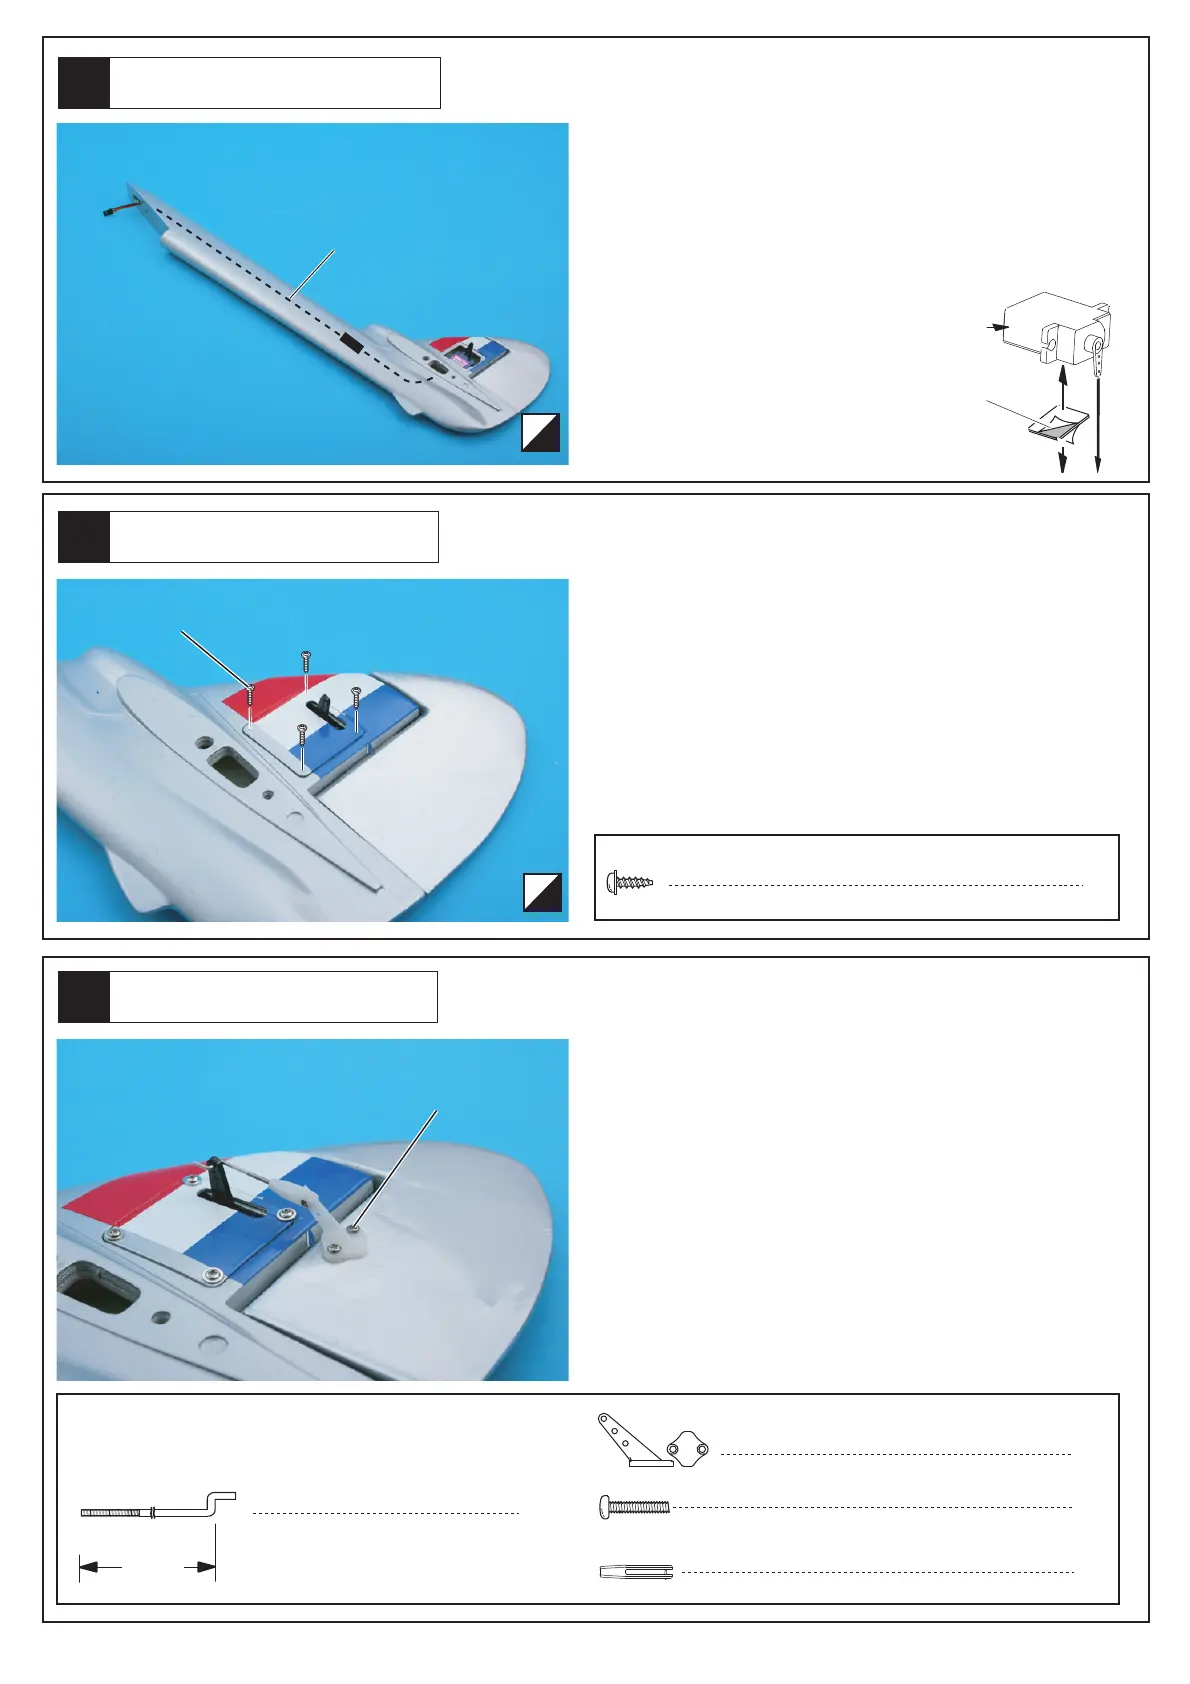
First, use a 400mm extension wire to connect to servo.
Then attach servo to vertical fin with strong double-
sided adhesive tape. Then put the wire through as
shown in picture.
You may also use A/B glue to attach the servo. But
please take into consideration for the quality of servo
and if it can be replaced or repaired easily.
Assemble left and right side the same way.
Attention: Double-sided adhesive tape and extension
wire are NOT included.
Double-Side Tape
Must be purchased
separately!
400mm extension
Place the PVC servo cover and lock with 2x8mm
screws as shown in picture.
Drill two 2mm holes on rudder on where control horn
will be mounted. Then put 2x16mm screw through
control horn and rudder, then add the horn base at the
underside of rudder and lock it in place. Then connect
the “Z” end of the pushrod to servo arm and connect
the other threaded end to clevis, adjust to suitable
length and attach to control horn.
Check the angle between servo arm and pushrod.
Assemble control horns on both sides of rudder the
same way.
Rudder Servo
Rudder Servo
2 x 8mm Screw
L
R
2x16mm Screw
 Loading...