8
04
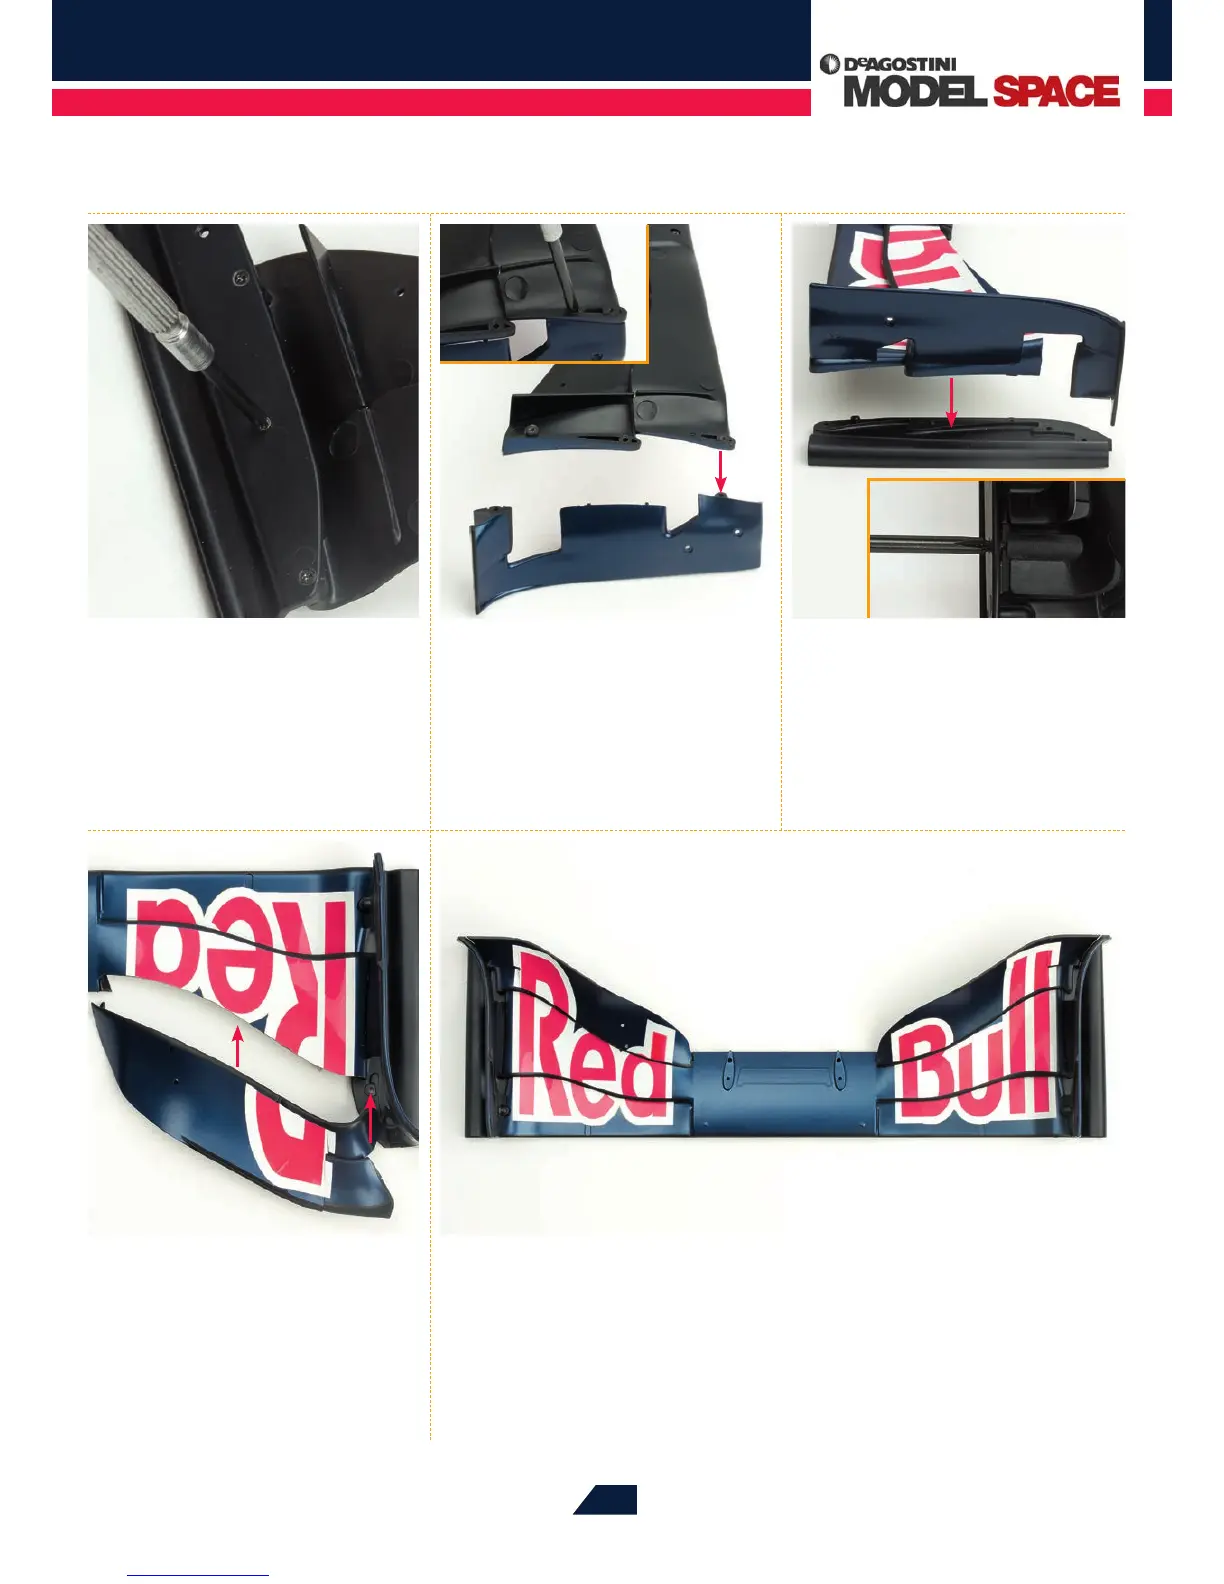
Place the upper right wing at the
rear of the wing assembly. Align the
holes at the arrow on the right and secure
using a 1.4 x 4mm screw. Repeat this step on
the left side.
05
This completes this phase of the front wing assembly. The front wing of your Red
Bull Racing RB7 should now look like the example shown above. Store the assembly
in a safe place until it is needed.
01
Lay the front wing on your work
surface with the underside
facing up. Using the Phillips screwdriver,
remove the six screws screwed through
the two baseplates into the wing, then
remove both baseplates.
02
Position the stored left endplate
as shown. Hold the front wing
above the endplate, so that the holes at
the front of both parts align (arrowed).
Connect both parts using a 1.4 x 4mm
screw. Repeat this step on the right side.
03
Position the right baseplate,
removed in Step 1, as shown.
Place the front wing onto the baseplate,
so that the proles on the underside
are located on the projections of the
baseplate (arrowed). Secure the parts
with three 1.4 x 4mm screws (inset), and
repeat this step on the left side.