386
23
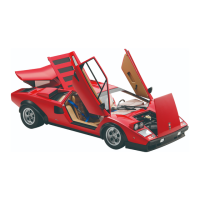
Turn the chassis over again and check the positions of the spur and pinion gears.
Adjust the engine’s position so that the two gears are sitting parallel to each other,
with their teeth aligned and ready to be engaged neatly, as shown by the red arrows.
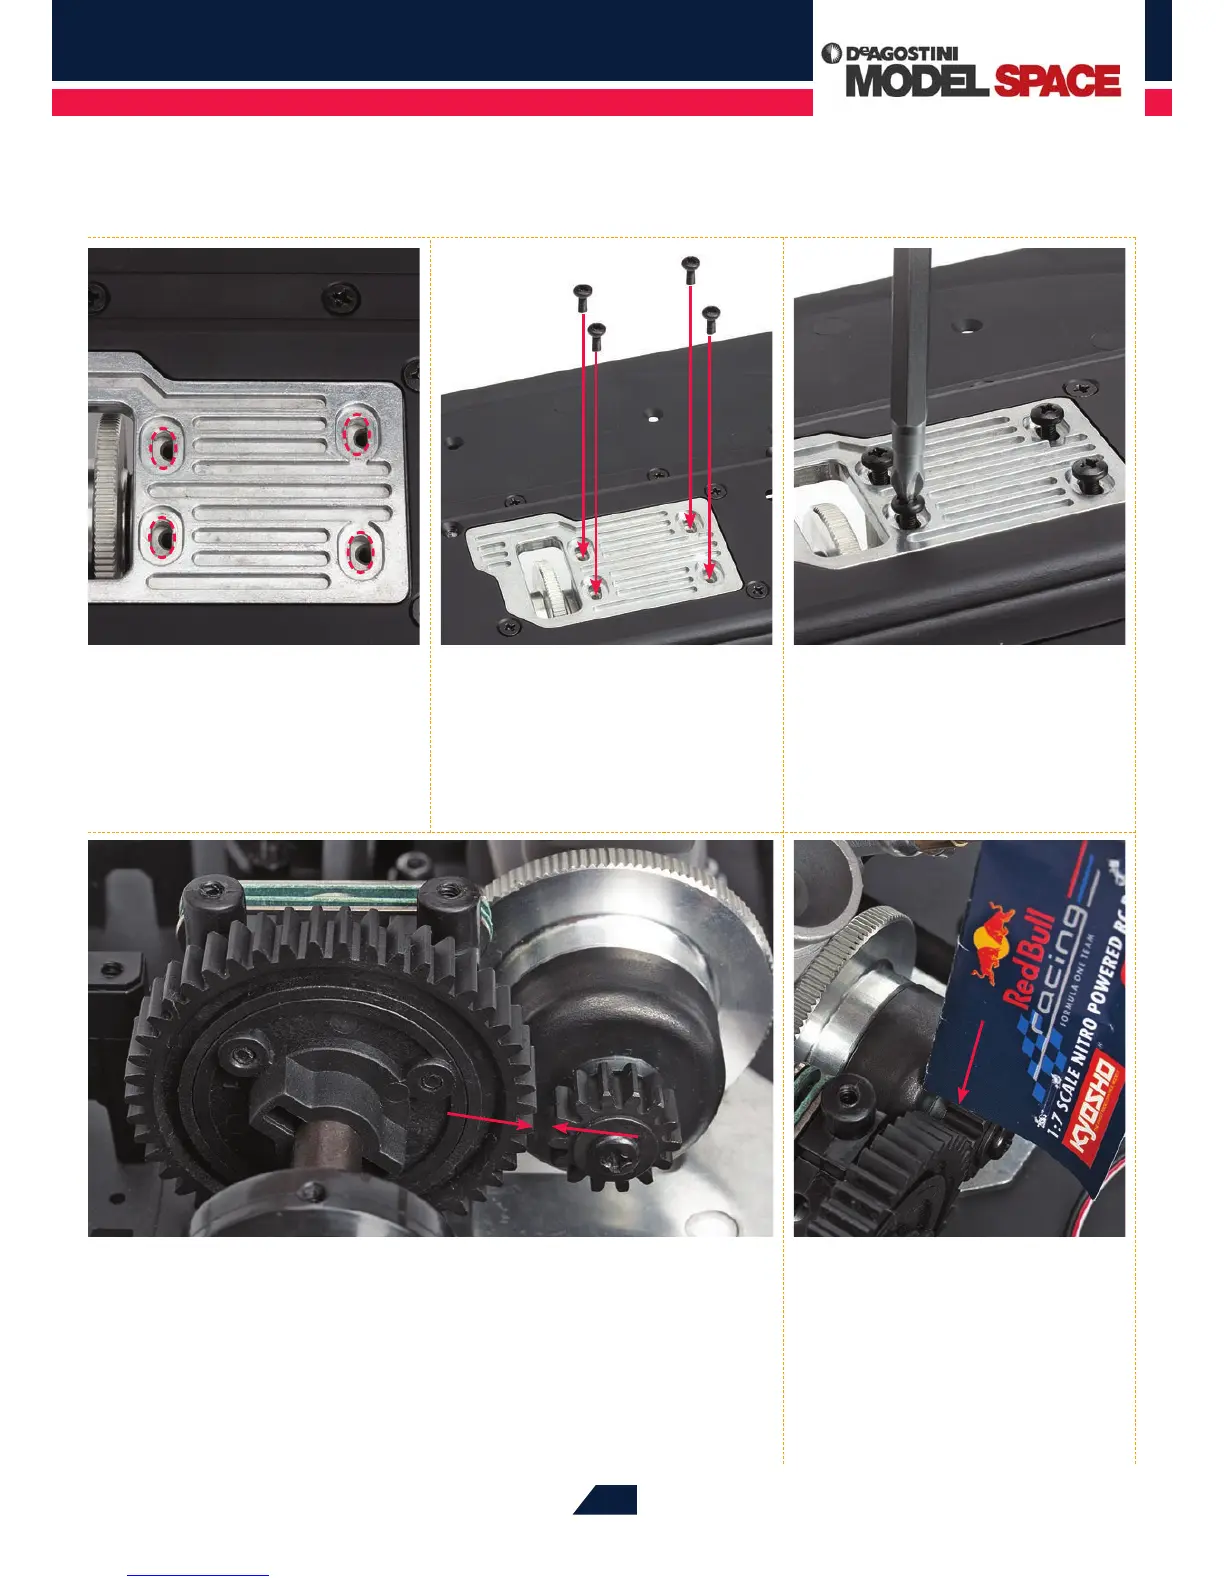
21
Place the four 3 x 8mm dome-
headed screws supplied with this
stage into the four holes marked in the
photo for Step 20 and tighten each one
with your ngertips.
24
Move the gears together as
indicated by the red arrows
in the photo for Step 23, making sure
that the engine’s pinion gear remains
perfectly parallel to the spur gear.
Engage the teeth of the gears and feed a
strip of cardboard in between them (the
cardboard from your RB7’s packaging is
suitable for this).
20
Hold the chassis assembly
together and carefully turn it
over. Gently slide the engine back and
forth until its four screw holes line up
with those of the engine mount (see
dotted red lines).
22
Now tighten each screw a little
further with the screwdriver,
but don’t tighten them fully. The engine
should still be able to slide a little from
side to side.