This document serves as a comprehensive user guide and guarantee instruction manual for Decathlon bicycles, designed to ensure optimal riding pleasure, safety, and longevity of the product. It emphasizes the importance of proper assembly, adjustment, and ongoing maintenance to preserve the bicycle's original qualities and safety features.
Function Description:
The Decathlon bicycle is designed for various cycling disciplines, offering models tailored for different user needs and terrains. These include:
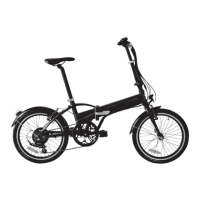
- Hybrid Bicycles: An ideal compromise between town and mountain bikes, offering comfort and versatility for solo rides or family outings on country roads and pathways. They feature thinner, larger diameter wheels than mountain bikes, making them more comfortable on tarmac roads.
- Town Bicycles: Perfectly fitted and comfortable, these are designed for secure urban travel, capable of handling paving stones and curbs. Equipped with mudguards and a chain cover, they allow riders to wear regular clothes without issue.
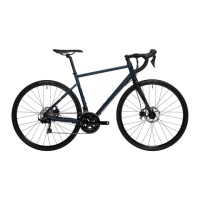
- Road Bicycles: Built for long-distance riding and fitness, these bikes are companions for grinding out miles, suitable for training or competition, and complement mountain biking for staying in shape.
- BMX Bikes: Specifically designed for acrobatic disciplines, including street riding (for figures in towns or skate parks), dirt jumping (for figures on earth mounds), flatland (for figures on the ground), and racing on earth circuits with bumps.
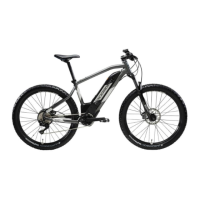
- Mountain Bikes: Popular for off-road adventures, countryside exploration, and forest trails. With large tires, they offer stability and navigate mud, gravel, or sand pathways with ease. Full suspension mountain bikes, with telescopic forks and suspension, are highlighted as the ultimate sporting bike.
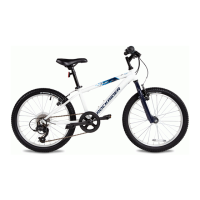
- Children's Bicycles (16” to 24”): Designed for safety and fun, these bikes are well-fitted, comfortable, solid, practical, and equipped with features suitable for school commutes and outdoor activities.
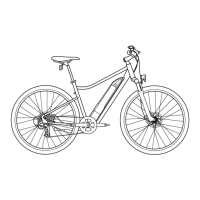
The manual also covers the essential components of a bicycle, including the seat, seat post, rear brake, front brake, front fork, crank, rear derailleur, chain, crankset, pedal, wheel, rim, and tire, explaining their roles in the overall function of the bicycle.
Usage Features:
The guide provides detailed instructions for setting up and safely using the bicycle:
- Sizing: Crucial for control and comfort, ensuring the bicycle is the correct size for the rider. A simple check involves standing over the frame; there should be 1-2 inches between the crotch and the frame.
- Saddle Adjustment: For mountain, hybrid, and town bikes, the saddle height should allow the heel to rest on the pedal in its lowest position with the leg extended. When pedaling, the leg should be slightly bent at the lowest point to prevent hip sway and facilitate easy pedaling. For road bikes, the crotch value multiplied by 0.88 gives the ideal seat height, measured from the pedal's center to the top of the seat, parallel to the ground. The saddle should not be raised above the maximum marker on the seat post for safety.
- Stem and Handlebar Adjustment: The handlebar can be extended up to maximum markers for safety. For road bikes, the stem height should be 2-5 cm lower than the saddle height. For town/hybrid bikes, handlebars should be set for an upright and comfortable position. MTB diver stems can be extended to maximum markers, or a headset type stem can be raised slightly with a spacer.
- Tire Inflation: Tires must be inflated to the pressure range indicated by the manufacturer on the tire side. Proper inflation affects puncture resistance. Tires should be mounted in the direction shown by the rotation arrow.
- Braking System: Instructions cover V-Brakes, cantilever brakes, and disc brakes. Brake levers should be positioned to prevent contact with the handlebar during maximum braking. Brake pads must be aligned with the rim, centered, and maintain a 1mm gap between the rim and the pad. For disc brakes, the cable assembly and friction pad replacement are detailed. Riders are advised to use the back brake first, then gradually apply the front brake to avoid falling forward.
- Gear Changing: For conventional gear changers, instructions explain how to adjust the rear and front derailleur screws (H and L) to align the chain with the spindles and prevent derailing. Riders are advised to pedal normally without forcing when changing gears. For hub gears, the method is simpler and detailed in the manufacturer's instructions, allowing for speed changes when stopped, without noise.
- Bearing Adjustment: The headset, which allows steering, requires proper adjustment and lubrication. Instructions are provided for checking play and tightening the adjusting cone and lock nut.
- Chain Tension (Single Speed): A correctly stretched chain should move up or down about 1 cm. Tension is adjusted by moving the back wheel.
- Pedal Installation: Pedals are marked L (left) and R (right). The R pedal is fixed to the right crank by turning clockwise, and the L pedal to the left crank by turning anticlockwise. Hand tightening is discouraged; a 15mm metric wrench should be used.
- Wheel Fixing System: Instructions for removing and installing wheels using quick fasteners or nuts. The quick fastener lever should be turned from Closed to Open, the fork correctly positioned, and then turned from Open to Closed, ensuring sufficient force to block the wheel.
- Accessories: Guidance on fitting reflectors, bottle cages, stands, and stabilizers.
Maintenance Features:
The manual stresses that regular maintenance is crucial for safety and extending the bicycle's lifespan.
- Cleaning: The bicycle can be cleaned with a water jet, soapy water, and a sponge. Transmission parts can be cleaned with a small brush. High-pressure cleaners and vapor jets should be avoided as they can liquefy grease in mechanical parts, seize bearings, damage the frame's enamel, and immobilize the bicycle. After cleaning, the bicycle should be wiped and dried carefully.
- Lubrication: Vaseline-type oil is recommended for cables and transmission parts, with specific oil for the chain. Lubrication should be applied immediately after cleaning to transmissions, links, gear change wheels, shift levers, brake levers, brake caliper spindles, and the chain. The saddle pin and stem should be sufficiently greased for watertightness. Some hubs have a greasing hole for syringe injection. Cartridge-type chain-sets are maintenance-free as they are greased for their lifespan.
- Reflector Maintenance: Reflectors are critical safety equipment and should not be removed. Every three months, all nuts and bolts holding reflectors should be tightened. Reflective surfaces must be clean, in good condition, and oriented correctly (front reflector forward, rear reflector backward, at least three inches below the seat top).
- Periodic Maintenance Schedule:
- 3 Months: Complete tightening, tension, and/or wheel truing.
- 6 Months: Chain changing, complete tightening, tension, and/or wheel truing.
- 1 Year: Change of chainset box, changing cables and brake housing, and gear changers.
- 2 Years: Change of chainset box, changing chain, changing cables and brake housing, and gear changers.
- Pre-Ride Check: Always perform a complete check before riding, including tire inflation, brake functionality, gear shifting, and proper tightening of the saddle pin and stem.
- Professional Servicing: For complex adjustments like headset adjustment or issues with telescopic forks, it is recommended to consult a qualified repairman or Decathlon's after-sales service department.
- Free Revision: A safety visit is provided free of charge within three months of purchase at Decathlon's after-sales service department.
- Guarantee: Covers material or manufacturing faults observed by Decathlon workshops, including replacement of defective parts and labor. The guarantee period is five years for the frame and two years for other components, paint, and labor. It requires the product to be undamaged, used in compliance with instructions, regularly maintained, and not modified with non-approved parts. Exclusions include third-party damage, intentional faults, negligence, wear parts (bulbs, cables, chain, rim, etc.), modifications outside workshops, and non-secure transport.
The manual also includes a "Bicycle Assembly Checklist" to ensure all components are properly lubricated, adjusted, and tightened, and a "Test Ride" is conducted before use. It emphasizes wearing helmets, reinforced clothing, gloves, and glasses for safety, especially during downhill mountain biking. It also advises against wearing loose clothing that could get caught in the wheels.