owner’s manual
Studio
9
www.definitivetech.com
Placement Options
Tabletop Mounting
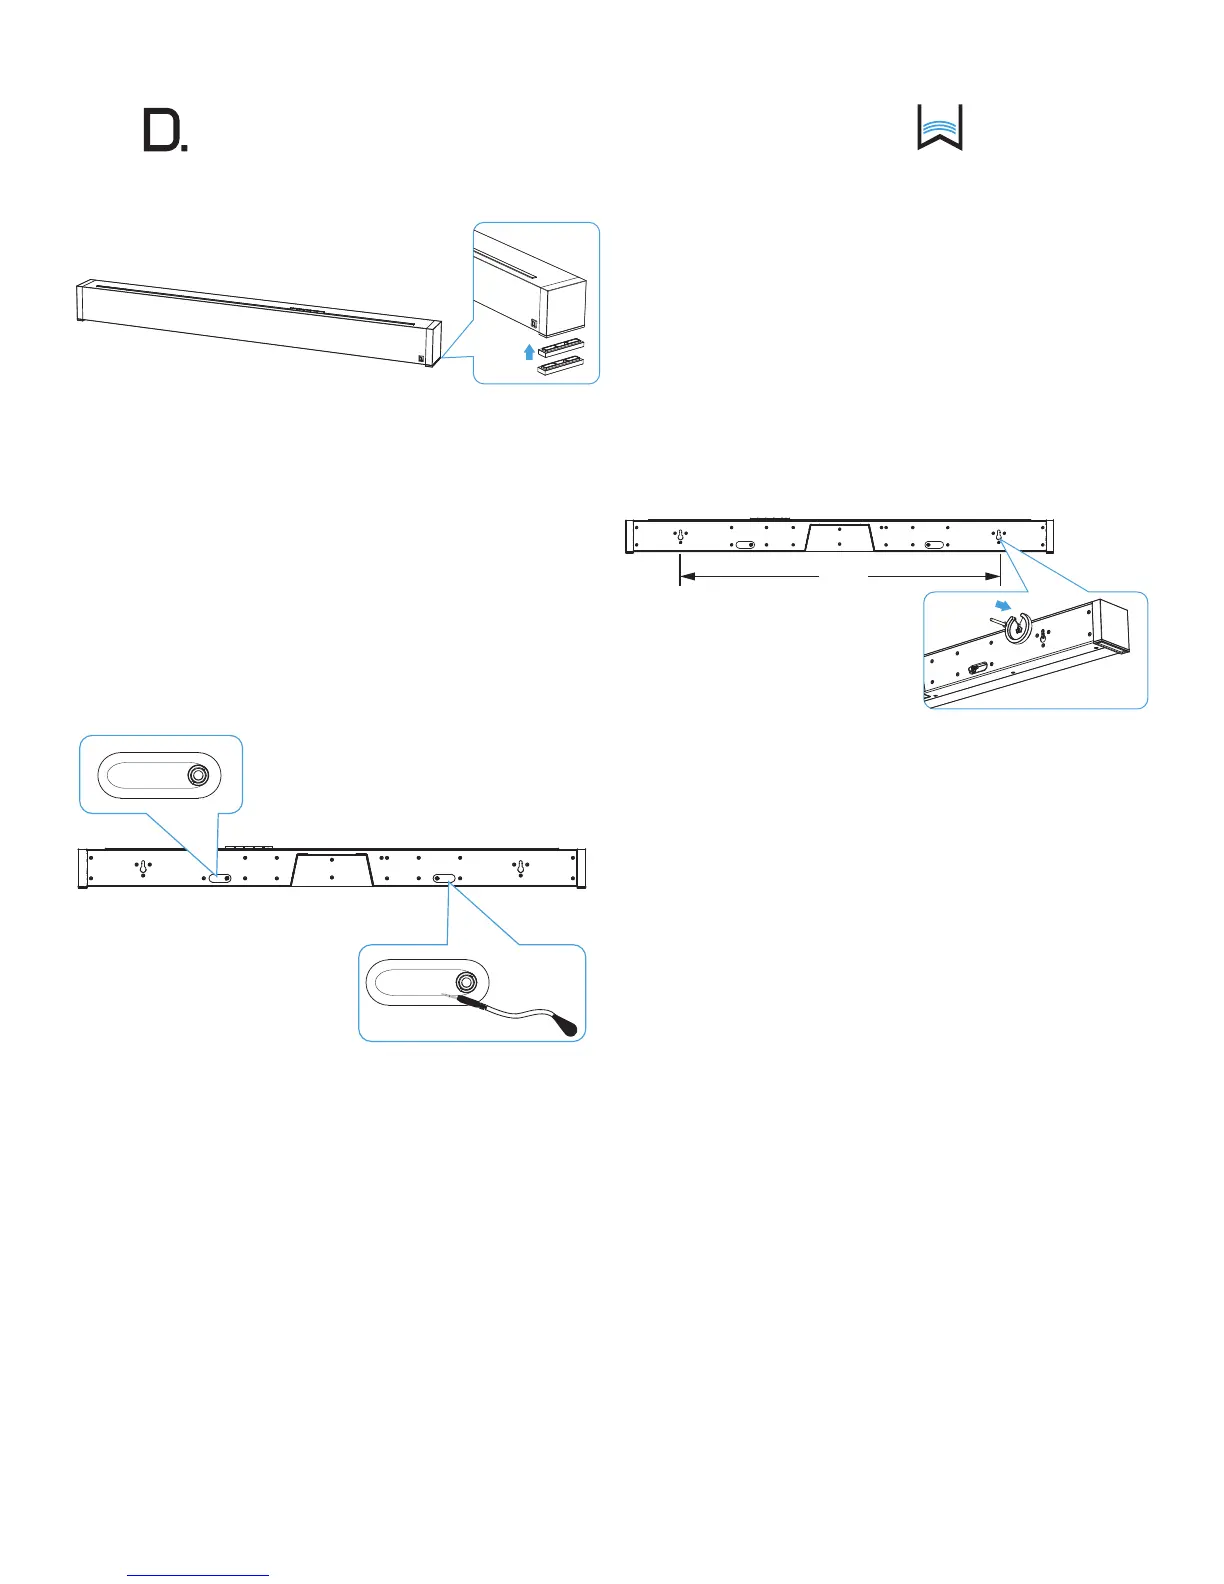
SoloCinema Studio comes with extra riser feet (two per side) that
magnetically attach to the bar to raise it as much as 15.2 mm (5/8”) off
the tabletop so the bar will clear the TV’s protruding table stand.
Attach magnetic feet: Peel off the protective cover and expose the magnets.
Attach the feet to the bottom edge of the sound bar.
What if the bar blocks your TV’s remote IR receiver?
NOTE: The SoloCinema Studio could block your TV’s remote “eye,”
making it impossible to control the TV via remote control, so we supply
an IR asher. Plug the asher into the bar’s IR output and position it in
front of the TV’s eye.
For custom installations: the IR input is more likely to be used with a home
automation system, like Crestron or Control 4. This is often just an electrical
connection to a piece of equipment.
IR OUTPUT
IR INPUT
Mounting the Sound Bar on the Wall
The SoloCinema Studio sound bar has built-in keyhole slots so you can
wall-mount it beneath your wall-mounted television. Spacers are included to
help secure and install your sound bar on the wall.
NOTE: DO NOT mount the sound bar directly to the wall. You must use the
supplied wall-mount spacers to ensure proper operation and reliability.
NOTE: DO MAKE SURE you are using a wall anchor of suitable load-bearing
capacity (13.65 lb).
Tips For Wall Mounting the Sound Bar
Leveling the sound bar: Use a bubble level to make sure the bar is level.
Mark holes with pencil, taking the keyhole slot measurement from the bar.
Drill Screw Holes in Wall: Pre-drill the pilot-hole locations for mounting screws
(not included). Use screws rated to hold securely in the wall material and
have screw heads at least 0.33” (8.5 mm) in diameter.
NOTE: Measure Twice Make sure the sound bar clears the ceiling, adjacent
walls, corners, beams, lighting xtures and door/window frames. Leave at
least 1-2” (25-50 mm) above the sound bar location to allow the sound bar
to slide onto the screws. Make sure the center of the bar is centered with the
TV screen’s center point.
Hang Sound bar on Posts: Line up the bar so that the screw heads slide
into the keyhole slots. Slide the bar down so the screw heads hold the
bar rmly in place.
812.8 mm
[32"]