Do you have a question about the dejavoo Z9 and is the answer not in the manual?
Steps to process a sale using a chip credit card on the terminal.
Steps to process a sale by manually entering credit card details.
Steps to process a sale using a debit card on the terminal.
Steps to void a credit transaction when the card is present.
Steps to process a return transaction for a credit card.
Steps to void a transaction by its transaction number without the card.
Procedure to reprint a previously issued transaction receipt.
Steps to settle the daily batch of transactions.
How to print various transaction reports like daily or summary.
Procedure for activating the 'Call Me' feature for assistance.
Steps to modify tip amounts for specific transactions.
Guide to enable or disable the server prompt feature.
Instructions for powering on, off, and power cycling the terminal.
Explanation of GPRS signal and battery strength indicators.
Meaning of the Wi-Fi icon status for enabled units.
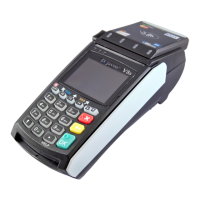
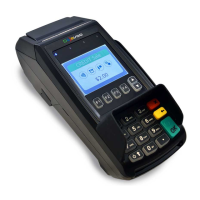
This document serves as a quick reference guide for the Dejavoo Z11 & Z9 touch screen Z-Line models with AURA icons, specifically tailored for EMV restaurant environments. It outlines various payment processing functions, reporting capabilities, and device maintenance procedures.
The device supports several payment transaction types, including Chip Credit Sale, Manually Entered Credit Sale, Debit Sale, Credit Card Return, Void Credit Transaction (Card Present), and Void by Transaction # (Card Not Present).
For a Chip Credit Sale, the process begins by tapping the CREDIT icon on the terminal's home screen, followed by the SALE icon. The user then inputs the SERVER # (if configured) and the SALE AMOUNT, confirming each with OK. The customer can then tap their contactless card or insert their chip card. If prompted, the sale amount is confirmed by tapping YES or NO. The transaction is then processed, and sales receipts are printed.
A Manually Entered Credit Sale follows a similar initial path: tapping CREDIT, then SALE. After inputting SERVER # and SALE AMOUNT, the card number is manually entered. The device then prompts for additional card-not-present (CNP) details like expiration date and ZIP code, depending on configuration. Once these details are entered, the transaction is processed, and receipts are printed.
For a Debit Sale, the user taps the DEBIT icon, then the SALE icon. SERVER # and SALE AMOUNT are entered. The customer can tap, swipe, or insert their card. After confirming the sale amount (if prompted), the cardholder inputs their PIN on the terminal's PIN Pad or an external PIN Pad. The transaction is then processed, and receipts are printed.
A Credit Card Return is initiated by tapping the CREDIT icon, then the RETURN icon. SERVER # and RETURN AMOUNT are entered. The card can be tapped, swiped, inserted, or the card number can be manually entered. The sale amount is confirmed (if prompted), and the transaction is processed, with receipts printed.
To perform a Void Credit Transaction (Card Present), the user taps CREDIT, then VOID. SERVER # and VOID AMOUNT are entered. If prompted, the void amount is confirmed with OK or CANCEL, and a Manager Password (default 1234) may be required. The card is then tapped or inserted. The transaction is processed, and void receipts are printed.
A Void by Transaction # (Card Not Present) is accessed from the idle prompt by tapping the FAVORITES menu icon, then selecting VOID TRANSACTION. If prompted, the Manager Password (default 1234) is entered. The user then taps BY TRANSACTION #, inputs the TRANSACTION # to be voided, and presses OK. The void transaction is confirmed by tapping SELECT. If prompted, the void amount is confirmed with OK or CANCEL, and the Manager Password may be required again. The void is then processed, and void receipts are printed.
The device offers several features to enhance usability and operational efficiency in a restaurant setting.
The Reprint Receipt function allows users to reprint past transaction receipts. This is accessed from the FAVORITES menu by tapping the icon, then selecting REPRINT RECEIPT. After entering the Manager Password (if prompted), the user can choose to reprint the LAST receipt, or specify a receipt BY TRANSACTION # or BY CARD NUMBER. The device then follows prompts to print the desired receipt.
The Settle Daily Batch feature is crucial for daily reconciliation. From the FAVORITES menu, the user taps the icon, then SETTLE DAILY BATCH. After entering the Manager Password (if prompted), the terminal communicates with the host to settle the batch, and a Settlement Report is printed.
Printing Reports provides insights into daily transactions. From the FAVORITES menu, the user taps the icon, then selects the desired report type (DAILY REPORT or SUMMARY REPORT). After entering the Manager Password (if prompted), the report is printed.
The Call Me Feature (if enabled) allows users to request assistance. From the terminal's main screen, the user taps the icon. After entering the Manager Password (if prompted), they tap CALL ME. The terminal sends a notification to the help desk, and a representative will call back to provide assistance.
Edit Tips by Transaction # is a valuable feature for restaurants where tips are added after the initial transaction. From the FAVORITES menu, the user taps the icon, then selects EDIT TIP. After entering the Manager Password (if prompted), they tap ALL, then TRANSACTION #. The transaction amount appears, and the user inputs the TIP AMOUNT, pressing OK. If prompted, the tip amount is confirmed with YES or NO. This process can be repeated for multiple transactions. Once all tips are adjusted, the user presses the XX key.
The Turn Server Prompt On/Off feature allows for customization of the transaction flow. From the SERVICES menu, the user taps the icon, then navigates through CORE, APPLICATIONS, CREDIT/DEBIT/EBT, and SETUP. After entering the Manager Password (if prompted), they select TRANS PROMPTS, then CLERKS, and finally PROMPT. The desired option is selected and confirmed with OK. To return to the home screen, the user presses the XX key twice.
The device also includes features related to power management and status indicators.
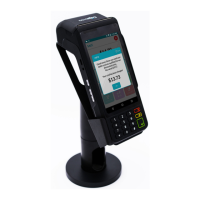
Terminal Power Options cover powering on and off the device. For Z9 models, powering on involves pressing the OK key. To power off a Z9, the user taps the FAVORITES menu icon, then selects POWER OFF. To power cycle all terminals, the user presses and holds the OK key on the keyboard until the terminal reboots.
Wireless Icon Indicators (Mobile Units Only) provide visual feedback on network and battery status. A GPRS signal strength indicator shows the signal quality (more bars mean better signal). A battery strength indicator displays the current battery level. A SIM icon indicates an issue with the SIM card (GPRS).
Wi-Fi Icon Indicator (For Wi-Fi Enabled Units) shows the Wi-Fi connection status. The Wi-Fi icon will blink when not connected and will remain static when successfully connected.
| Connectivity | WiFi, Bluetooth |
|---|---|
| Battery | 2600mAh Lithium-ion |
| Card Readers | EMV, NFC, Magnetic Stripe |
| Operating System | Linux |
| Printer | Thermal receipt printer |
| Payment Types | Credit, Debit, EMV, NFC |
| Certifications | PCI PTS 5.x, EMV L1/L2 |
| Display | Color touchscreen |