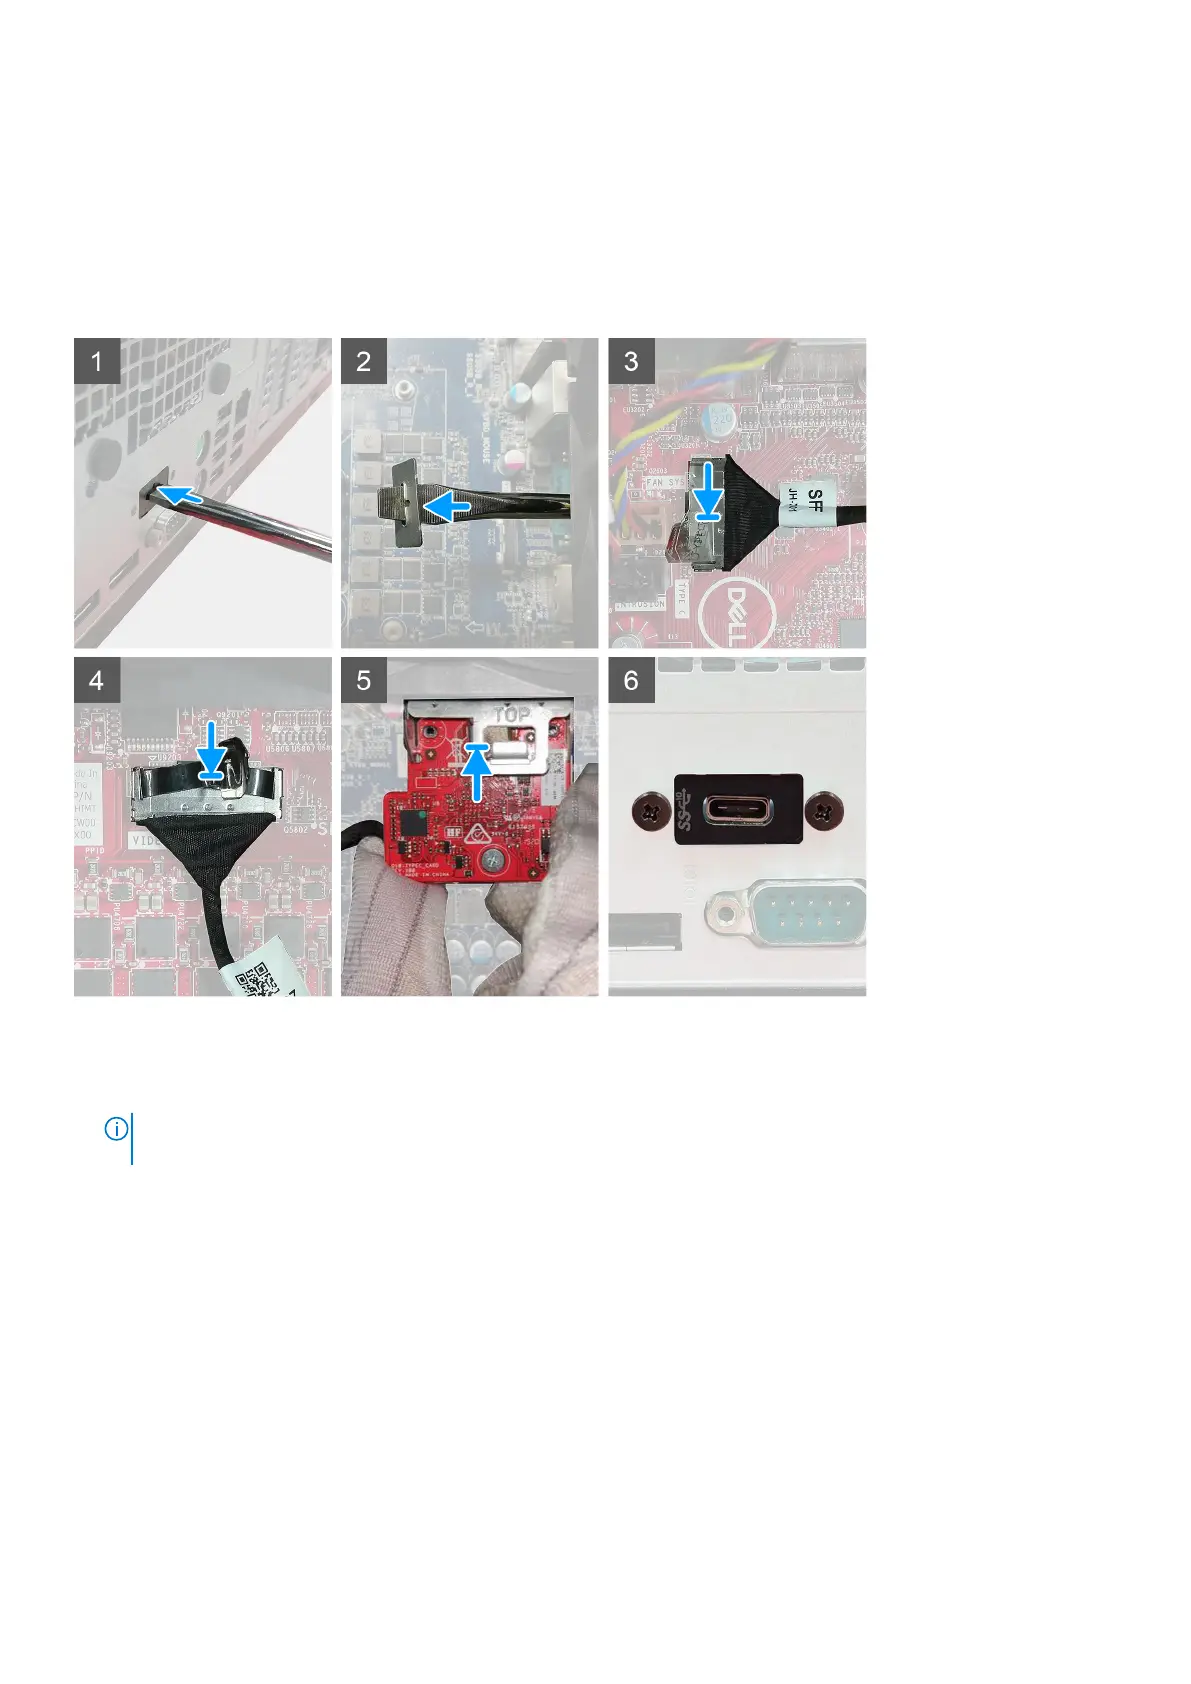
Steps
1. To remove the dummy metal bracket, insert a flat-head screwdriver in the hole of the bracket. Push the bracket to release
the bracket, and then lift the bracket out from the system.
NOTE:
This is applicable if you are upgrading the system or adding any of the optional video ports. This is not applicable
if you are replacing a defective module.
2. Insert the optional I/O module (Type-C/HDMI/VGA/DP/Serial) into its slot from the inside of your computer.
3. Connect the I/O cable to the connector on the system board.
4. Replace the two (M3X3) screws to secure the optional I/O module to the system.
Next steps
1. Install the side cover.
2. Follow the procedure in after working inside your computer.
44
Removing and installing components
 Loading...


