2. Install the screw (M2x2) that secures the optical drive to disk-drive cage.
Next steps
1. Install the disk-drive cage.
2. Install the 3.5-inch hard drive, if applicable.
3. Install the front bezel.
4. Install the side cover.
5. Follow the procedure in After working inside your computer.
Memory
Removing the memory module
Prerequisites
1. Follow the procedure in Before working inside your computer.
2. Remove the side cover.
3. Remove the front bezel.
4. Remove the 3.5-inch hard drive, if applicable.
5. Remove the disk-drive cage.
About this task
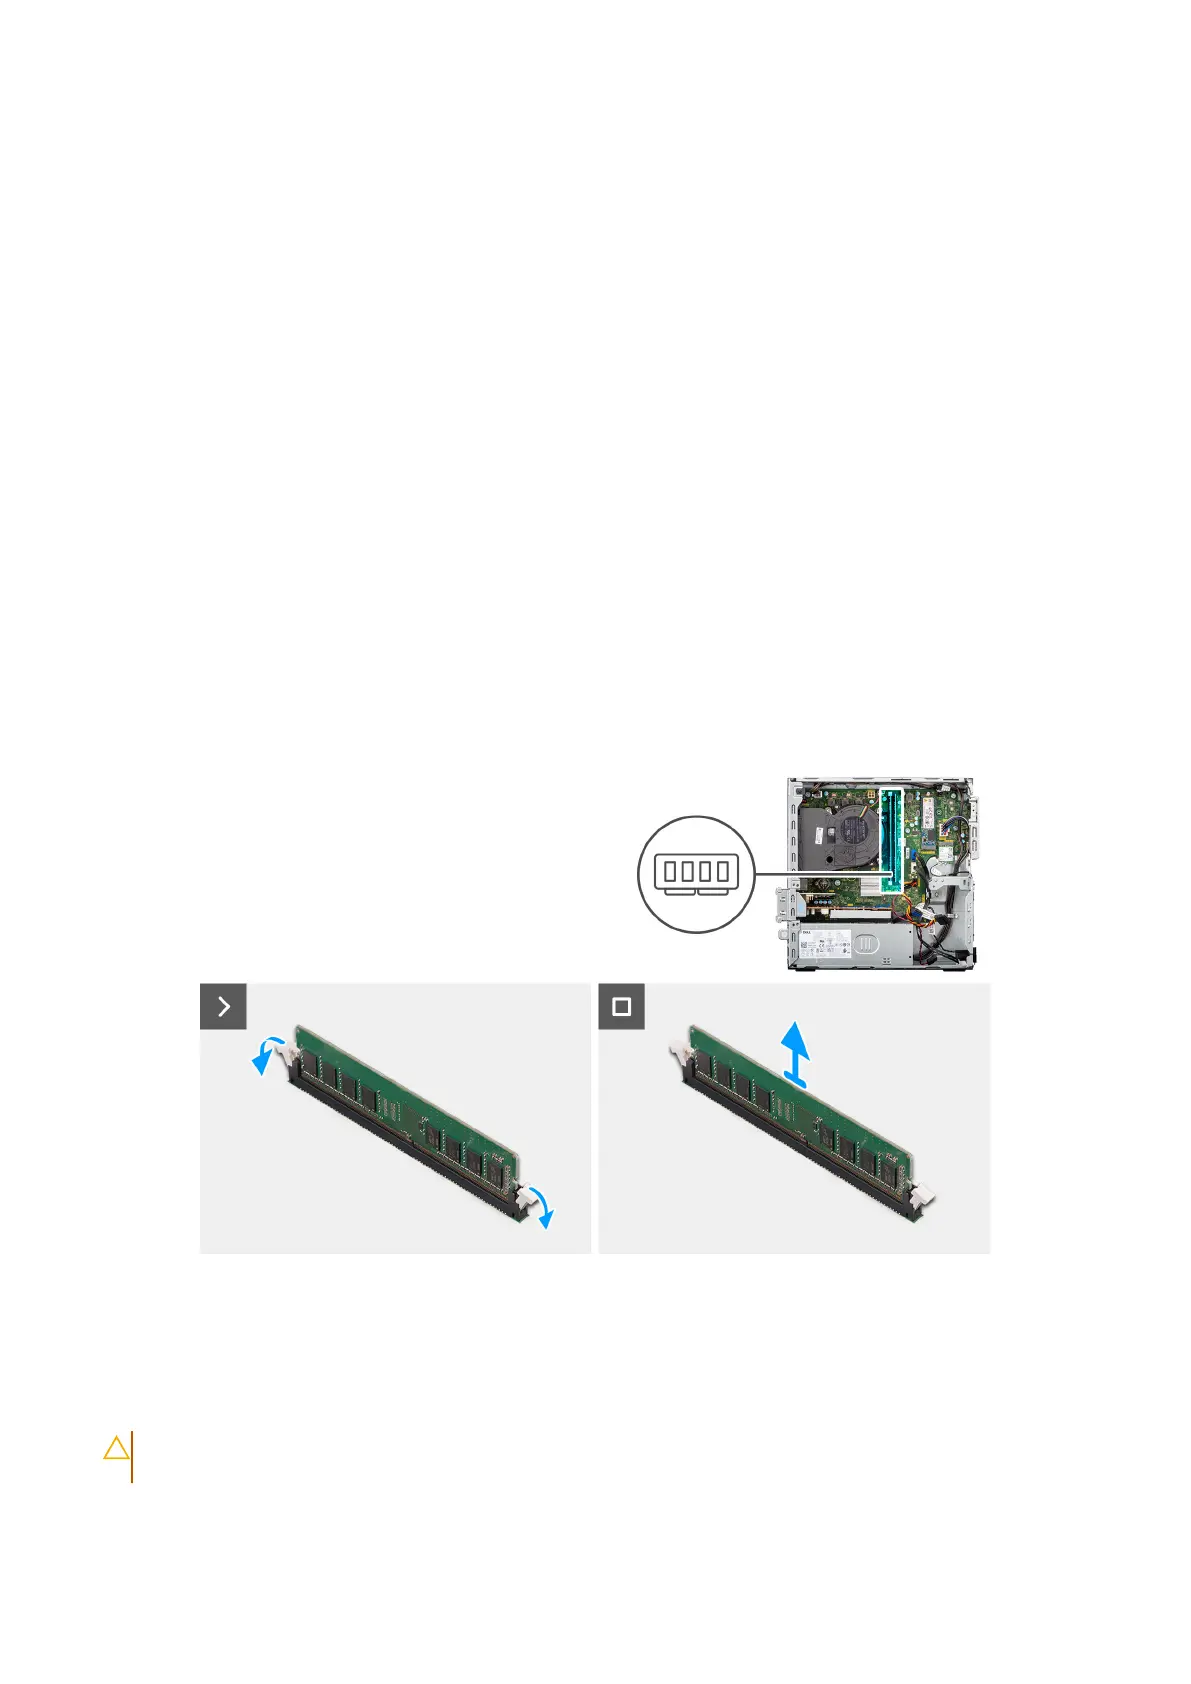
The following images indicate the location of the memory modules and provide a visual representation of the removal procedure.
Figure 15. Removing the memory
Steps
1. Use your fingertips to carefully spread apart the securing-clips on each end of the memory-module slot (DIMM1 or DIMM2,
whichever is applicable) .
2. Grasp the memory module near the securing clip, and then gently ease the memory module out of the memory-module slot.
CAUTION:
To prevent damage to the memory module, hold the memory module by the edges. Do not touch
the components on the memory module.
54 Removing and installing Customer Replaceable Units (CRUs)
Restricted - Confidential