1. Plugthepowercablesforyourcomputerandmonitorintoanearbyoutlet.
2. Turn on the monitor and the computer.
If your monitor displays an image, installation is complete. If it does not display an image, see Solving Problems.
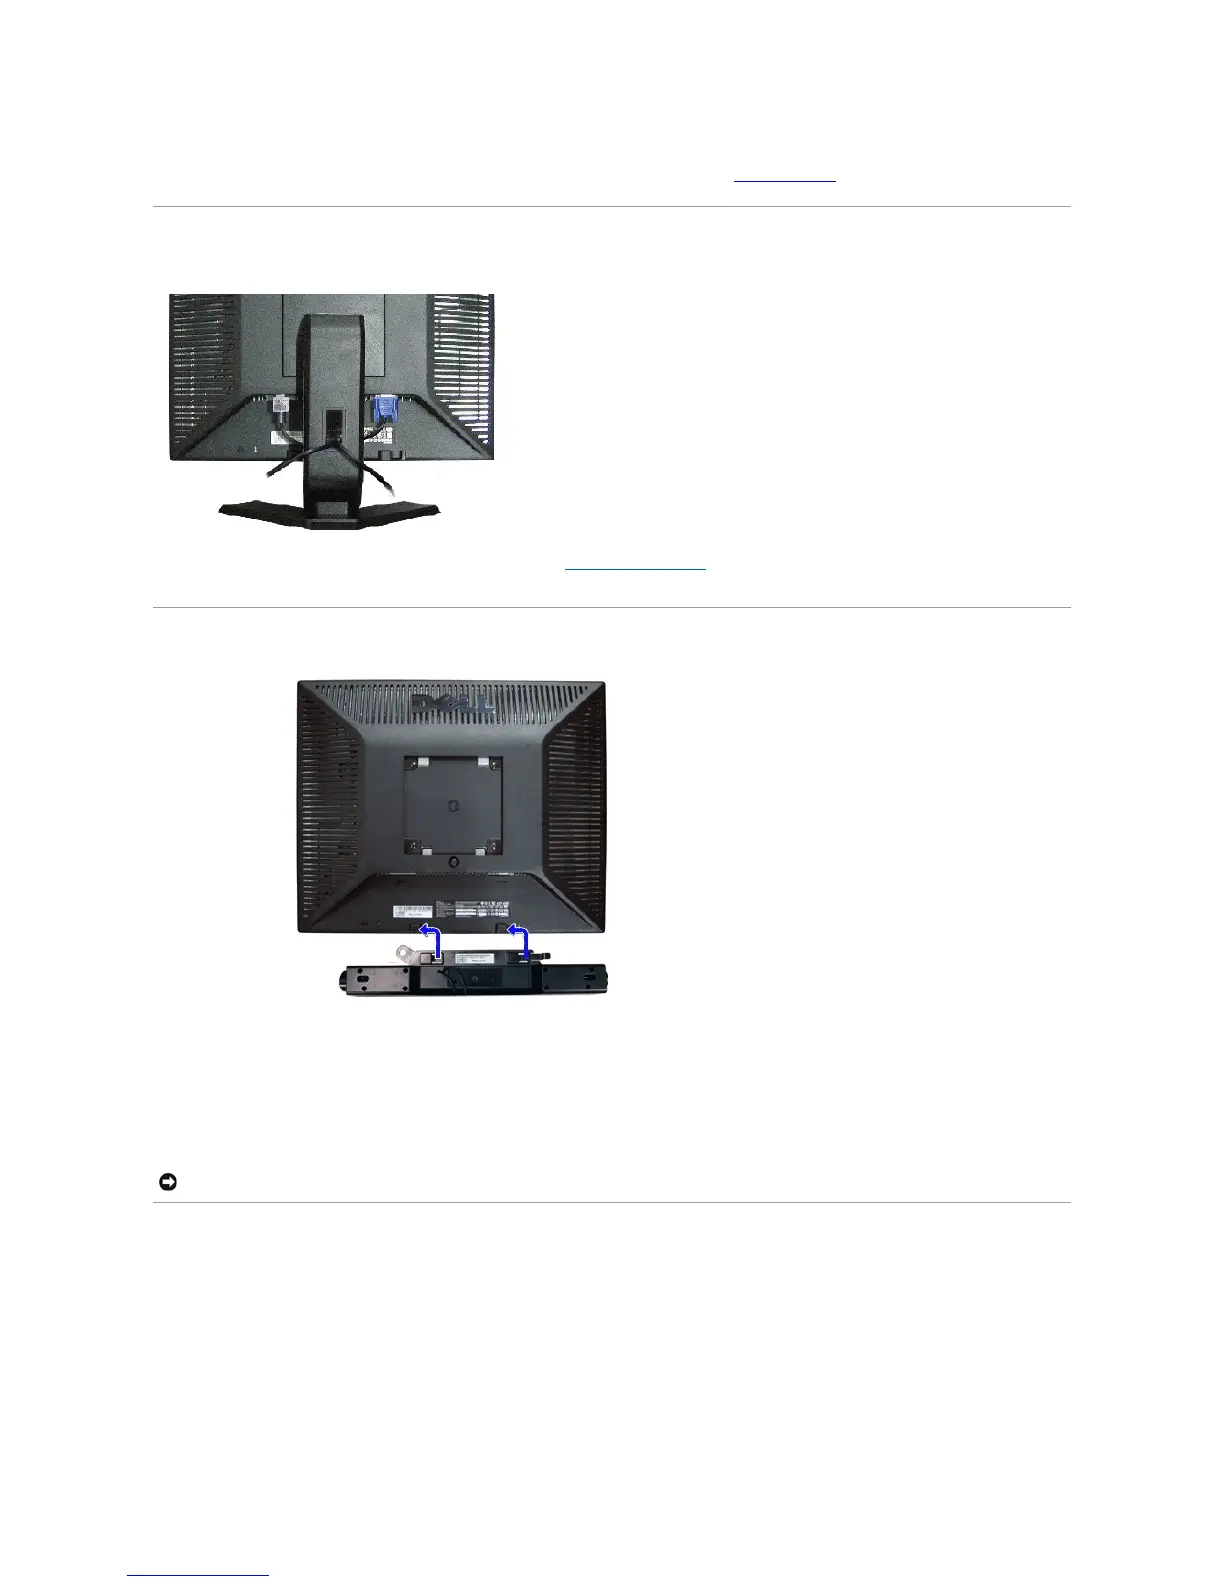
Organizing Your Cables
After attaching all necessary cables to your monitor and computer (see Connecting Your Monitor),usethecablemanagementslottoorganizeallcablesas
shown above.
Attaching the Soundbar (Optional)
Removing the Stand
After placing the monitor panel on a soft cloth or cushion, press and hold the stand removal button, and then remove the stand.