Do you have a question about the Dell E2016HV and is the answer not in the manual?
Instructions for connecting the monitor to your computer.
Guide to using the monitor's self-test feature to check functionality.
This document is a simplified service manual for the Dell E2016HV LCD Monitor, providing essential information for its maintenance and troubleshooting. It outlines the procedures for connecting the monitor, understanding its internal components, and addressing common issues that users might encounter. The manual is structured to guide technicians and users through various aspects of the monitor's lifecycle, from initial setup to advanced diagnostics.
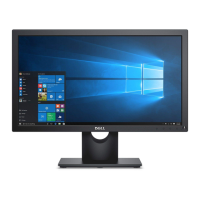
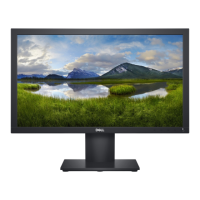
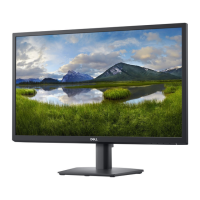
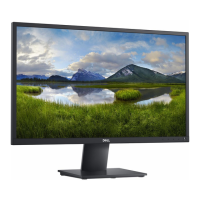
The primary function of the Dell E2016HV is to serve as a visual display unit for computers, providing a clear and consistent image for various computing tasks. As an LCD monitor, it utilizes liquid crystal display technology to render images, offering a modern display solution for both home and office environments. The simplified service manual focuses on ensuring the monitor's optimal performance and longevity through proper handling and repair.
Regarding usage features, the manual emphasizes the importance of correct connection to a computer. Users are instructed to turn off their computer and disconnect the power cable before connecting the VGA cable to the corresponding video port. This highlights a fundamental safety and operational practice to prevent damage to both the monitor and the computer. The monitor is designed to be user-friendly, with straightforward connection procedures that do not require specialized tools for basic setup.
A key usage feature detailed in the manual is the monitor's self-test capability. This diagnostic tool allows users to verify if the monitor is functioning correctly, especially when the screen remains dark despite proper connection to a computer. To initiate the self-test, users must turn off both the computer and the monitor, unplug the video cable from the computer, and then turn on the monitor. A floating dialog box indicating "No VGA Cable" will appear if the monitor is working correctly, confirming that the issue lies with the video signal from the computer rather than the monitor itself. This feature is invaluable for quickly isolating problems and reducing unnecessary service calls.
Another significant usage feature is the built-in diagnostics tool, which helps determine if screen abnormalities are inherent to the monitor or related to the computer's video card. This diagnostic can only be run when the video cable is unplugged and the monitor is in self-test mode. Users are guided to press and hold specific buttons on the front panel (Button 1 and Button 4 simultaneously for 2 seconds) to activate a series of colored screens (gray, red, green, blue, black, white). By inspecting these screens for abnormalities, users can identify display issues such as dead pixels, color inconsistencies, or other visual defects. This systematic approach to diagnosis empowers users to troubleshoot effectively before seeking professional help.
Maintenance features are primarily focused on troubleshooting and repair procedures. The "Exploded view diagram with list of items" provides a visual breakdown of the monitor's internal components, indicating the location and identification of various parts. This diagram is crucial for technicians performing repairs, as it helps in identifying specific components that might need replacement or inspection. The "Wiring connectivity diagram" further aids in maintenance by illustrating how different internal cables (Light Bar Cable, PW-IF-Board Cable, Keypad Cable, LVDS Cable) are connected, which is essential for reassembly and ensuring proper electrical connections.
The "List of tools / equipment" specifies that a Philips-head screwdriver and a Hex-head screwdriver are required for disassembly and assembly procedures. This indicates that the monitor is designed to be serviceable, allowing for component-level repairs with standard tools. The "Disassembly and Assembly Procedures" section, presented as a LE20PD DISASSEMBLY BLOCK diagram, provides a flow chart illustrating the steps to dismantle and reassemble the monitor. This block diagram shows the hierarchical breakdown of components, such as separating the back cover, VESA cover, stand, and various internal boards (power board, I/F board, keypad board, panel). This detailed procedural guide is fundamental for technicians to perform repairs efficiently and correctly.
Troubleshooting instructions are extensive, covering a wide range of common problems and their possible solutions. For instance, if there is "No video/Power LED off," solutions include ensuring the video cable is secure, checking the power outlet, confirming the power button is depressed, and selecting the correct input source. For "Poor focus," users are advised to perform Auto Adjust via OSD, adjust Phase and Pixel Clock controls, eliminate video extension cables, reset to Factory Settings, and change video resolution. "Shaky/Jittery video" also suggests Auto Adjust, Phase and Pixel Clock adjustments, Factory Settings reset, and checking environmental factors.
More specific issues like "Missing pixels" or "Stuck-on pixels" are addressed by cycling power on-off, with a note that permanently off pixels can be a natural defect in LCD technology. "Brightness problems" can be resolved by resetting to Factory Settings, using Auto Adjust, and adjusting brightness/contrast controls. "Geometric distortion" and "Horizontal/Vertical lines" also point to Factory Settings, Auto Adjust, and OSD adjustments. "Synchronization problems" involve similar steps, along with checking for bent pins in the video cable connector and restarting the computer in safe mode.
Safety-related issues, such as "Visible signs of smoke or sparks," explicitly state "Do not perform any troubleshooting steps. Contact Dell immediately," highlighting critical safety protocols. "Intermittent problems" suggest checking video cable connections and resetting to Factory Settings. "Missing color" and "Wrong color" issues guide users to perform self-test checks, ensure secure video cable connections, and adjust color modes and preset settings via OSD. "Image retention" advises setting the screen to turn off after idle time or using a dynamically changing screensaver.
Product-specific problems, such as "Screen image is too small," recommend checking the Aspect Ratio setting in the Display OSD and resetting to Factory Settings. If the "OSD does not appear on the screen," users are advised to power cycle the monitor and check if the OSD menu is locked. "No Input Signal" prompts users to check the signal source, ensure the computer is not in power-saving mode, verify cable connections, and reset the computer or video player. "The picture does not fill the entire screen" suggests running built-in diagnostics and acknowledges that different video formats might cause this.
Finally, the manual addresses "Dell Soundbar Problems," providing solutions for "No power to Soundbar" (checking power/volume knob, power indicator, and cable) and "No sound" (checking audio line-in cable, volume controls, playing audio content, cleaning/reseating the plug, and testing with another audio source). These comprehensive troubleshooting guides underscore the monitor's design for maintainability and user-driven problem resolution, minimizing the need for external support for common issues.
| Color | black |
|---|---|
| Screen Type | led |
| Tiltable | yes |
| Touch Screen | no |
| Webcam | no |
| OS Compatibility | windows |
| Screen Size | 19.5 inches |
| Panel Type | tn |
| Aspect Ratio | 16:9 |
| Resolution | 1600 x 900 |
| Native Resolution | 1600 x 900 |
| Refresh Rate | 60hz |
| Horizontal Viewing Angle | 90 degrees |
| Vertical Viewing Angle | 65 degrees |
| Response Time | 5 milliseconds |
| Brightness | 200 candela per square meter |
| Contrast Ratio | 600:1 |
| Synchronization | not applicable |
| Horizontal Scan Rate | 83 kilohertz |
| HDR | no |
| Built-In Speakers | no |
| HDMI Ports | 1 |
| Voice Assistant | no |
| Power Saving Mode | 0.3 watts |
| Power Consumption | 17 watts |
| Depth with Stand | 6 3/5 inches |
| Height with Stand | 14 1/2 inches |
| Width with Stand | 18 3/5 inches |
| Depth without Stand | 2 inches |
| Height without Stand | 10 4/5 inches |
| Net Weight without Stand | 5 pounds |