1
PS6610 Hardware Owner's Manual 2 Drive Maintenance
Table 7: Drive LED States
Item Description Indicator States
• Off — Drive OK
Drive status indicator (LED)
• Amber — Drive failed
• Blinking — Drive identification
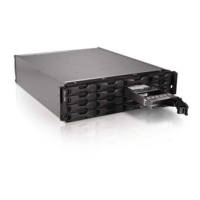
Installing and Removing Disk Drives
The proper insertion and seating of hard drives in the chassis drawers is critical to the operation of the
array. For proper cooling, do not remove a failed drive until it can be replaced with another.
Note: You should always wear electrostatic protection when handling a drive. See Hardware
Protection on page 6.
Install Disk Drives
The 3.5-inch drives and 2.5-inch drives come preconfigured in their carriers (DDICs) and are installed
vertically into the top of the open drawer with the large arrow pointing toward the rear of the chassis.
Note: Installing a drive is easier if you work from the side of the open drawer.
1. Hold the drive by the carrier and slide the drive most of the way into a slot.
2. Using both hands (thumbs and forefingers), apply downward pressure firmly and equally across
the carrier (see Figure 8).
3. While maintaining downward pressure, slide the drive carrier's top plate toward the back of the
drawer until the release button in the center clicks into place (see Figure 9).
Note: It is possible for a drive to appear seated but not be fully locked into position, eventually
causing it to dislodge itself. After installing a drive, check the release button in the center of the
carrier. If the drive is not fully locked into position, a yellow line will be visible underneath the arrow
button. If the yellow line is visible, remove the drive and reinstall it.
12

 Loading...