Replacing the Hard Drive
1. Remove the new drive from its packaging.
Save the original packaging for storing or shipping the hard drive.
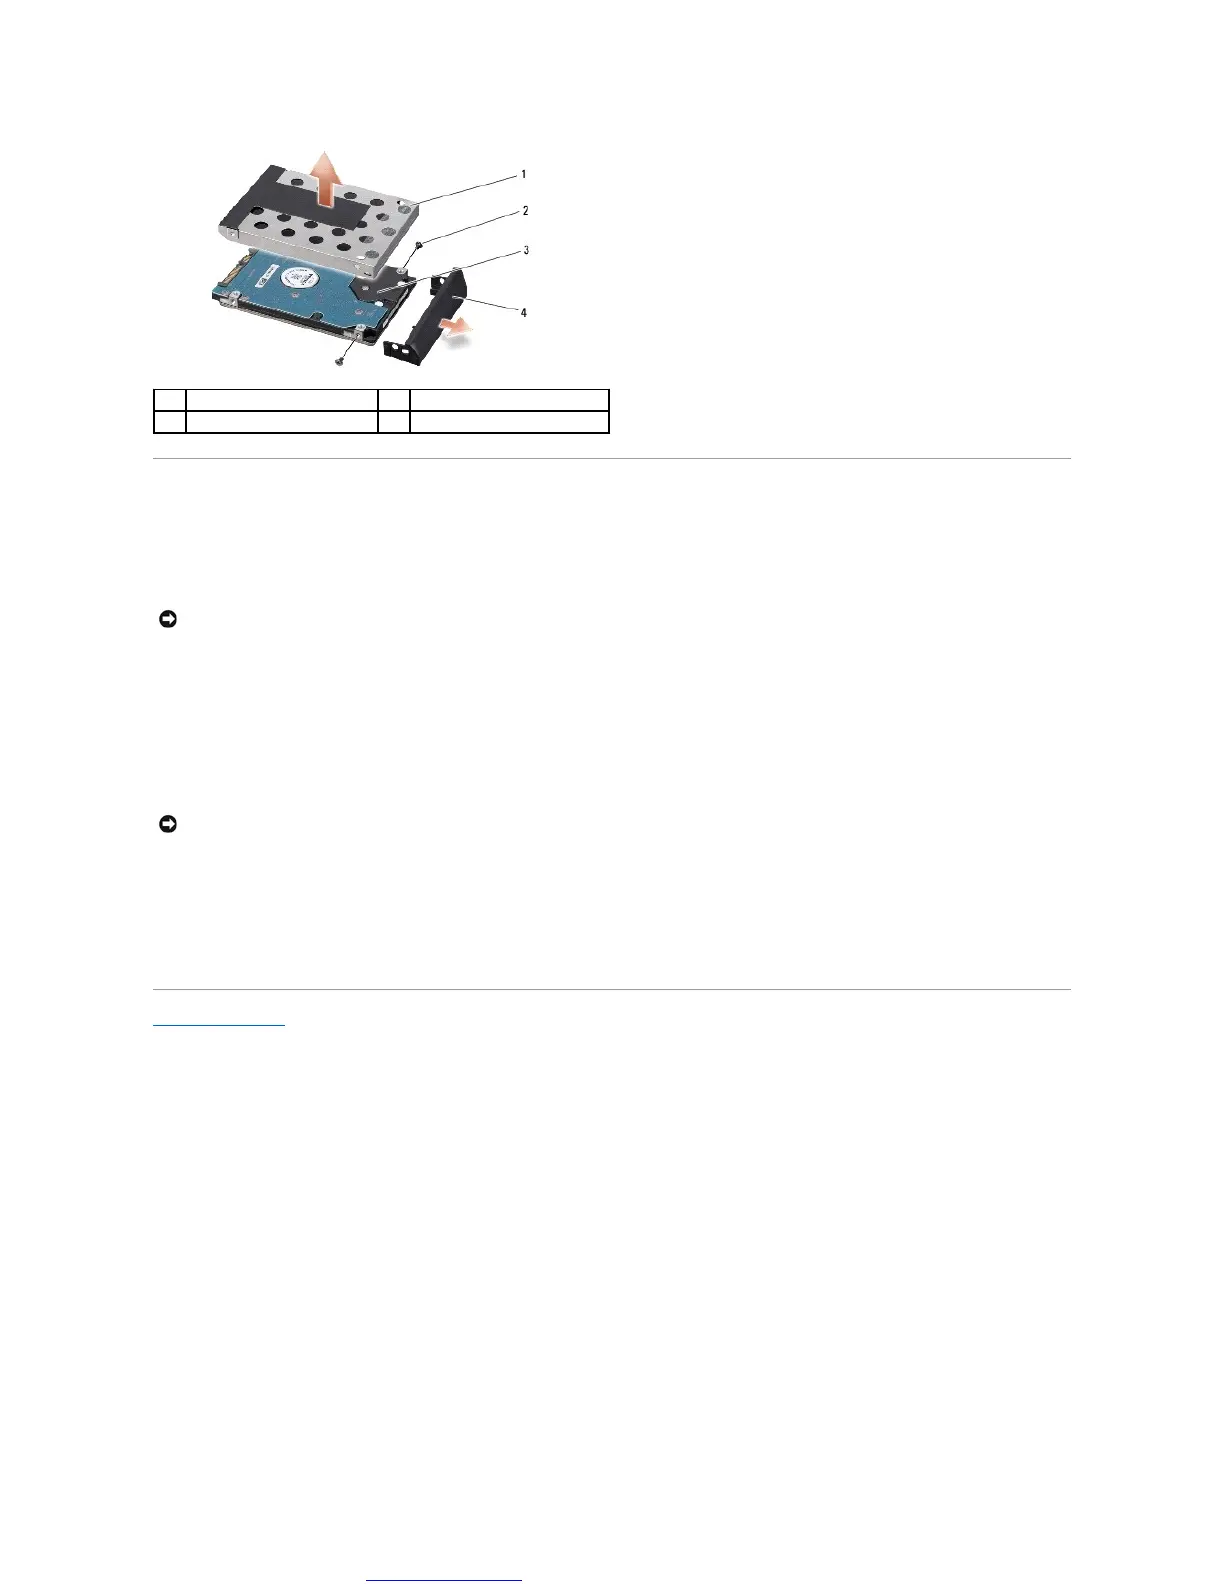
2. Replace the hard drive cage and the hard drive bezel.
3. Replace the two screws (one on either side) that secure the hard drive cage and bezel to the hard drive.
4. Slide the hard drive assembly into the bay.
5. Replace the two screws that secure the hard drive assembly to the computer base.
6. Slide the battery into the bay until it clicks into place.
7. Install the operating system for your computer, as needed (see Dell Technology Guide).
8. Install the drivers and utilities for your computer, as needed (see Dell Technology Guide).
Back to Contents Page
 Loading...