EasyManua.ls Logo

Dell Inspiron 2000 - Modem and Network Connections

Dell Inspiron 2000
67 pages
To Next Page IconTo Next Page
To Previous Page IconTo Previous Page
Loading...
8. Ground yourself by touching the unpainted metal surface of an I/O connector on the back of the computer.
NOTICE: While you work, periodically touch the I/O panel to dissipate any static electricity that might harm components.
Screw Identification
NOTICE: When reinstalling a screw, you must use a screw of the correct length. Otherwise, you could damage the hardware. Make
sure that the screw is properly aligned with its corresponding hole, and avoid overtightening.
When you are removing and replacing components, print the Table 1 placement mat as a tool to lay out and keep track of the component screws.
Table 1. Screw Placement Mat With Component Screw Counts and Sizes
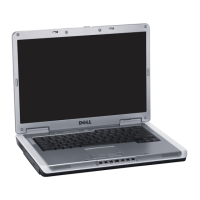
1
Battery bay latch
2
Battery
Hard-Disk Drive Assembly:
M3 x 3 mm (2 each)
Display Assembly Hinge to Base:
M2 x 4 mm (2 each)
M2 x 5 mm (2 each)
Display Assembly Bezel:
M2 x 3.5 mm (6 each)
Rubber Screw Covers (4 each)
LCD Panel and Inverter:
M2 x 3.5 mm (5 each)
Display Assembly Hinges:
M2.6 x 4 mm (4 each)
Keyboard Assembly:
M2 x 4 mm (4 each)
Palmrest Assembly:
M2.6 x 1.6 mm (6 each [battery bay])
M2 x 4 mm (4 each [black])
M2 x 6 mm (3 each [silver])
Touch Pad:
M2 x 3.5 mm (3 each)
Modem Retainer Bracket:
M2 x 8.5 mm (2 each)
VGA and Parallel Port:
5 mm socket (4 each)
Media Bay (IDE) Connector:
Media bay connector screws (2
each)
Fan:
M2 x 3.5 mm (2 each)
Speaker:
M2 x 3.5 mm (2 each)
Audio I/O Cover:
M2 x 4 mm (2 each)
System Board Assembly:
M2 x 3.5 mm (6 each)

Other manuals for Dell Inspiron 2000

Related product manuals