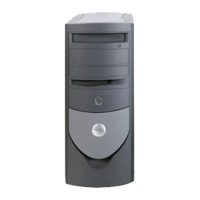
7-8 Dell OptiPlex GX1 and GX1p Mini Tower Managed PC Systems Reference and Installation Guide
To further ensure proper positioning of the drive in the chassis, insert and tighten
all four screws
in the order in which the holes are numbered
(the holes are
marked “1” through “4”).
6OLGHW KHQHZGULY HLQWRWKHGULYHED\ XQWLOLWVQDSVVHFXUHO\LQW RSODFH
VHH)LJX UH
Make sure that both bracket tabs snap into place in the drive bay.
)LJXUH,QVHUWLQJWKH1HZ'ULYH,QWRWKH'UL YH%D\
,I\RXDUHLQVWDOOLQJDGULYHWKDWKDVLW VRZQFRQWUROOHUFDUGLQVWDOOWKH
FRQWUROOHUFDUGLQDQH[SDQVLRQVORW
See “Installing an Expansion Card” in Chapter 6.
&RQQHF WD'&SRZHUFDEOHWR WKHSRZHULQSXWFRQQHFWRURQWKHEDFN R I
W KHGULYH V HH) LJXUH
&$87,21<RXPXVWPDWF KWKHFRORUHGVWULSRQWKHFDEOHZLWKSLQRQWKH
GULYH·VLQWHUIDFHFRQQHFWRUWR DYRLGSR VVLEOHGDPDJHWR\RXUV\VWHP
&RQQHFWWKHDSSURSUL DW HLQWHUIDFHFDEOHW RWKHLQ WHUIDFHFRQQHFWRURQ
WKHEDFNRIWKHGULYHVHH )L J XUH
If your system came with an EIDE CD-ROM or tape drive, use the spare connec-
tor on the existing interface cable. Otherwise, use the EIDE interface cable
provided in the drive kit.
5.25-inch drive

 Loading...


