EasyManua.ls Logo

Dell OptiPlex GX110 User Manual

Dell OptiPlex GX110
69 pages
To Next Page IconTo Next Page
Page #1 background imageLoading...
Page #1 background image
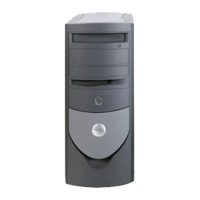
Dell™OptiPlex™GX110SystemsServiceManual
Notes, Notices, and Cautions
Throughout this guide, blocks of text may be accompanied by an icon and printed in bold type or in italic type. These blocks are notes, notices, and
cautions, and they are used as follows:
Information in this document is subject to change without notice.
©19992000 Dell Computer Corporation. All rights reserved.
Reproduction in any manner whatsoever without the written permission of Dell Computer Corporation is strictly forbidden.
Trademarks used in this text: Dell and OptiPlex are trademarks of Dell Computer Corporation; Microsoft, MS-DOS, and WindowsNT are registered trademarks of Microsoft
Corporation.
Other trademarks and trade names may be used in this document to refer to either the entities claiming the marks and names or their products. Dell Computer Corporation
disclaims any proprietary interest in trademarks and trade names other than its own.
Initial release: 4 Oct 1999
Last revised: 31 Jul 2000
Small-Form-Factor Chassis Removing and Replacing Parts
Low-Profile Chassis Removing and Replacing Parts
Midsize ChassisRemoving and Replacing Parts
Mini Tower Chassis Removing and Replacing Parts
NOTE: A NOTE indicates important information that helps you make better use of your system.
NOTICE: A NOTICE indicates either potential damage to hardware or loss of data and tells you how to avoid the problem.
CAUTION: A CAUTION indicates a potentially hazardous situation which, if not avoided, may result in minor or moderate
injury.
Question and Answer IconNeed help?

Do you have a question about the Dell OptiPlex GX110 and is the answer not in the manual?

Dell OptiPlex GX110 Specifications

General IconGeneral
ProcessorIntel Pentium III
Maximum Memory512 MB
Memory Slots3 DIMM slots
ChipsetIntel 810e
Operating SystemWindows 98, Windows NT 4.0, Windows 2000
RAM64 MB SDRAM standard
Storage10 GB HDD
GraphicsIntegrated Intel 810e
AudioIntegrated AC'97
NetworkIntegrated 10/100 Ethernet
Expansion Slots1 AGP, 3 PCI
Ports1 Serial, 1 Parallel, 1 VGA
Form FactorDesktop
Optical DriveCD-ROM

Summary

Low-Profile Chassis - Removing and Replacing Parts

Low-Profile Chassis Overview and Safety

Introduces procedures, lists tools, and outlines essential safety precautions for the low-profile chassis.

Low-Profile Chassis External Components

Steps to remove computer cover, front panel inserts, control panel, and intrusion switch.

Low-Profile Drives and Power Supply

Procedures for removing and replacing drives and the system power supply.

Low-Profile Expansion and Logic Boards

Steps for replacing expansion cards, riser boards, system board components, DIMMs, microprocessor, battery, and system board.

Midsize Chassis - Removing and Replacing Parts

Midsize Chassis Overview and Safety

Introduces procedures, lists tools, and outlines essential safety precautions for the midsize chassis.

Midsize Computer Cover and Front Panel

Steps to remove computer cover and front-panel inserts.

Midsize Internal Chassis Components

Procedures for removing expansion cages, control panels, and intrusion switches.

Midsize Drives and Power Supply

Instructions for removing and replacing drives and the system power supply.

Midsize Expansion Cards and Memory

Procedures for installing/removing expansion cards and DIMMs.

Midsize System Board and Peripherals

Steps for replacing the microprocessor, battery, and system board.

Mini Tower Chassis - Removing and Replacing Parts

Mini Tower Chassis Overview and Safety

Introduces procedures, lists tools, and outlines essential safety precautions for the mini tower chassis.

Mini Tower Chassis External Components

Steps to remove computer cover, front bezel, and front panel buttons.

Mini Tower Drives and Power Supply

Procedures for removing and replacing drives, drive shelf, and system power supply.

Mini Tower Expansion and Logic Boards

Steps for replacing expansion cards, riser boards, system board components, DIMMs, microprocessor, battery, and system board.

Small-Form-Factor Chassis - Removing and Replacing Parts

Small-Form-Factor Chassis Overview and Safety

Introduces procedures, lists tools, and outlines essential safety precautions for the SFF chassis.

Small-Form-Factor Chassis External Components

Steps to remove computer cover, front panel buttons, control panel, and intrusion switch.

Small-Form-Factor Drives and Power Supply

Procedures for removing and replacing drives, drive shelf, and system power supply.

Small-Form-Factor Expansion and Logic Boards

Steps for replacing expansion cards, riser boards, system board components, DIMMs, microprocessor, battery, and system board.

Related product manuals