About this task
NOTE: Before removing the base cover, ensure that there is no SD card installed in the SD card slot on your computer.
NOTE: The I/O board includes a RJ45 network-port assembly. If you are replacing the I/O board, ensure that you remove
the RJ45 network-port assembly from the old I/O board and install it in the new I/O board.
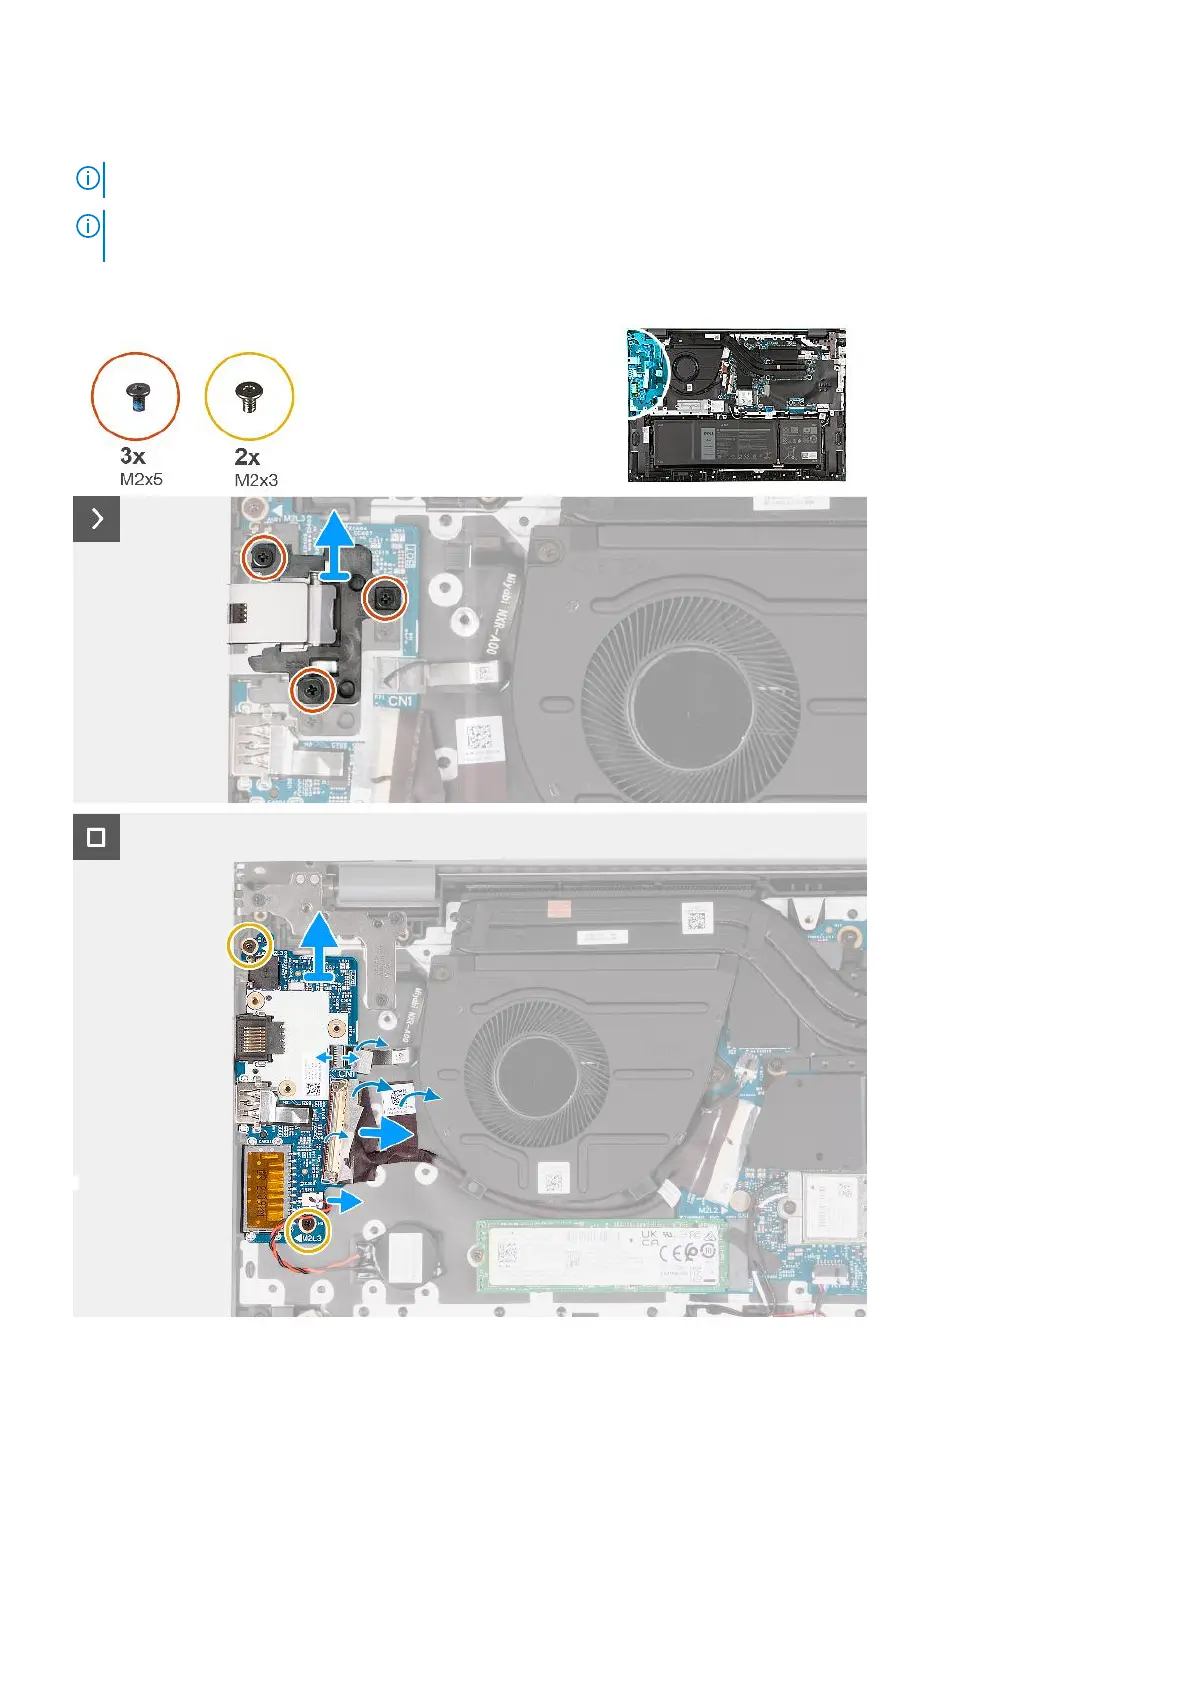
The following image(s) indicate the location of the I/O board and provides a visual representation of the removal procedure.
Steps
1. Remove the three screws (M2x5) that secure the RJ45 network-port assembly to the I/O board.
2. Lift the RJ45 network-port assembly off the I/O board.
3. Peel the tape that secures the I/O-board cable connector latch to the I/O board.
4. Open the latch and disconnect the power-button board cable from the I/O board.
5. Open the latch and disconnect the fingerprint-reader cable from the I/O board.
Removing and installing Field Replaceable Units (FRUs)
53