Replacing Drives: Dell XPS 430 Service Manual
drives.htm[4/15/2014 11:28:30 AM]
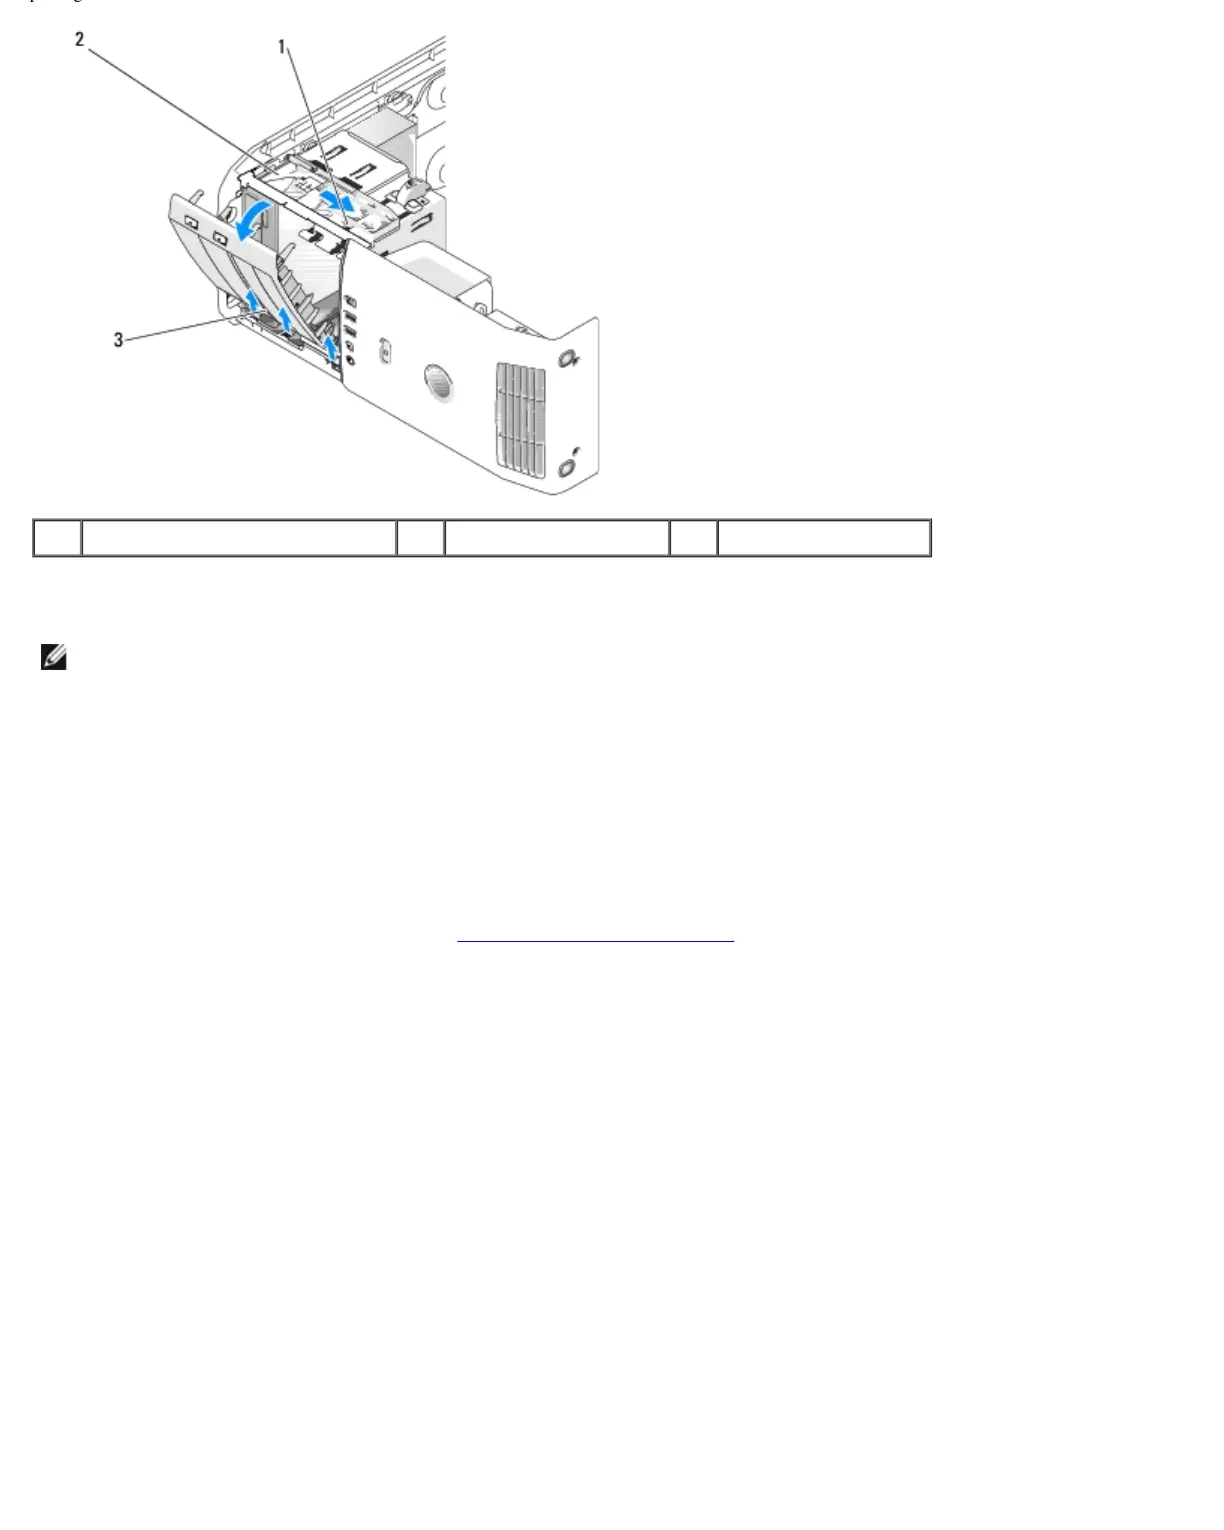
1 sliding plate lever 2 sliding plate 3 drive panel
3. Grasping the lever on the sliding plate, pull the sliding plate downward and hold in place.
NOTE: The sliding plate secures and releases the drive panel and helps to secure the drives. Push from the inside and
pivot the drive panel to the left to release the panel from its side hinges.
4. The drive panel clicks open. Gently ease it out and set it aside in a secure location.
5. To replace the drive panel:
a. Align the drive panel tabs with the side-door hinges.
b. Rotate the drive panel towards the computer until the sliding plate lever clicks into place and the drive panel
snaps into place on the front panel.
c. Replace the computer cover (see Replacing the Computer Cover.
Replacing the Drive-Panel Insert