EasyManua.ls Logo

DeLonghi DDSX220WF User Manual

DeLonghi DDSX220WF
4 pages
To Next Page IconTo Next Page
Page #1 background imageLoading...
Page #1 background image
10
Read the separate safety instructions before using the appliance.
1. DESCRIPTION
1.1 Description of appliance (A)
A1. Air outlet louver
A2. Lifting handles
A3. Room sensor air intake
A4. Castors
A5. Water level viewing window
A6. Condensate collection tank
A7. Epa lter
A8. Silver ion dust lter
A9. Filter housing cover
A10. Continuous drain rubber stopper
A11. Continuous drain cap
A12. Continuous drain hose
1.2 Description of control panel (B)
B1. ON/STAND-BY button
B2. Ventilation button
B3. Dehumidifying button
B4. Wi-Fi button
B5. Swing button
B6. Dry button
B7. Timer button
1.3 Description of display(C)
C1. Full tank alarm
C2. EPA lter present symbol
C3. Ventilation mode active
C4. % Relative Humidity
C5. Wi-Fi symbol
C6. App control symbol
C7. Dry mode active
C8. Hours
C9. Dehumidifying mode active
C10. Low temperature alarm
C11. Remote timer symbol
C12. Local timer symbol
2. DOWNLOAD THE APP!
DE’LONGHI
DEʼLONGHI
This appliance can also be used with the app "Aria Dry De'Longhi"
that can be downloaded from the App Store®.
To gain access to all functions, a local network (Home WLAN)
with Internet access is required. Moreover, check that there
are no impediments to Internet access: Firewall, Proxy,
authentications, etc.
3. DRAINING THE CONDENSATE WATER
The condensate can be drained in 2 ways:
3.1 Draining into the tank
The condensate is drained directly into the tank (A6).
When the tank is full, the appliance stops and the display (C)
shows the tank alarm (C1). Proceed as follows:
1. Remove the tank (g. 1) and empty it into a sink or bathtub.
2. Replace the tank in its housing, making sure the handle is
properly positioned (g. 2).
3.2 Continuous external draining
If the appliance is used for long periods of time without the
possibility to regularly empty the tank, the continuous drain
function should be used.
Proceed as follows:
1. Remove the continuous drain cap (A11) from the spout,
turning it in an anti-clockwise direction, then remove the
continuous drain rubber stopper (A10) from the opening
(g. 3) (Watch out for any leaking water!)
2. Attach the condensate drain hose (A12) to the spout (g.
4).
3) Make sure the hose is positioned below the spout (g. 5) or
the water will ow back into the tank of the appliance.
Also make sure there are no kinks in the hose.
4. MODE SELECTION
Connect the appliance to the mains supply. Upon rst use, the
symbol will appear on the display and at the same time,
an acoustic signal will sound to indicate that the appliance is in
stand-by mode.
1. To turn the appliance on, touch the button (B1).
The appliance will operate in the previously set mode and
the air outlet louver (A1) will open in a preset position (g.
6).
2. If there is a blackout, when the power is restored the
appliance will resume operation in the previously set
operating mode.
Please note:
If the symbol (C1) appears on the display, the tank (A6)
needs to be emptied or properly positioned (see paragraph “3.1
Draining into the tank”).

Other manuals for DeLonghi DDSX220WF

Question and Answer IconNeed help?

Do you have a question about the DeLonghi DDSX220WF and is the answer not in the manual?

DeLonghi DDSX220WF Specifications

General IconGeneral
Humidity ControlYes
Auto RestartYes
Continuous DrainageYes
Refrigerant gasR290
HumidistatYes
WiFiYes
Operating Temperature Range1-35°C

Summary

Appliance Description and Features

Appliance Component Description

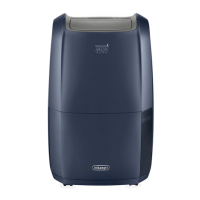
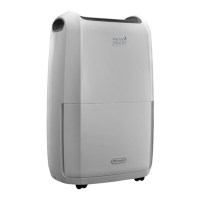
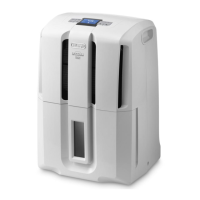
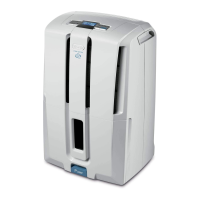
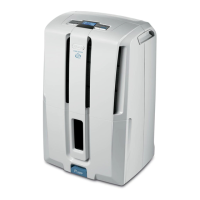
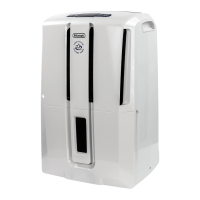
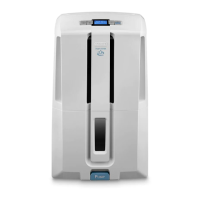
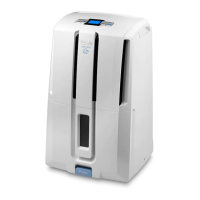
Details the physical parts of the appliance, including air louvers, handles, filters, and tanks.

Control Panel Overview

Explains the functions of buttons on the appliance's control panel.

Display Symbols Explained

Describes the various symbols and indicators shown on the appliance's display.

App Download and Connectivity

Mobile App Integration

Guide to downloading the 'Aria Dry De'Longhi' app for enhanced functionality.

Condensate Water Management

Draining Condensate into the Tank

Instructions for emptying the appliance's internal condensate tank.

Continuous External Draining Setup

How to set up continuous drainage using an external hose.

Appliance Mode Selection and Operation

Initial Setup and Stand-by Mode

How to turn the appliance on and its initial stand-by state.

Dehumidifying Mode Usage

Instructions for operating the appliance in dehumidifying mode.

Dry Mode Operation

Guidance on using the appliance's dry mode for rapid moisture removal.

Ventilation Mode Settings

How to activate and adjust fan speed for ventilation mode.

Swing Function Control

How to use the swing function to distribute airflow evenly.

Timer Function Programming

Instructions for setting delayed start-up and shut-down timers.

Wi-Fi Connectivity and Status

How to activate Wi-Fi and understand its connection status indicators.

Air Filtration System

EPA Filter Functionality

Explains the role of the EPA filter in air purification.

Cleaning and Maintenance Procedures

Cabinet Exterior Cleaning

Guidelines for safely cleaning the appliance's outer surfaces.

Dust and Silver Ion Filter Cleaning

Instructions for cleaning the removable dust and silver ion filters.

EPA Filter Replacement

Steps for replacing the EPA filter and resetting the filter alarm.

Technical Specifications Summary

Appliance Specifications List

Details electrical, operational, and environmental specifications of the appliance.

Troubleshooting and Error Indicators

On-Display Alarms and Solutions

Lists common alarm symbols, their causes, and recommended solutions.

Common Malfunctions and Fixes

Addresses typical problems like humidity not decreasing and provides troubleshooting steps.

Related product manuals