EasyManua.ls Logo

DeLonghi ECAM 22.320.SB - User Manual

DeLonghi ECAM 22.320.SB
18 pages
Print Icon
To Next Page IconTo Next Page
Loading...
DE
GB
BEAN TO CUP ESPRESSO AND CAPPUCCINO MACHINE
Instructions for use
ECAM22.320
Question and Answer IconNeed help?

Do you have a question about the DeLonghi ECAM 22.320.SB and is the answer not in the manual?

Summary

Introduction and Safety

Symbols and Notation

Explains warning symbols and bracket notation used in the manual.

Basic Safety Warnings

Highlights critical safety measures to prevent electrical shock and burns.

Intended Use Guidance

Defines the appliance's designed purpose and lists improper uses.

Appliance Description and Setup

Component Identification

Identifies and lists all parts, buttons, and accessories of the appliance.

Initial Setup Procedures

Guides on unpacking, placement, power connection, and initial setup.

Appliance Operation

Startup and Shutdown Safe Practices

Details safe procedures for powering the appliance on and off, including rinse cycles and warnings.

Core Menu Configurations

Covers settings for descaling, time adjustment, and automatic shut-off.

Menu Settings and Functions

Operational Settings

Covers settings for auto-start, temperature, energy saving, water hardness, and language preferences.

Maintenance and Information Settings

Details filter management, factory reset, and machine usage statistics.

Making Coffee

Selecting Coffee Taste and Quantity

Explains how to choose coffee taste and set cup quantities.

Adjusting the Grinder

Guides on adjusting the grinder for coffee coarseness.

Making Coffee with Beans

Step-by-step instructions for brewing with coffee beans.

Specialty Coffee Drinks

Using Pre-Ground Coffee

Instructions for making coffee with pre-ground coffee.

Making Long Coffee

Steps to prepare a long coffee using beans or pre-ground coffee.

Frothing Milk for Cappuccino

Detailed steps for frothing milk and making cappuccino.

Making Hot Milk (Not Froth)

Instructions for preparing hot milk without froth.

Cleaning Procedures

Cleaning the Cappuccino Maker

Instructions for cleaning the milk frothing system after each use.

Hot Water Dispensing

Provides steps and safety notes for dispensing hot water.

Cleaning Key Components

Details cleaning procedures for milk frother, grounds container, drip tray, and internal parts.

Maintenance and Descaling

Cleaning Water Tank and Spouts

Guides on cleaning the water tank, coffee spouts, and pre-ground coffee funnel.

Cleaning the Infuser

Provides detailed instructions and warnings for cleaning the coffee infuser.

Descaling the Machine

Explains the descaling procedure, required products, and safety warnings.

Water Hardness and Filter Management

Performing the Descale Cycle

Details the process of descaling the coffee machine, including mixing and running the solution.

Setting Water Hardness

Guides on measuring water hardness and programming the machine accordingly.

Installing the Water Filter

Provides instructions for preparing and installing a new water softener filter.

Filter Replacement and Technical Data

Replacing the Water Filter

Instructions for replacing the water softener filter and notifying the appliance.

Removing the Water Filter

Steps to remove the water filter and disable its notification.

Technical Specifications

Lists electrical, physical, and performance specifications of the appliance.

Troubleshooting and Error Messages

Interpreting Display Messages

Explains common messages displayed by the machine and their causes/solutions.

Resolving Common Malfunctions

Provides solutions for common problems like coffee temperature, strength, and delivery issues.

Overview

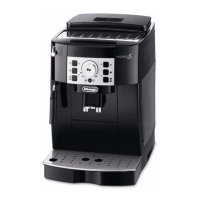
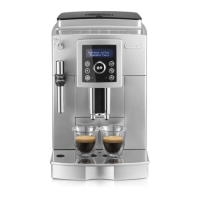
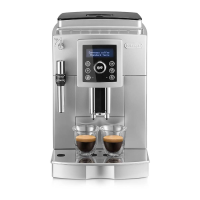
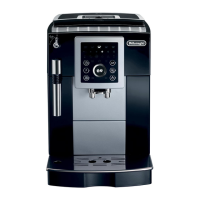
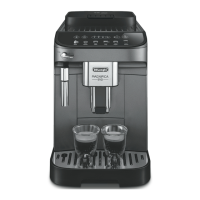
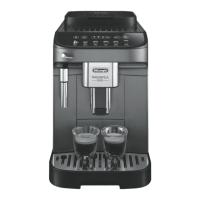
This document describes the De'Longhi ECAM22.320 Bean to Cup Espresso and Cappuccino Machine, an automatic coffee and cappuccino maker designed for household use.

Function Description:

The ECAM22.320 is an automatic coffee and cappuccino maker that grinds coffee beans, brews espresso, and froths milk for cappuccino and hot milk. It is designed to prepare coffee and heat drinks, with all other uses considered improper. The machine features a control panel with a display (B1) that guides the user through various operations and settings.

Important Technical Specifications:

  • Voltage: 220-240 V~50/60 Hz max. 10A
  • Absorbed power: 1450W
  • Pressure: 15 bar
  • Max. capacity water tank: 1.8 litres
  • Size (LxHxD): 238x345x430 mm
  • Cable length: 1.15 m
  • Weight: 9.1 Kg
  • Max. capacity beans container: 250 g
  • Compliance: EC Regulation 1275/2008 for standby, Low Voltage Directive 2006/95/EC, EMC Directive 2004/108/EC, and food conformity to EC regulation 1935/2004.

Usage Features:

Initial Setup:

  1. Electrical Connection: Ensure the product voltage matches the mains supply. Connect the power cable (C5) to the socket (A9) at the back of the appliance and then to an earthed mains socket (fig. 1). Press the main switch (A8) down (fig. 2).
  2. Language Selection: When "English" appears on the display, press the (B6) button for a few seconds until "ENGLISH set" is displayed (fig. 3).
  3. Water Tank: Remove the water tank (A10), fill it to the MAX line with fresh water (fig. 4A), and reinsert it (fig. 4B).
  4. Cappuccino Maker Preparation: Place a container (min. 100 ml) under the cappuccino maker (A19) (fig. 5). Turn the steam knob (A21) to the "I" position (fig. 5). The appliance will deliver hot water and then turn off automatically. Turn the steam knob back to "O".
  5. First Use Note: It is recommended to make 4-5 cups of coffee or cappuccinos before the appliance yields satisfactory results.

Turning On/Off:

  • Turning On: Press the (B2) button (fig. 6). The machine performs an automatic preheat and rinse cycle. It is ready when the coffee taste and quantity message is displayed.
  • Turning Off: Press the (B2) button (fig. 6). The machine performs an automatic rinse cycle and then enters stand-by mode. If not used for a long time, unplug the appliance after turning it off and pressing the main switch (A8).
  • Descale: Follow instructions on page 14.
  • Adjust Time: Set the hour and minutes using the (B4) and (B5) buttons.
  • Auto-off: Set the appliance to turn off after 15, 30 minutes, or 1, 2, or 3 hours.
  • Auto-start: Set a specific time for the appliance to turn on automatically.
  • Set Temperature: Adjust coffee water temperature (low, medium, high).
  • Energy Saving: Enable or disable to reduce energy consumption.
  • Set Water Hardness: Adjust according to water hardness test results (page 15).
  • Set Language: Change the display language.
  • Install/Replace Filter: Instructions for the water softener filter (page 15-16).
  • Default Values (Reset): Resets all menu settings and programmed quantities to default, except language.
  • Statistics Function: Displays usage statistics (coffees made, descaling cycles, water delivered, filter replacements).

Making Coffee:

  • Coffee Taste: Select from Extra-mild, Mild, Standard, Strong, or Extra-strong using the Aroma (B7) button (fig. 7).
  • Coffee Quantity: The machine has default quantities for short espresso (≈40ml), long espresso (≈120ml), and double versions. To reprogram, press and hold the desired coffee button until "Program quantity" is displayed, release, and press again when the desired level is reached.
  • Adjusting the Grinder: Turn the grinding dial (A2) only when the coffee mill is in operation (fig. 8). Turn clockwise for faster delivery/weaker coffee, anticlockwise for slower delivery/creamier coffee.
  • Hotter Coffee Tips: Perform a rinse cycle (B5), warm cups with hot water, or increase coffee temperature in the menu.
  • Using Coffee Beans: Fill the beans container (A7) (fig. 9). Place 1 or 2 cups under the coffee spouts (A13) (fig. 10, 11). Lower the spout for creamier coffee (fig. 12). Press the (B8) for 1 cup short espresso, (B9) for 2 cups short espresso, (B10) for 1 cup long coffee, (B11) for 1 cup long espresso, or (B12) for 2 cups long espresso.
  • Using Pre-ground Coffee: Press the (B6) button. Add one level measure of pre-ground coffee to the funnel (A6) (fig. 13). Place a cup under the spouts. Press the (B8) or (B11) button. Only one cup can be made at a time.
  • Making LONG Coffee: Follow coffee bean or pre-ground coffee instructions and press the LONG button (B10, B11, B12).

Making Cappuccino and Hot Milk:

  • Preparation: Use a large cup for coffee. Fill a container with about 100g of skimmed or partially skimmed milk at refrigerator temperature (about 5°C). Position the cappuccino/hot milk ring (A20) downwards for CAPPUCCINO (fig. 14).
  • Steam Delivery: Press the (B4) button. Turn the cappuccino maker outwards and immerse it in the milk (fig. 15), avoiding the black ring. Turn the steam knob (A21) to "I" (fig. 5). Steam will be delivered, frothing the milk. Rotate the container for creamier froth.
  • Stop Steam: Turn the steam knob back to "O" when desired froth is achieved. Add frothed milk to coffee.
  • Hot Milk (not frothed): Position the cappuccino/hot milk ring upwards in the "HOT MILK" position.

Maintenance Features:

Cleaning:

  • Cappuccino Maker (A19): Clean after each use to prevent blockages. Let hot water run for a few seconds by turning the steam knob to "I" then "O". Wait for it to cool. Remove by turning outwards and sliding down (fig. 16). Move the ring upwards (fig. 17), slide the nozzle downwards (fig. 18). Clean the two holes with a pin if blocked (fig. 19). Reassemble (fig. 20).
  • Coffee Grounds Container (A14): Empty and clean when "EMPTY GROUNDS CONTAINER" is displayed. Remove the drip tray (A18), empty and clean the grounds container, and check the condensate tray (A15) (fig. 21).
  • Drip Tray (A18) and Condensate Tray (A15): Empty regularly to prevent overflow. The drip tray has a floating red level indicator (A17) (fig. 22). Remove the drip tray and grounds container (fig. 21), empty, wash, and check the condensate tray.
  • Inside of the Machine: Turn off and unplug. Regularly check (about once a month) and clean with a brush and sponge. Remove residues with a vacuum cleaner (fig. 23).
  • Water Tank (A10): Clean regularly (about once a month) with a damp cloth and mild washing up liquid. Remove the filter (if present) and rinse.
  • Coffee Spouts (A13): Clean with a sponge or cloth (fig. 24A). Check for blockages and clean with a toothpick if necessary (fig. 24B).
  • Pre-ground Coffee Funnel (A6): Check regularly (about once a month) for blockages and clean with a brush.
  • Infuser (A12): Clean at least once a month. Ensure the machine is off. Remove the water tank. Open the infuser door (A11) (fig. 25). Press the two red release buttons and pull the infuser outwards (fig. 26). Soak in water for 5 minutes, rinse under the tap. Use a brush to remove coffee residues from the infuser housing. Reinsert by sliding it onto the internal support until it clicks (fig. 27). Ensure the two red buttons have popped out. Close the door and replace the water tank.

Descaling:

  • When to Descale: When "DESCALE" flashes on the display.
  • Procedure: Turn on the machine. Press MENU (B3), select "Descale" using (B4) or (B5), and confirm with (B6). Confirm "Add descaler". Empty the water tank (A10) and remove the filter (if present). Pour 100ml descaler (C2) into the tank (A10) up to level A, then add 1 litre of water up to level B (fig. 27). Place a 1.5 litre container under the cappuccino maker (A19) (fig. 5). Confirm descaler introduction. Turn the steam knob (A21) to "I" (fig. 5). The descaling program will run for about 30 minutes. When "FILL TANK!" is displayed, empty the container, remove, rinse, and refill the water tank. Hot water will come out of the cappuccino maker. When "TURN STEAM KNOB" is displayed, turn the knob to "O". Insert the filter (if present), fill the tank, and the machine is ready.

Water Softener Filter (C3):

  • Measuring Water Hardness: Use the TOTAL HARDNESS TEST indicator paper (C4) provided. Immerse in water for 1 second, shake, and after 1 minute, check the number of red squares (1-4 levels).
  • Setting Water Hardness: In the menu, select "Water hardness" and set the level according to the test paper.
  • Installing the Filter: Remove from packaging. Turn the date indicator disk (fig. 28) to display the next two months of use. Activate the filter by running tap water through it for at least 1 minute (fig. 29). Fill the water tank, submerge the filter for 10 seconds to release air (fig. 30). Insert the filter into the housing (fig. 31A) and close the tank lid (fig. 31B). Notify the appliance of filter installation via the menu ("Install filter").
  • Replacing the Filter: Replace when "Replace filter" is displayed, after two months, or if unused for 3 weeks. Follow installation steps for the new filter and notify the appliance via the menu.
  • Removing the Filter: Remove the water tank and filter. In the menu, select "Install filter" and then "Disable" to notify the appliance of removal.

Important Safety Warnings:

  • Electrical Shock: Do not touch the appliance, plug, or power cable with damp hands. Ensure the socket is accessible. Unplug by grasping the plug, not the cable.
  • Burns: The appliance produces hot water and steam. Avoid contact with splashes.
  • Damage: Do not use if visibly damaged. Do not repair. Contact Customer Services.
  • Children: Keep packaging away from children. Supervise children to ensure they do not play with the appliance.
  • Installation: Leave at least 3 cm space around the appliance and 15 cm above. Do not place near taps or sinks. Do not install where temperature can drop below freezing.
  • Cleaning: Do not use solvents, abrasive detergents, or alcohol. Do not use chemical products. Do not wash components in a dishwasher. Do not use metal objects to remove deposits.
  • Descaler: Contains acids. Observe manufacturer's safety warnings. Use only De'Longhi recommended descaler.

Disposal:

  • The appliance must not be disposed of with household waste. Take it to an authorised waste separation and recycling centre in compliance with European directive 2002/96/EC.

DeLonghi ECAM 22.320.SB Specifications

General IconGeneral
BrandDeLonghi
ModelECAM 22.320.SB
CategoryCoffee Maker
LanguageEnglish

Related product manuals