This document provides instructions for the ECAM23.210 Bean to Cup Espresso and Cappuccino Machine.
Function Description
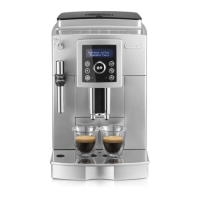
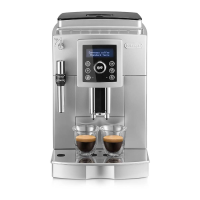
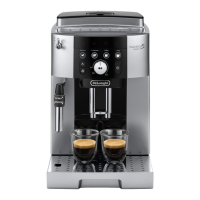
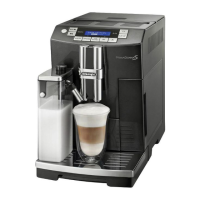
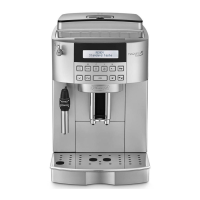
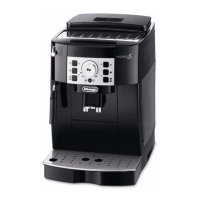
The ECAM23.210 is an automatic coffee and cappuccino maker designed to prepare coffee and heat drinks. It is a household appliance and not suitable for commercial use. The machine features a control panel (A1) with various buttons and lights for operation. It includes a grinding adjustment knob (A2) for customizing coffee fineness, a cup shelf (A3), and a coffee spout (A12) with adjustable height. The machine can make one or two cups of coffee with customizable taste and quantity. It also features a cappuccino maker (A18) for delivering steam to make hot drinks with milk.
Usage Features
To use the appliance, first ensure the main switch (A8) on the back is in the 'I' position (fig. 3). The water tank (A9) should be filled with fresh water up to the MAX line (fig. 1A). For coffee preparation, coffee beans are added to the beans container (A7) or pre-ground coffee can be used in the pre-ground coffee funnel (A6).
The control panel (B) allows for various selections:
- On/Off (B2): Turns the appliance on and off. Each time it's turned on or off, it performs an automatic preheat and rinse cycle.
- Menu Access (B3): The 'P' button allows access to the programming menu for settings like Descale, Auto-off, Set temperature, Energy Saving, Water hardness, Install filter, Replace filter, Default values, and Statistics.
- Rinse Cycle (B4): Performs a rinse cycle. When in the settings MENU, it acts as an "ESC" button to exit a function.
- Quantity Selection (B5): A knob to select the desired quantity of coffee. In the settings MENU, it selects functions.
- Aroma Selection (B6): Selects the coffee taste (Extra mild, Mild, Standard, Strong, Extra strong).
- 1 Cup Coffee (B7): Makes one cup of coffee with the displayed settings.
- 2 Cups Coffee (B8): Makes two cups of coffee with the displayed settings.
- Steam/Hot Water (B9): Delivers steam for milk-based drinks. When in the MENU, it acts as an "OK" button to confirm selections.
Making Coffee:
- Coffee Beans: Fill the container (A7) with coffee beans (fig. 13). Place a cup(s) under the coffee spouts (A12) (fig. 10). Lower the spouts as near as possible to the cup for a creamier coffee (fig. 14). Press the button for 1 or 2 cups (B7 or B8, figs. 11 and 15).
- Pre-ground Coffee: Only one cup can be made at a time. Press the aroma selection button (B6) repeatedly until the pre-ground coffee symbol appears. Put one level measure of pre-ground coffee into the funnel (A6) (fig. 16). Place a cup under the coffee spouts. Press the 1 cup coffee button (B7).
- Customizing Quantity: To modify the "my coffee" quantity, place a cup under the spouts, turn the selection knob (B5) until the 'M' light comes on, press and hold the 1 cup button (B7) until coffee delivery starts, then release. Press the 1 cup button again when the desired level is reached.
- Adjusting Coffee Mill: The grinding adjustment knob (A2) (fig. 12) should only be turned when the coffee mill is in operation. Turn clockwise towards "7" if coffee is too thin or delivery is too slow. Turn anti-clockwise towards "1" for fuller-bodied, creamier coffee. Make small adjustments (one click at a time).
Making Cappuccino:
Prepare coffee in a large cup. Fill a container with about 100 grams of milk (preferably skimmed or partially skimmed milk at refrigerator temperature). Press the steam button (B9). The steam light will flash, indicating to turn the steam knob (A19). Immerse the cappuccino maker (A18) in the milk (fig. 17), taking care not to immerse past the raised line (fig. 18). Turn the steam knob to the 'I' position (fig. 4). Steam will be delivered, frothing the milk. Rotate the container with slow upward movements for a creamier froth. Stop steam delivery before removing the container to avoid burns. Add frothed milk to the coffee.
Heating Water:
Place a container under the cappuccino maker (A18). Turn the steam knob (A19) to the 'I' position. Turn the steam knob to the '0' position to stop delivery.
- Auto-off: The appliance turns off automatically after 2 hours by default. This can be changed to 15 or 30 minutes, or 1, 2, or 3 hours via the menu.
- Temperature: Modify the water temperature (low, medium, high) for coffee.
- Energy Saving: Enable or disable energy saving mode.
- Water Hardness: Customize water hardness to reduce descaling frequency. Use the provided "TOTAL HARDNESS TEST" indicator paper (page 16) to measure water hardness and set the corresponding level in the menu.
- Install/Replace Filter: Instructions for installing and replacing the water softener filter (C4).
- Default Values: Resets all menu settings and programmed quantities to default.
- Statistics: Displays machine statistics (coffees made, descaling times, water delivered, filter replacements).
Maintenance Features
Regular cleaning is essential for optimal performance and longevity of the appliance.
- Coffee Grounds Container (A13), Drip Tray (A17), and Condensate Tray (A14): These must be emptied and cleaned regularly. When the 'grounds container full' light flashes, empty and clean the grounds container and drip tray (fig. 23). The drip tray has a red level indicator (A16) (fig. 24) that shows when it needs emptying.
- Water Tank (A9): Clean monthly with a damp cloth and mild washing-up liquid. Remove and rinse the water softener filter (if present).
- Coffee Spouts (A12): Clean with a sponge or cloth (fig. 26A). Check for blockages and remove coffee deposits with a toothpick (fig. 26B).
- Pre-ground Coffee Funnel (A6): Check monthly for blockages and remove coffee deposits with the supplied brush.
- Inside of the Machine: Regularly check and clean internal parts (accessible after removing the drip tray) with a brush and sponge (fig. 25).
- Infuser (A11): Clean at least once a month. To remove, turn off the machine, remove the water tank, open the infuser door (A10) (fig. 27), press the two red release buttons inwards, and pull the infuser outwards (fig. 28). Soak the infuser in water for 5 minutes, then rinse. Use the brush to remove coffee residues from the infuser housing. To reinsert, slide it onto the internal support and push until it clicks into place. If difficult to insert, adapt its size by pressing the two levers shown in the figure (page 15).
- Cappuccino Maker (A18): Clean after each use to prevent milk residue build-up. Discharge a little hot water by turning the steam knob to 'I', then '0'. Wait for it to cool, turn it outwards, and remove it by pulling downwards (fig. 19). Remove the nozzle downwards (fig. 20). Ensure the two holes (fig. 21) are not blocked and clean with a pin if necessary. Wash all parts with a sponge and warm water. Replace the nozzle and then the cappuccino maker (fig. 22).
- Descaling: The appliance must be descaled when the 'descale' light flashes. Use De'Longhi descaler only. Turn on the machine, access the menu via the 'P' button, select 'descale', confirm. Empty the water tank and remove the filter. Pour descaler (100 ml) into the tank up to level A (fig. 29A), then add water up to level B (fig. 29B). Place a 1.5-liter container under the cappuccino maker (A19). Press the 'confirm' button, then turn the steam knob to 'I'. The descaling program will run for about 30 minutes. After the tank is empty, empty the container, remove, rinse, and refill the water tank. Hot water will be delivered from the cappuccino maker. When the tank is empty again, turn the knob to '0', insert the filter (if present), refill the water tank, and the appliance is ready.