15
Place an empty container with a minimum capacity of 50
oz./ 1.5 liters under the water spout.
4. Wait until the appliance is ready for use.
Important! Danger of burns
Hot water containing acid ows from the spout. Avoid contact
with splashes of water.
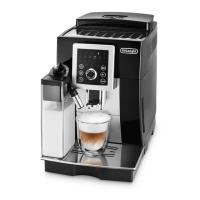
5. Press the button: the
lights shown in g. 36
come on:
and
ash.
6. Press the button
to conrm. (If you want
to abort the operation,
press the button,
corresponding to
).
7. Press the button to conrm. The descaling pro-
gramme starts and the descaler liquid comes out of the
cappuccino maker.
The descale programme automatically performs a series of
rinses and pauses to remove limescale deposits from inside
the machine.The descale programme starts and the des-
caler liquid comes out of the water spout.
After about 20 minutes, the
, and lights come on.
8. The appliance is now ready for rinsing through with clean
water. Extract the water tank, empty, rinse under running
water, ll with clean water up to the MAX level, insert the
lter (if removed previously) and put the water tank back
in the machine. The light comes on.
9. Empty the container used to collect the descaler solution
and replace it empty under the water spout.
10. Press the button to start the rst rinsing. Hot water
ows out of the spout.
11. When the water tank is completely empty, the
,
and lights come on.
12. Extract the water tank, empty, rinse under running water,
ll with clean water up to the MAX level, and put the water
tank back in the machine. The ight comes on.
13. Press the button to start the second rinsing. Hot water
ows out of the spout and coee outlet.
14. Press Ok and ll the water tank: the appliance is ready for
use.
Please note!
If the descaling cycle is not completed correctly (e.g. lack of elec-
tricity) we recommend repeating the cycle.
WATER SOFTENER FILTER IF FITTED
Certain models are tted with a water softener lter. If this is not
the case with your model, you are recommended to purchase
one from De’Longhi Customer Services.
To use the lter correctly, follow the instructions below.
Installing the lter
37
1. Remove the lter from
the packaging.
2. Turn the date indicator
disk (g. 37) until the
next two months of use
are displayed.
Please note
The lter lasts about two
months if the appliance is used
normally. If the coee machine
is left unused with the lter in-
stalled, it will last a maximum of three weeks.
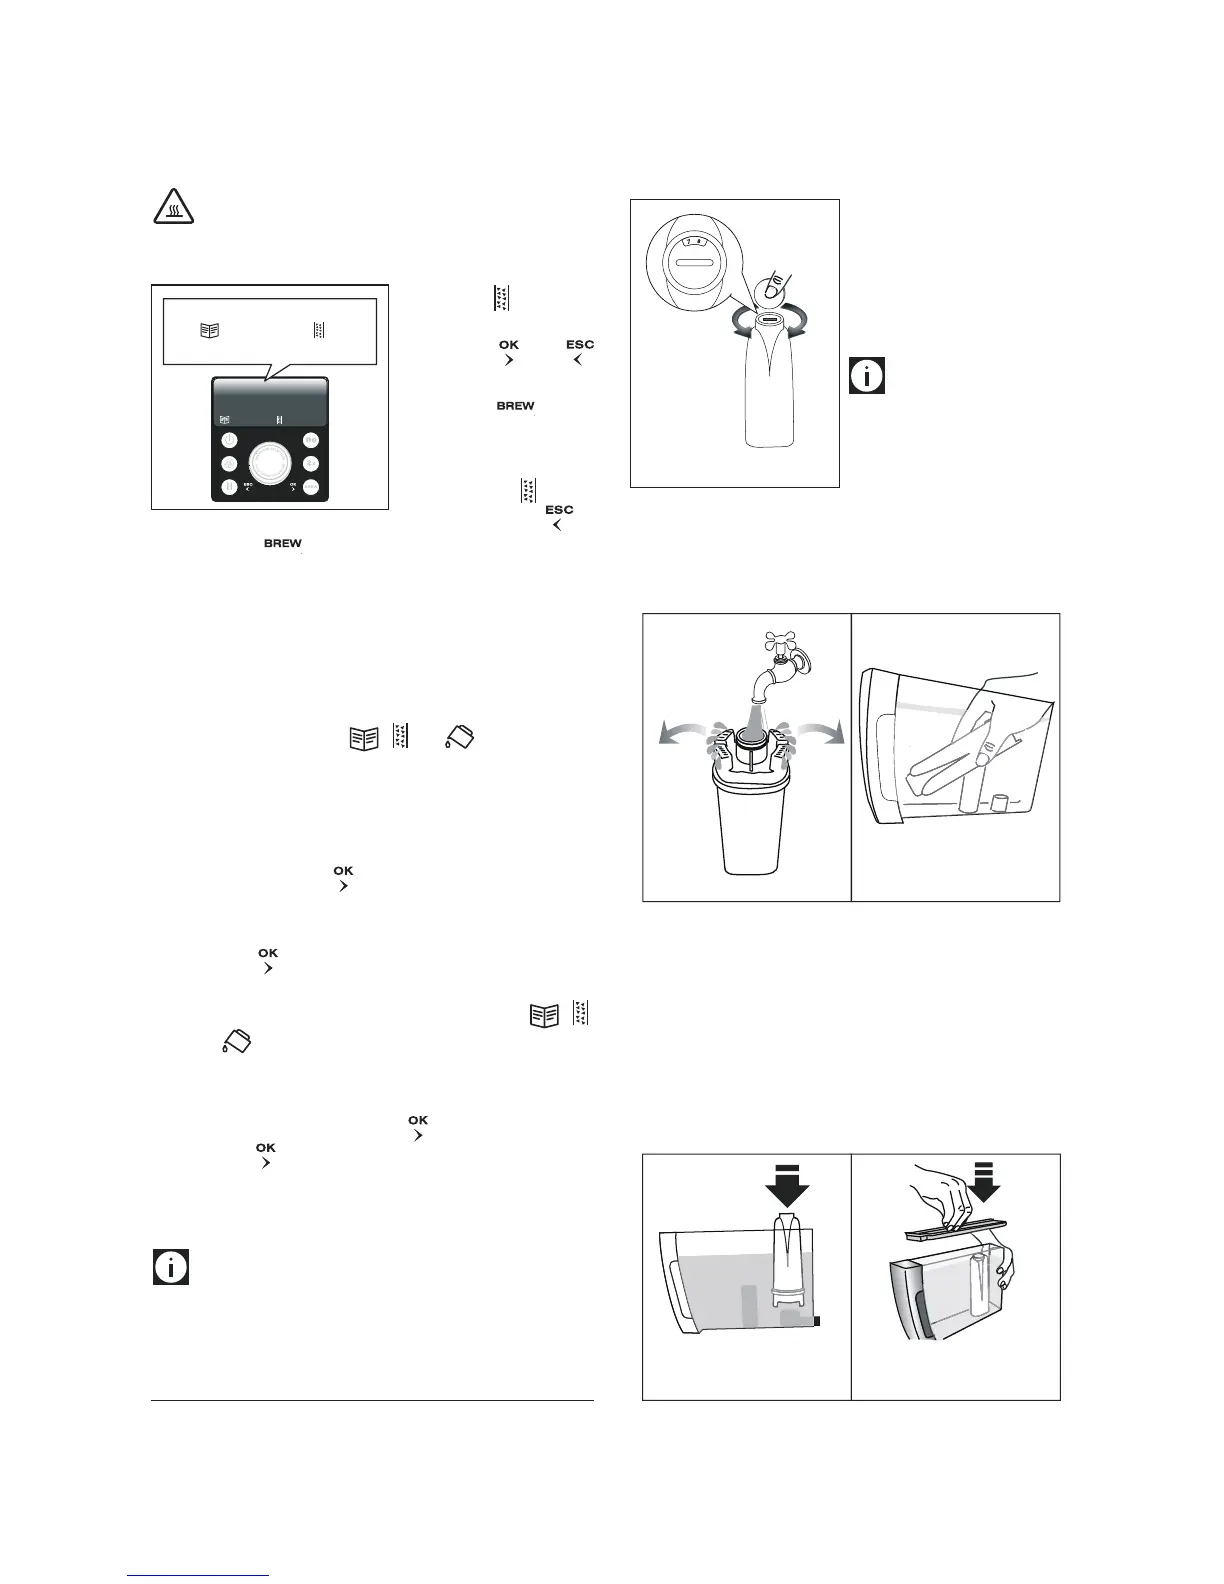
3. To activate the lter, run tap water through the hole in the
lter as shown in the gure until water comes out of the
openings at the side for more than a minute (g. 38).
3938
0,5 L
4. Extract the tank from the appliance and ll with water.
5. Insert the lter in the water tank and immerse it com-
pletely for about ten minutes, sloping it to enable the air
bubbles to escape (g. 39).
6. Insert the lter in the lter housing and press as far as it
will go (g. 40A)
7. Close the tank with the lid, then put the tank back in the
machine (g. 40B).
40A
40B
When you install the lter, it must be activated delivering hot
water until it ows regularly.
36
 Loading...