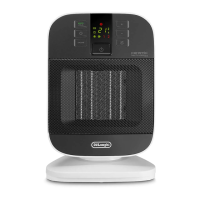
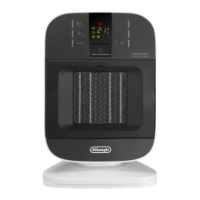
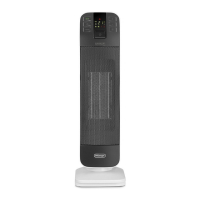
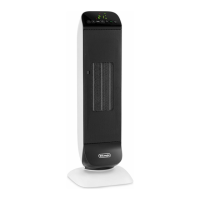
EasyManua.ls Logo

DeLonghi HFX25S20 - User Manual

DeLonghi HFX25S20
3 pages
Print Icon
To Next Page IconTo Next Page
Loading...
7
DESCRIPTION
A ON/STANDBY button
B +/- Adjustment buttons
C Oscillation button
D ECO function button
E Timer button
F MODE button (for selecting the operating mode)
G Power indicator light
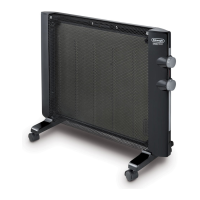
USE
Installation
The appliance can be used on any horizontal surface.
Do not overload the electrical circuit. Avoid using the same
socket for other appliances.
Electrical connection
- Before plugging the appliance into the outlet, check that
the power supply corresponds to the value indicated on
the rating plate and that the power supply is adequate
for the load.
Operation and use
- Connect the appliance to the power outlet.
- The appliance emits a beep and the power indicator
light (G) also comes on and remains lit while power to
the appliance is on. The appliance goes into STANDBY.
- Press the ON/STANDBY button (A) to turn on the
appliance. It will begin to heat with the predened
settings.
- Press the MODE button (F) to select one of the following
functions available:
l
Ventilation
In this operating mode only the fan operates, so the
appliance does not heat the room.
l
Anti-freeze
In this operating mode the appliance keeps the room
at a temperature of 45°F (7°C) to prevent freezing
temperatures.
l
Heating 1 and Heating 2
In this operating mode you can set the desired
temperature by pressing the + and - adjustment
buttons (B).
- Heating 1 (minimum power level):
The appliance operates at the minimum power, reducing
noise and energy consumption to the minimum.
- Heating 2 (maximum power level):
The appliance operates at the maximum power for rapid
heating of the room.
ECO function
In this operating mode the appliance will automatically set
the power level to guarantee the best comfort reducing the
energy consumption.
In this operating mode the unit may switch the heating
power level from maximum to minimum and vice versa,
several times in an hour. When using the ECO function, the
maximum temperature setting is 79°F (26°C). To activate this
function, press the ECO button (D).
Oscillation button
If you want the appliance to distribute the airow over a
larger area, press the oscillation button (C) . The appliance
will then oscillate right and left. To stop the oscillation in the
desired position, just press oscillation button (C) again.
Turn the appliance o
To turn o the appliance press button ON/STANDBY (A). The
display could show the count down for about 6 seconds. To
completely turn o the appliance, remove the plug from the
socket.
Please note: The display can show the temperature in
both °F and °C. To change the temperature scale, press and
hold the + key for approximately 10 seconds, then release.
Please be aware that the temperature shown may not cor-
respond exactly to the actual temperature.
24HOUR DIGITAL TIMER
This function can be activated from any operating mode.
Delayed switch-on: with the appliance in the STANDBY
position, press the timer button (E) .
The display shows the symbol and the time remaining
before switch-on. To set the timer, use the + and - adjustment
buttons (B), then wait a few seconds for the programming to
be set.
The display returns in stand-by and the symbol to indicate
you have set the timer. When the programmed time has been
reached, the appliance turns on with the same settings it had
during the previous operation.
Delayed shut-o: With the appliance on, press the timer
button (E) . The display shows the symbol and the
time remaining before shut-o. To set the timer, use the +
and – adjustment buttons (B), then wait a few seconds for
the programming to be set. The display returns to show the
current settings and the symbol to indicate you have set
the timer. When the programmed time as been reached the
appliance shuts o automatically.
Question and Answer IconNeed help?

Do you have a question about the DeLonghi HFX25S20 and is the answer not in the manual?

Overview

This document describes a portable electric heater, likely a fan heater, with various operational modes and safety features.

Function Description

The device is primarily a heating appliance designed to warm a room. It features several operating modes to suit different needs:

  • Ventilation: In this mode, only the fan operates, circulating air without heating.
  • Anti-freeze: This mode maintains a room temperature of 45°F (7°C) to prevent freezing, making it suitable for spaces that need to be kept above freezing point without continuous heating.
  • Heating 1 (Minimum Power Level): This mode operates at minimum power, reducing noise and energy consumption.
  • Heating 2 (Maximum Power Level): This mode operates at maximum power for rapid heating of the room.
  • ECO Function: This intelligent mode automatically adjusts the power level to ensure optimal comfort while minimizing energy consumption. The unit may switch between maximum and minimum heating power multiple times per hour. The maximum temperature setting in ECO mode is 79°F (26°C).

The device also includes an Oscillation Function to distribute airflow over a larger area by oscillating left and right.

Important Technical Specifications

The manual does not explicitly list specific power ratings (e.g., wattage) or voltage beyond stating "Supply voltage" and "Absorbed power" refer to the rating label. However, it does mention:

  • Temperature Scale: The display can show temperature in both °F and °C.
  • ECO Mode Temperature Limit: Maximum 79°F (26°C).
  • Anti-freeze Temperature: Maintains 45°F (7°C).
  • Timer Intervals: Can be set in 30-minute intervals from 30 minutes to 10 hours, and in one-hour increments thereafter.
  • Remote Control Battery: Uses a 3V CR2025 button battery.

Usage Features

The heater is designed for ease of use with a control panel and a remote control.

Control Panel Components:

  • ON/STANDBY button (A): Powers the appliance on or off.
  • +/- Adjustment buttons (B): Used to set desired temperature or timer.
  • Oscillation button (C): Activates or deactivates oscillation.
  • ECO function button (D): Activates the ECO mode.
  • Timer button (E): Activates and sets the 24-hour digital timer for delayed switch-on or shut-off.
  • MODE button (F): Selects between Ventilation, Anti-freeze, Heating 1, and Heating 2 modes.
  • Power indicator light (G): Illuminates when the appliance is powered.

Initial Setup:

  • Place the appliance on any horizontal surface.
  • Ensure the power supply matches the rating plate and is adequate for the load. Avoid overloading electrical circuits.
  • Connect the appliance to a power outlet. It will beep, and the power indicator light (G) will illuminate, entering STANDBY mode.
  • Press the ON/STANDBY button (A) to turn it on; it will start heating with predefined settings.

Temperature Adjustment:

  • In Heating 1 or Heating 2 modes, use the +/- buttons (B) to set the desired temperature.
  • To change the temperature scale (°F/°C), press and hold the "+" key for approximately 10 seconds.

24-Hour Digital Timer:

  • Delayed Switch-on: With the appliance in STANDBY, press the timer button (E). The display shows the timer symbol and remaining time. Use +/- buttons (B) to set the timer. The appliance will turn on with previous settings once the time is reached.
  • Delayed Shut-off: With the appliance on, press the timer button (E). The display shows the timer symbol and remaining time. Use +/- buttons (B) to set the timer. The appliance will shut off automatically once the time is reached.
  • To cancel the timer, press the timer button (E) twice.

Remote Control:

  • The remote control mirrors the functions of the control panel.
  • Before first use, remove the plastic tab from the base of the remote.
  • Battery Replacement: Extract the battery holder, insert a 3V CR2025 battery with correct polarity (+ and -), then reinsert the holder.

Safety Features:

  • Overheating Protection: A safety device switches the heater off if it overheats (e.g., obstructed grilles). Users should unplug, clear obstructions, and allow it to cool before restarting.
  • Tip-over Safety Switch: Automatically turns the heater off if it tips over or is improperly positioned. It will return to STANDBY mode once restored to a vertical position.
  • Important Note: Do not cover the appliance to avoid overheating.

Maintenance Features

Regular maintenance is crucial for the appliance's longevity and safe operation.

  • Unplug Before Maintenance: Always unplug the appliance from the outlet before performing any maintenance.
  • Grille Cleaning: Regularly clean the air intake and outlet grilles using a vacuum cleaner, especially during periods of frequent use.
  • Cleaning Agents: Never use abrasive powders or solvents to clean the appliance.
  • Battery Disposal: If the remote control battery is disposed of or replaced, it must be removed and disposed of according to local recycling regulations, as batteries are harmful to the environment. Do not throw batteries into an open flame.

Troubleshooting

The manual provides solutions for common issues:

  • "PF" display: Indicates a fault with the temperature sensor. Requires servicing.
  • Product doesn't turn on:
    • Check if the plug is connected.
    • If the delayed start timer is ON, wait for it to elapse or cancel it by pressing button (E) twice and then (A).
    • If room temperature has reached the set temperature, increase the set temperature using the "+" button.
  • Appliance shuts off unexpectedly:
    • Check if the appliance is receiving power.
    • Ensure the appliance is in a vertical position on a flat surface (tip-over switch may have been tripped).
    • Check the set temperature and timer (appliance may be off because the set temperature was reached or the timer elapsed).
  • "Ht" blinking display: Indicates high internal temperature, possibly due to obstructed air intake/outlet grilles or incorrect positioning.
    • Check and correct appliance positioning, ensuring minimum distances from walls/objects.
    • Remove any obstructions.
    • Disconnect the plug, let the appliance cool down, then plug it back in. If the issue persists, contact customer service.

DeLonghi HFX25S20 Specifications

General IconGeneral
BrandDeLonghi
ModelHFX25S20
CategoryHeater
LanguageEnglish

Related product manuals