EasyManua.ls Logo

DeLonghi HFX85W20C - User Manual

DeLonghi HFX85W20C
7 pages
Print Icon
To Next Page IconTo Next Page
Loading...
11
DESCRIPTION
A ON/STANDBY button
B Lid release button
C Air purication lter
D Remote control
E Control panel
F Heating button
F1 Heating mode
G Temperature buttons
G1 Temperature indicator (C° and F°)
H ECO button
H1 ECO function
I Airow direction button
J Oscillation button
K Timer button
K1 Timer function
L Fan speed buttons
L1 Fan speed indicator
M Fan button
M1 Fan mode
N Hours
O Power indicator light
P Receiver for remote control
Increase button
Decrease button
Q Handle
R Air inlet
S Air outlet
OPERATION AND USE
Electrical connection
Before plugging the appliance into the outlet, check that
the power supply corresponds to the value indicated on the
rating plate and that the power supply is adequate for the
load.
Installation
The appliance can be used on any horizontal stable surface.
Do not overload the electrical circuit.
Avoid using the same socket for other appliances.
Please note: the appliance can be easily moved
carrying it by the handle. Before moving it remember to turn
it o.
Starting instructions
Please note: the lter is provided with a protective
wrapper around it that needs to be removed before rst use.
- Before turning on the appliance remove the lter from
its housing as explained in the lter maintenance
section.
- Remove the wrapper covering the lter (g.1).
g.1
- Replace the lter in its housing as explained in the lter
maintenance section.
- Connect the appliance to the power outlet.
- The appliance emits three beeps and the power
indicator light (O) also comes on and remains lit while
power to the appliance is on. The appliance goes into
STANDBY.
OPERATING MODES
Turn on the appliance
- Press/touch the ON/STANDBY button (A) to turn on the
appliance.
There are two buttons to select the operating modes of
the appliance: heating (F) and fan (M).
- To turn o the appliance press/touch button ON/
STANDBY (A). If unit has been in heat mode, expect
the display to count down for about 10 seconds before
the unit shuts o. After that, to completely turn o the
appliance, remove the plug from the socket.
Please note: never turn o the appliance by only
pulling the plug. Press/touch the ON/STANDBY button (A)
and wait a few minutes before pulling the plug. In this way
the appliance can perform operating status checks.
Air purication
The product is designed to oer constant air purication
from allergens and pollutants in heating and fan modes. The
purication function is NOT working when in the STANDBY
mode. If air purication is desired regardless of the need for
heating or cooling, it is advisable to set the product in fan
mode using ventilation levels 1 through 5.
Heating mode
- To select this operating mode, press the heating button
(F) on the remote control. The display shows the
Question and Answer IconNeed help?

Do you have a question about the DeLonghi HFX85W20C and is the answer not in the manual?

Summary

Operation and Use

Electrical Connection Checks

Verify power supply rating and adequacy before connecting the appliance to the outlet.

Appliance Installation

Proper placement on a stable surface and avoiding circuit overload are crucial.

Starting Instructions

Instructions on preparing the filter by removing its protective wrapper before first use.

Operating Modes

Turning On the Appliance

Steps to press the ON/STANDBY button to activate the appliance and enter standby.

Air Purification Functionality

Details on how air purification works in heating and fan modes, not in standby.

Using Heating Mode

How to select and use the heating mode, including temperature and fan speed control.

ECO Function

Activate ECO mode in heating to optimize power for comfort and energy saving.

Fan Mode Operation

How to use the fan-only mode for air circulation without heating, with speed adjustment.

Timer and Oscillation Features

Setting Delayed Switch-On

How to set a delayed start-up for the appliance in standby mode.

Setting Delayed Shut-Off

How to set a delayed shutdown for the appliance when it is operating.

Using Oscillation

How to activate and stop the oscillation feature for wider air distribution.

Display and Settings

Airflow Direction Adjustment

How to orientate the airflow direction to high or low positions.

Changing Temperature Scale

Instructions to switch between Fahrenheit and Celsius display.

No Beep Function

How to activate or deactivate the buzzer sounds for appliance operations.

Brightness of the Display

How to adjust the display brightness to different levels.

Remote Control and Operation

Remote Control Battery Insertion;Replacement

Guide on how to insert or replace batteries in the remote control.

Operating from Control Panel

How to operate the unit using the control panel when the remote is unavailable.

Maintenance

General Product Maintenance

General cleaning advice for the appliance, including safety precautions.

Air Purification Filter Maintenance

Detailed steps for cleaning and maintaining the air purification filter.

Troubleshooting

PF Error Display

Identifies cause and solution for "PF" error message with beep.

Product Not Turning On

Troubleshooting steps for when the appliance fails to power on.

Unexpected Appliance Shutdown

Solutions for the appliance shutting down without user intervention.

Flashing Dot and Beep

Addresses issues related to a flashing dot, beep, and unit being off.

CF Filter Indicator

Explains the "CF" indicator and how to reset the filter alarm.

Overheating or Obstruction Alerts

Addresses overheating and obstruction issues indicated by "Ht" or "it".

FI Fan Motor Error

Troubleshooting for the "FI" error, indicating fan motor issues.

Overview

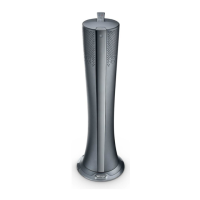
This document describes a multi-functional appliance designed for air purification, heating, and fan operation, with various user-friendly features and maintenance guidelines.

Function Description

The appliance serves as a versatile unit for maintaining indoor air quality and comfort. Its primary functions include:

  • Air Purification: The device offers continuous air purification, removing allergens and pollutants in both heating and fan modes. This function is active whenever the appliance is operating, but not in STANDBY mode. For purification without heating or cooling, it can be set to fan mode at ventilation levels 1 through 5.
  • Heating Mode: In this mode, the appliance provides warmth. Users can set the desired temperature between 10°C and 28°C using the temperature buttons (G) on the remote control. The fan speed in heating mode can be adjusted from 1 to 6. An "ECO" function (H) is available in heating mode to automatically adjust power levels for optimal comfort while minimizing energy consumption. When the set temperature is reached, the appliance temporarily stops heating but may continue operating at a reduced airflow speed before restarting to maintain the desired temperature.
  • Fan Mode: This mode operates the fan without heating, providing a cooling breeze ideal for warmer days. It offers 10 fan speeds, adjustable via the speed buttons (L) on the remote control.
  • Timer Function: The timer allows for delayed appliance start-up or shut-off, helping to conserve electricity. This function can be activated from any operating mode. For delayed switch-on, the appliance must be in STANDBY mode, and the timer can be set for durations ranging from 0.5h to 12h. For delayed shut-off, the appliance must be ON, and the timer can be set for similar durations. The operating settings can still be modified while the timer is active. If a power failure occurs, the timer function resets, and the appliance goes into STANDBY.
  • Oscillation Function: To distribute airflow over a larger area, the oscillation button (J) on the remote control can be pressed, causing the appliance to oscillate left and right. Pressing the button again stops the oscillation in the desired position.
  • Airflow Direction: The airflow can be oriented in two positions: "H" (high) and "L" (low) direction, using the airflow direction button (I).
  • No Beep Function: This feature allows users to activate or deactivate the buzzer on the control panel by pressing the airflow direction button (I) and oscillation button (J) simultaneously. However, the buzzer will still generate sounds for "STANDBY" and "ON" commands.
  • Display Brightness: The appliance offers three brightness levels for its display. The highest brightness is active when any button is pressed, then it decreases to an operating level after a few seconds of inactivity. Brightness levels can be adjusted by pressing the ECO button (H) and timer button (K) together, then using the speed buttons (L) to select "L1," "L2," or "L3."

Usage Features

The appliance is designed for ease of use with both a remote control and a control panel.

  • Remote Control: The primary interface for controlling the appliance, featuring buttons for ON/STANDBY (A), lid release (B), heating (F), temperature adjustment (G), ECO mode (H), airflow direction (I), oscillation (J), timer (K), fan speed (L), and fan mode (M). The remote control uses a 3V lithium flat button battery (CR2032), which needs to be inserted or replaced by removing a screw-secured cover.
  • Control Panel: While the remote control is essential for full functionality, the ON/STANDBY button (A) on the control panel allows for switching between fan and heating modes if the remote is unavailable. Pressing and holding the ON/STANDBY button for approximately 10 seconds in STANDBY mode will turn the appliance on with the opposite function set before it was shut off, with pre-defined temperature or speed settings.
  • Temperature Scale Change: The temperature scale (Fahrenheit or Celsius) can be changed by simultaneously pressing the temperature button (G▲) and speed button (L▲) on the remote control.
  • Initial Setup: Before first use, the protective wrapper covering the air purification filter must be removed. The appliance should be connected to a power outlet, and upon connection, it emits three beeps and the power indicator light (O) illuminates, entering STANDBY mode.
  • Turning On/Off: The appliance is turned on by pressing the ON/STANDBY button (A). To turn it off, the ON/STANDBY button (A) should be pressed again. If the unit was in heat mode, the display will count down for about 10 seconds before shutting off. It is crucial to use the ON/STANDBY button to turn off the appliance and wait a few minutes before unplugging it, allowing the unit to perform operating status checks.
  • Placement: The appliance should be placed on a horizontal, stable surface. It is important to avoid overloading electrical circuits and using the same socket for other appliances.
  • Portability: The appliance can be easily moved by its handle (Q), but it should always be turned off before moving.
  • Safety Warnings: Users are cautioned never to insert hands or foreign objects into the air outlet (S). Manual rotation of the appliance for oscillation is also discouraged to prevent damage.

Maintenance Features

Regular maintenance ensures the appliance's optimal performance and longevity.

  • General Cleaning: Before any maintenance, the appliance must be unplugged from the wall socket. The air intake and outlet grilles should be cleaned regularly with a vacuum cleaner. Only a soft, damp cloth should be used for cleaning; abrasive powders or solvents are strictly prohibited.
  • Air Purification Filter Maintenance: The air purification filter requires regular cleaning to remove accumulated dust. To clean the filter:
    1. Open the lid by pushing the lid release button (B).
    2. Rotate the filter cover counter-clockwise until the pointer on the cover aligns with the symbol (fig.2).
    3. Remove the filter and use a vacuum cleaner to remove collected dust.
    4. Reinsert the filter and rotate the cover clockwise until the pointer aligns with the symbol (fig.3).
    5. The lid should not be closed forcibly; ensure the filter is properly set.
  • Filter Replacement Alarm (CF): The unit is programmed to automatically remind users to change the filter. After a pre-defined number of working hours, the display will cyclically show "CF," indicating that the filter needs replacement. Only original De'Longhi replacement filters should be used. To reset the "CF" alarm, quickly insert the plug and then touch and hold the ON/STANDBY button (A) for at least 10 seconds until a long beep is heard. The filter is designed to last up to 9 months with 8 hours of daily usage at medium working load, but visual inspection may indicate earlier replacement if it appears dark.
  • Troubleshooting: The manual provides a troubleshooting guide for common issues:
    • "PF" display and beep: Indicates temperature sensors are not working. Contact Customer Service.
    • Product not turning on: Check plug connection to the outlet.
    • Appliance turning off unexpectedly: Check plug connection. If the set temperature is reached or the timer has elapsed, use the "+" button to increase temperature or turn off the timer.
    • Flashing dot, beep, and unit off: Indicates the tip-over switch has activated. Ensure the appliance is standing upright on a flat surface. If the issue persists, contact Customer Service.
    • "Ht" or "It" blinking: Indicates high internal temperature or obstructed air intake/outlet. Check appliance positioning for minimum distances from walls/objects and remove any obstructions. Disconnect the plug, let the appliance cool down, then plug it back in. If the problem persists, contact Customer Service.
    • "FI" display: Indicates the fan motor is not working. Disconnect the plug, let the appliance cool down, then plug it back in. If the problem persists, contact Customer Service.

DeLonghi HFX85W20C Specifications

General IconGeneral
TimerYes
Noise level49 dB
Air purify rate- m³/h
Number of speeds-
Air purifiers functionsCooling, Heating
Noise level (low speed)28 dB
Timer duration (maximum)12 h
Suitable for room area up to- m²
Suitable for room volume up to60 m³
AC input voltage220 - 240 V
AC input frequency50 Hz
Power consumption (max)2000 W
Filter life (max)9 month(s)
Filters out PM2.599 %
Particle filtration2.5 µm
Display typeLED
Product colorGraphite
Weight and Dimensions IconWeight and Dimensions
Width270 mm
Height850 mm
Weight7400 g

Related product manuals