9
ENGLISH
Turning on and setting the timer
ELECTRICAL CONNECTION
Before plugging in check that:
• the mains outlet corresponds to the power
outlet shown on the rating plate;
• the outlet and the mains lead correspond to
the power requirements of the appliance ;
• the plug should fit the outlet, otherwise
have the outlet replaced;
• the outlet is properly grounded.
The manufacturer cannot be held
responsible for any damages due to failure
in following normal safety procedures.
Replacement of the power cord must be
carried out by qualified personnel.
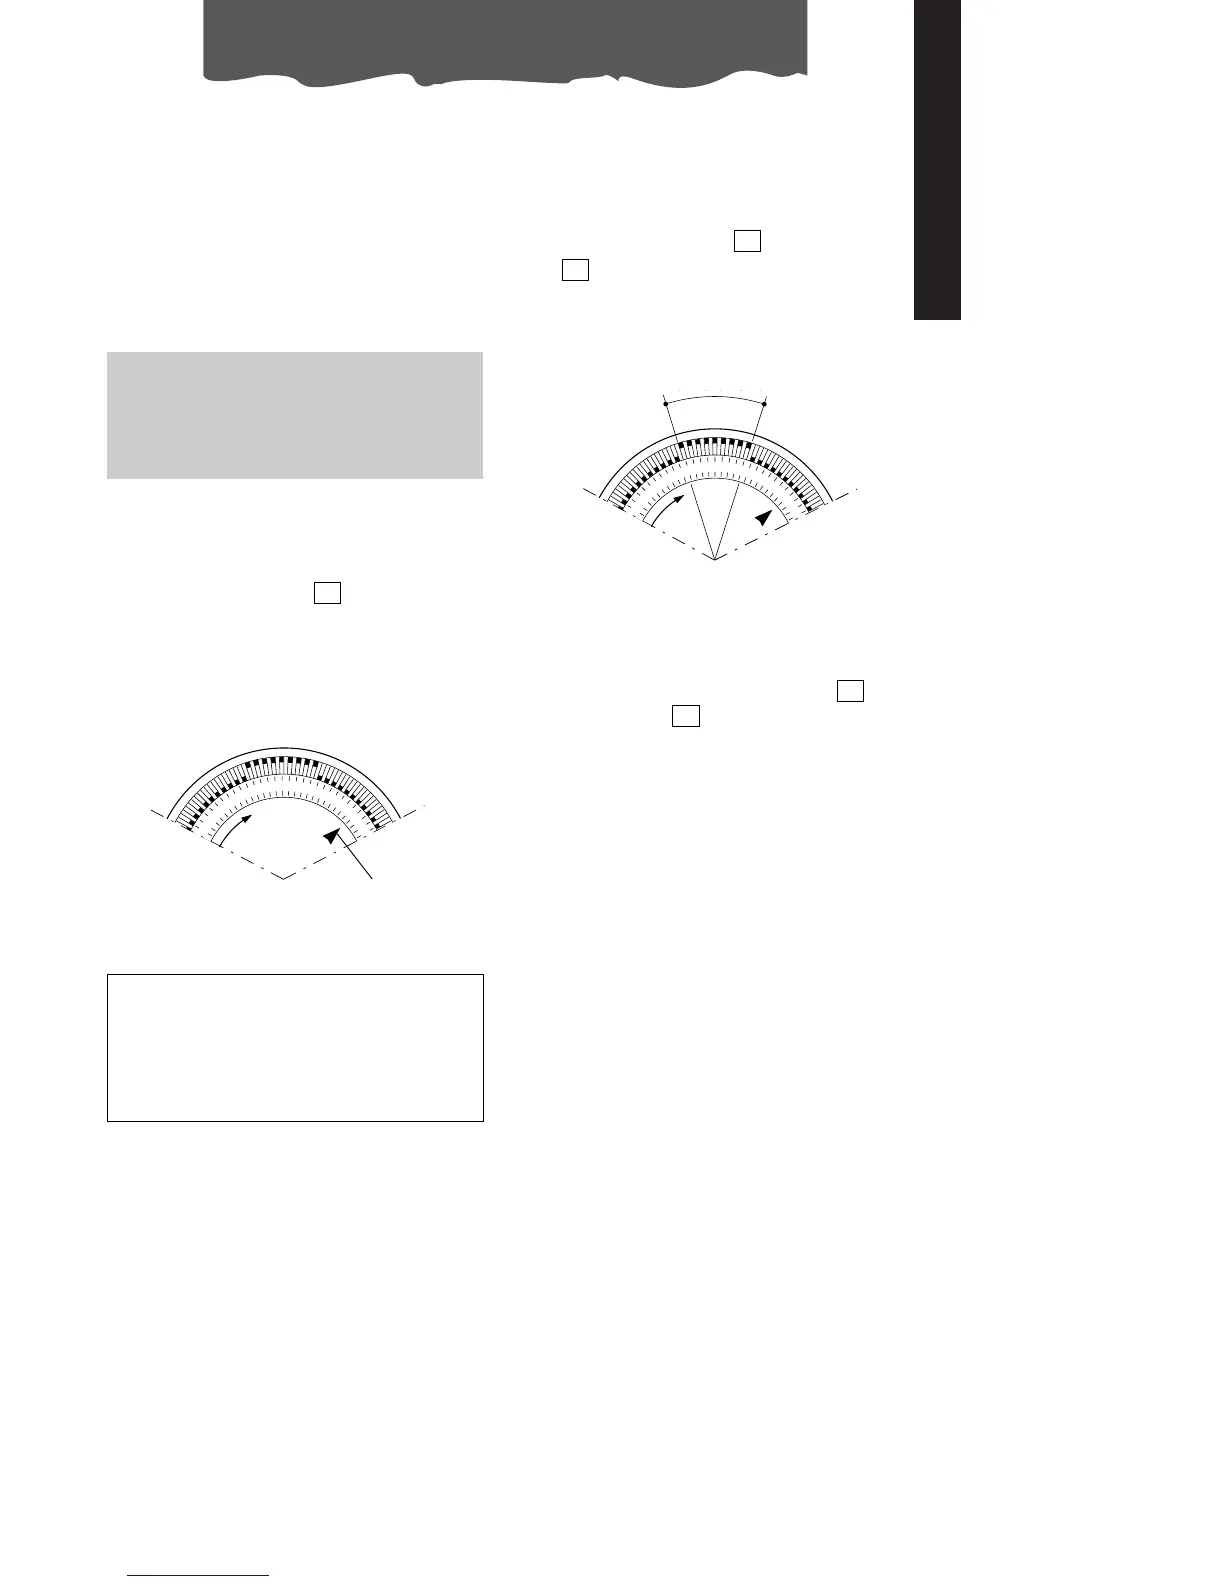
SETTING THE TIMER
The programmer/timer , like all clocks,
must be set to the exact time. If for example
it is 4.00 pm., turn the dial in a clockwise direc-
tion (following the direction of the arrow) until
the number 4 is lined up with the triangular
pointer (the arrows indicates 4:00 P.M.
approximately ).
13
pointer
Note: Never turn the dial in an counter-
clockwise direction!
The timer is in effect an electric clock and
works only if the plug is connected to the
power supply. Whenever the plug is
disconnected or if there is a power failu-
re, the programmer stops (the clock is
then “slow”) and must be re-set.
PROGRAMMED MODE
1) Set the operating times by pushing out the
notches on the dial corresponding to the
time required (each notch represents 15
mins.)
2) Press the TIMER key , the signal light
will come ON.
3) Make sure that the timer indicates the cor-
rect time (see instructions on setting).
14
12
4) Select the desired function as shown in the
chart section.
Note: To override the programmed operating
times, simply press the ON/OFF key (the
timer signal light will go out)
14
12
operating time



 To Next Page