Stretto
3
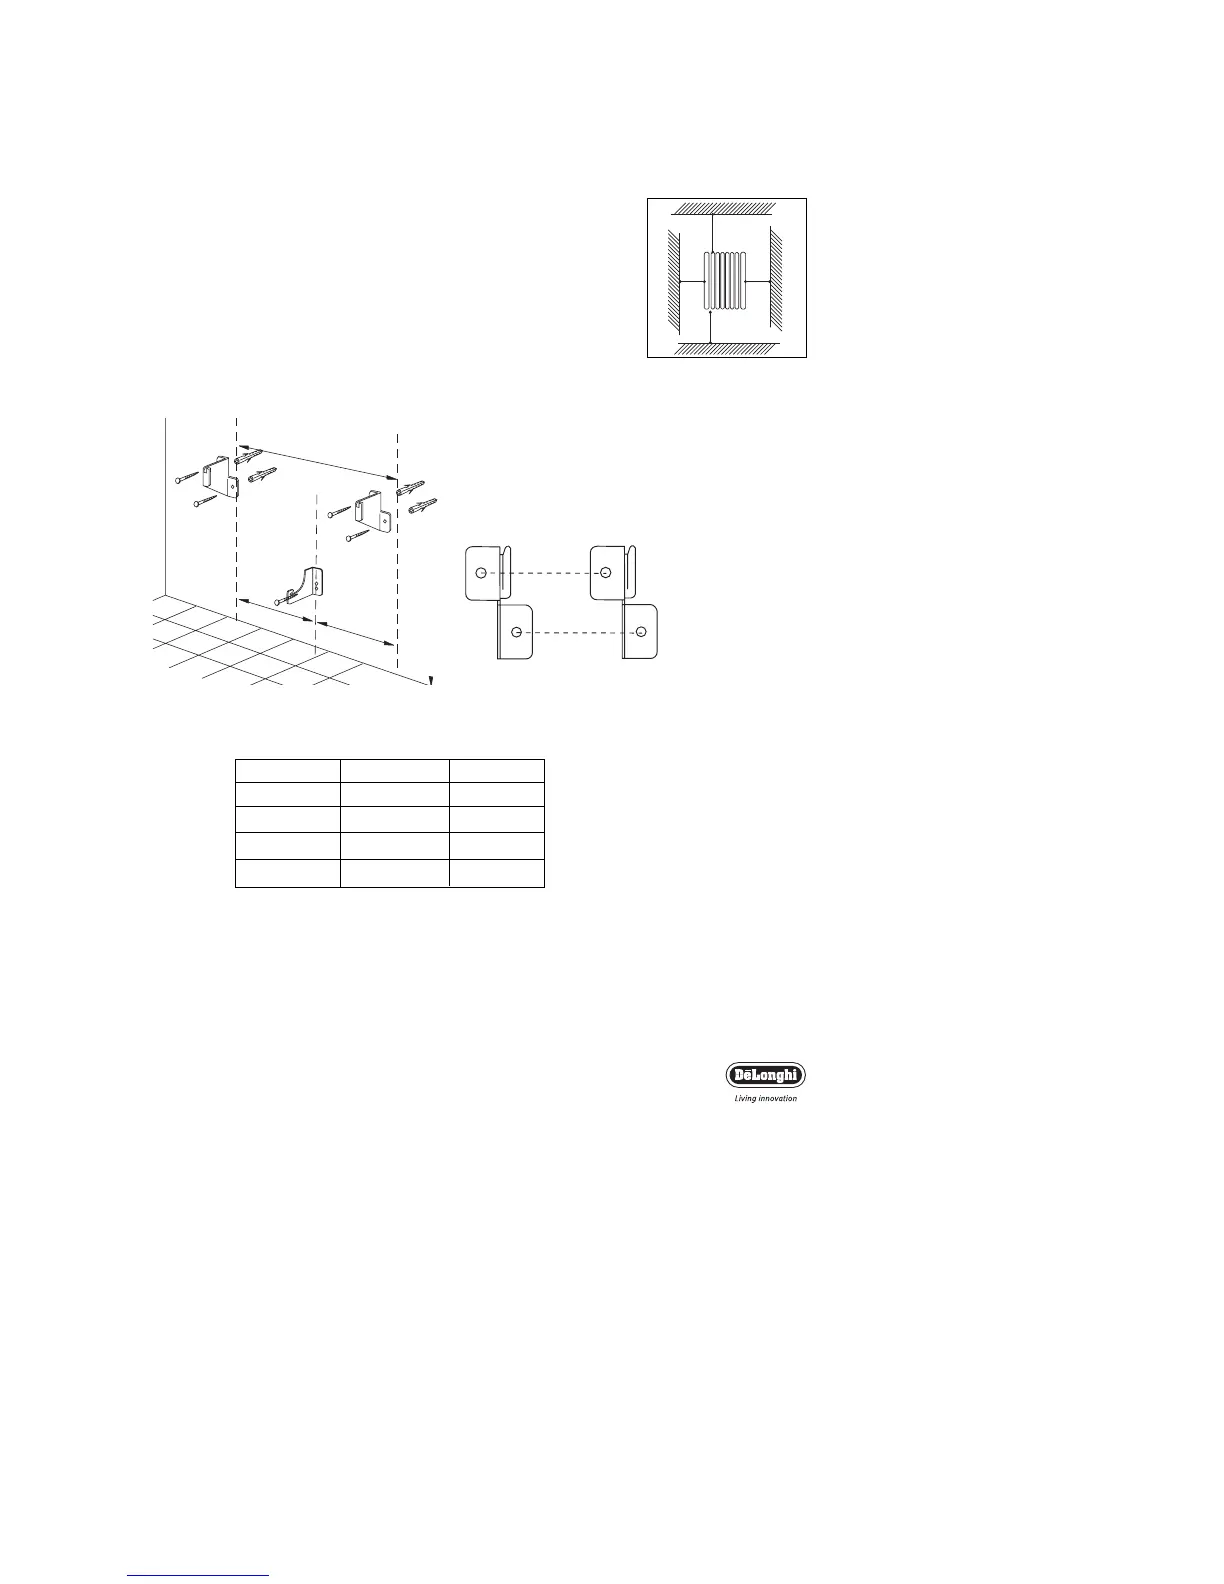
Installation wall-mounting
The wall mounting kit should contain:
2 x Upper brackets (A)
1 x Lower brackets (B)
1. Select position for siting the heater ensuring that:
a. It is not located directly below a power socket outlet.
b. The plug and power outlet can be easily reached after
installation.
c. No electric cables or other tubes could be damaged.
d. Keep away from curtains or inflammable materials. Also
note the minimum distances indicated in the figure 2.
Important
Before drilling into any wall ensure no electrical cables are present
in the area.
2. Following carefully the dimensions as indicated below (the dis-
tance depends on which model you have purchased) mark dis-
tance “D” on your wall.
3. Line up the centre of the holes of the brackets “A” with the
marked line (indicated in fig.3/4 as a dashed line) ensuring that the
2 brackets are level, mark the holes to be drilled.
4. For solid brick block walls, use a 6 mm masonry drill and drill the
marked holes and then insert wall plugs to suit.
(For plasterboard we suggest, locating the studding and using No
6 woodscrews directly into the wood, or special plasterboard fix-
ings. For other wall types please seek specialist advice).
Model
1 Kw
1,5 Kw
2 Kw
2,5 Kw
Distance
D
D
D
D
mm
140 mm
210 mm
280 mm
385 mm