G:09:02
Automatic Transmission
r •
Fig. 70 CONVERTER SHAFT TUBE
FINAL DRIVE COMPONENT REPAIR
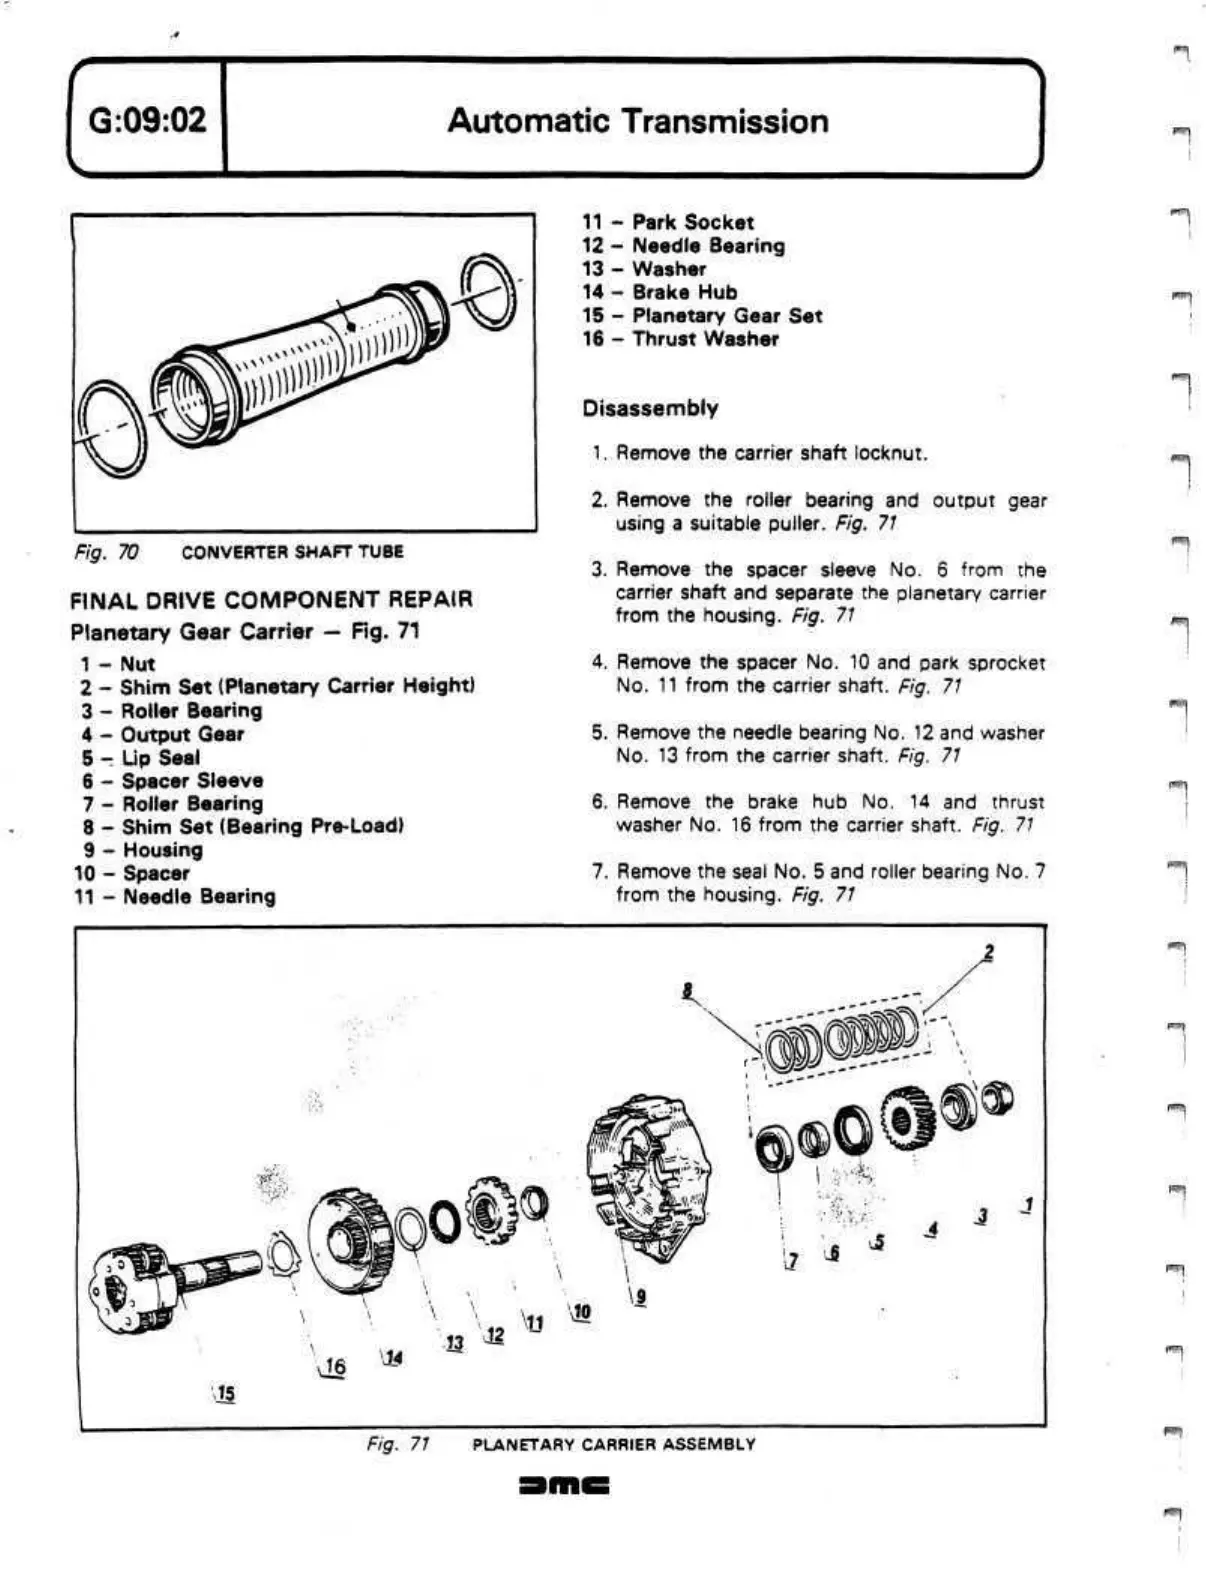
Planetary Gear Carrier — Fig. 71
1 - Nut
2
-
Shim Set (Planetary Carrier Height)
3 - Roller Bearing
4
-
Output Gear
5 - Lip Seal
6 - Spacer Sleeve
7 - Roller Bearing
8 - Shim Set (Bearing
Pre-Load)
9 - Housing
10 - Spacer
11 - Needle Bearing
11 - Park Socket
12 - Needle Bearing
13
-
Washer
14 - Brake Hub
15 - Planetary Gear Set
16 - Thrust Washer
Disassembly
1.
Remove the carrier shaft locknut.
2.
Remove the roller bearing and output gear
using a suitable puller. Fig. 71
3. Remove the spacer sleeve No. 6 from the
carrier shaft and separate the planetary carrier
from the housing. Fig.
71
4.
Remove the spacer No. 10 and park sprocket
No.
11 from the carrier shaft. Fig. 71
5. Remove the needle bearing No. 12 and washer
No.
13 from the carrier shaft. Fig. 71
6. Remove the brake hub No. 14 and thrust
washer No. 16 from the carrier shaft. Fig. 71
7. Remove the seal No. 5 and roller bearing No. 7
from the housing. Fig. 71
jam
(•"•'
'•'
I
Fig. 71 PLANETARY CARRIER ASSEMBLY
N"
:
f
 Loading...
