r
BRAKE SERVO
jpffi
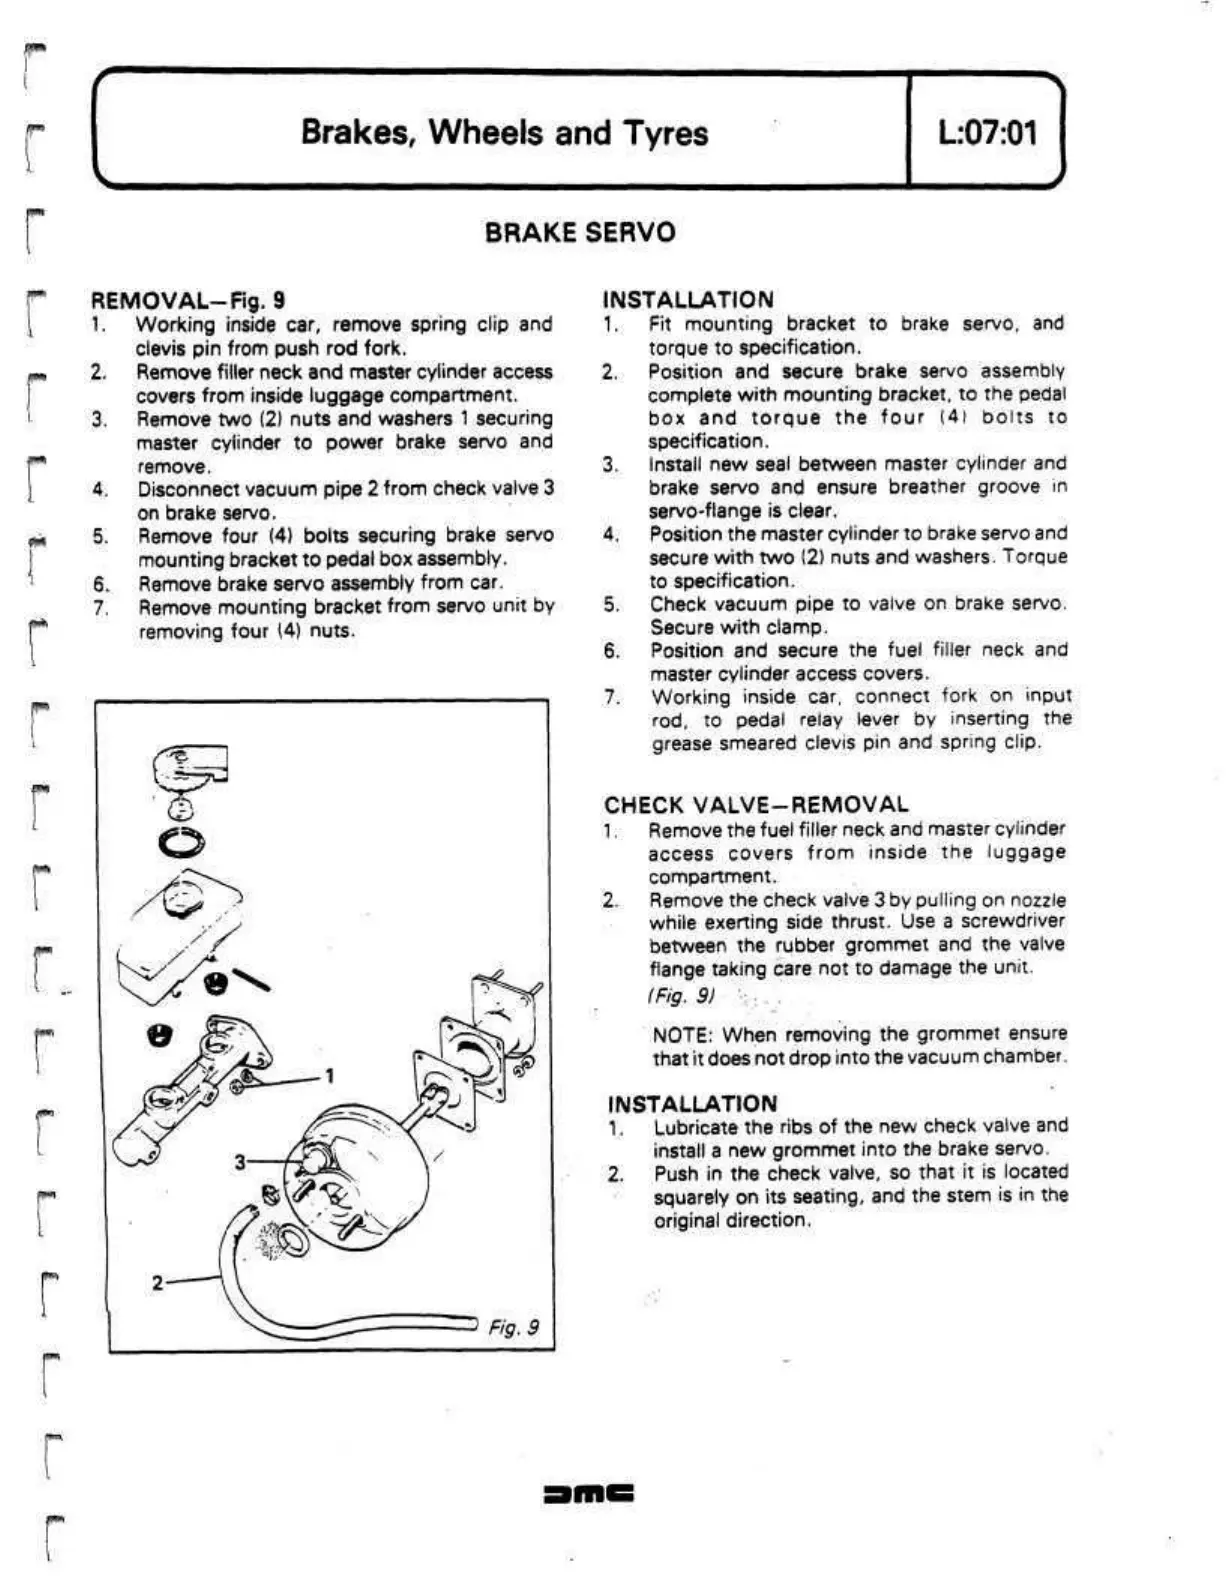
REMOVAL-Fig.
9
1.
2.
pTI^
#6§
4.
6.
7.
n*wi
Working inside car, remove spring clip and
clevis pin from push rod fork.
Remove filler neck and master cylinder access
covers from inside luggage compartment.
Remove two (2) nuts and washers 1 securing
master cylinder to power brake servo and
remove.
Disconnect vacuum pipe 2
from
check valve 3
on brake servo.
Remove four (4) bolts securing brake servo
mounting bracket to pedal box assembly.
Remove brake servo assembly from car.
Remove mounting bracket from servo unit by
removing four (4) nuts.
INSTALLATION
1.
Fit mounting bracket to brake servo, and
torque to specification.
2.
Position and secure brake servo assembly
complete with mounting bracket, to the pedal
box and torque the four (4) bolts to
specification.
3. Install new seal between master cylinder and
brake servo and ensure breather groove in
servo-flange is clear.
4.
Position the master cylinder to brake servo and
secure with two (2) nuts and washers. Torque
to specification.
5. Check vacuum pipe to valve on brake servo.
Secure with clamp.
6. Position and secure the fuel filler neck and
master cylinder access covers.
7. Working inside car, connect fork on input
rod,
to pedal relay lever by inserting the
grease smeared clevis pin and spring clip.
CHECK VALVE-REMOVAL
1.
Remove the fuel filler neck and master cylinder
access covers from inside the luggage
compartment.
2.
Remove the check valve 3 by pulling on nozzle
while exerting side thrust. Use a screwdriver
between the rubber
grommet
and the valve
flange taking care not to damage the unit.
(Fig.
9)
••>,..'..
NOTE:
When removing the grommet ensure
that it does not drop into the vacuum chamber.
INSTALLATION
1.
Lubricate the ribs of the new check valve and
install a new grommet into the brake
servo.
2.
Push in the check valve, so that it is located
squarely on its seating, and the stem is in the
original direction.
 Loading...
