LIGHTING SYSTEM
HEAD LAMP UNIT
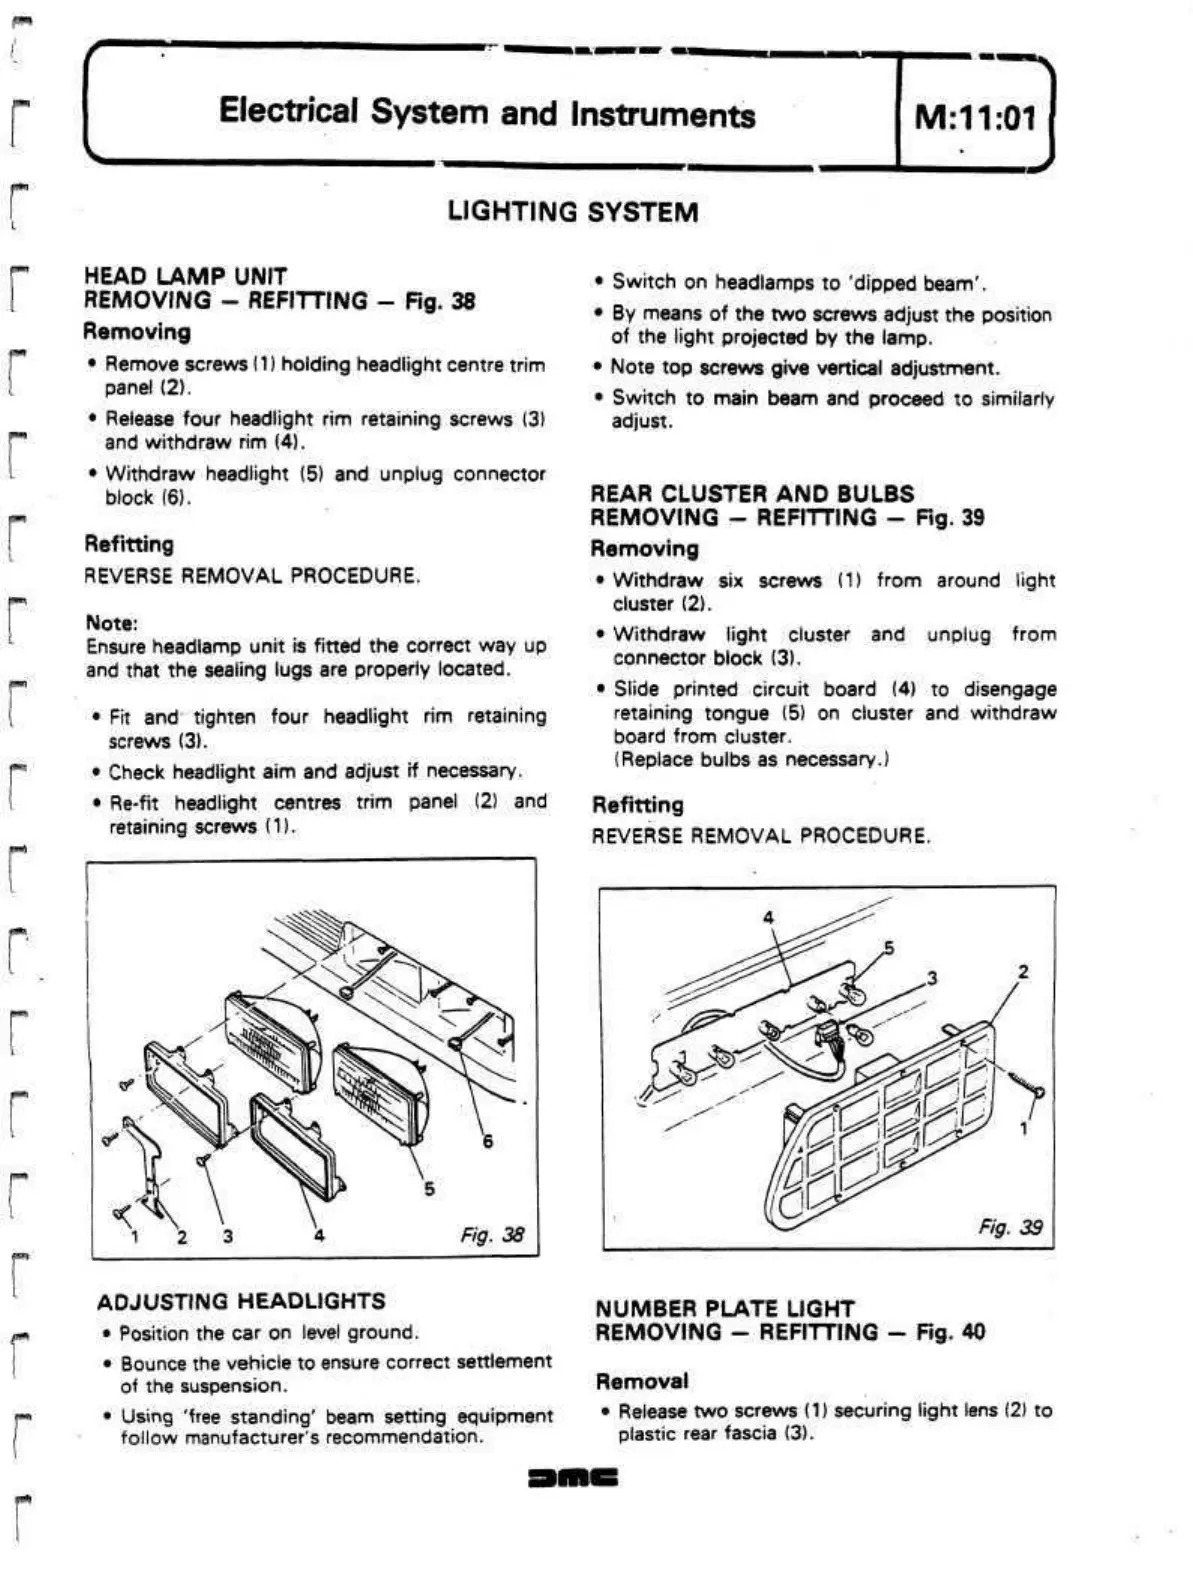
REMOVING - REFITTING - Fig. 38
Removing
• Remove screws (1) holding headlight centre trim
panel (2).
•
Release four headlight rim retaining screws (3)
and withdraw rim (4).
• Withdraw headlight (5) and unplug connector
block (6).
Refitting
REVERSE REMOVAL PROCEDURE.
Note:
Ensure headlamp unit is fitted the correct way up
and that the sealing lugs are properly located.
• Fit
and
tighten four headlight rim retaining
screws
(3).
• Check headlight aim and adjust if necessary.
• Re-fit headlight centres trim panel (2) and
retaining screws (1).
• Switch on headlamps to 'dipped beam'.
• By means of the two screws adjust the position
of the light projected by the lamp.
•
Note top screws give vertical adjustment.
• Switch to main beam and proceed to similarly
adjust.
REAR CLUSTER AND BULBS
REMOVING - REFITTING - Fig. 39
Removing
• Withdraw six screws (1) from around light
cluster (2).
• Withdraw light cluster and unplug from
connector block (3).
• Slide printed circuit board (4) to disengage
retaining tongue (5) on cluster and withdraw
board from cluster.
(Replace bulbs as necessary.)
Refitting
REVERSE REMOVAL PROCEDURE.
ADJUSTING HEADLIGHTS
• Position the car on level ground.
• Bounce the vehicle to ensure correct settlement
of the suspension.
• Using 'free standing' beam setting equipment
follow manufacturer's recommendation.
NUMBER PLATE LIGHT
REMOVING - REFITTING - Fig. 40
Removal
• Release two screws (1) securing light lens (2) to
plastic rear fascia (3).
 Loading...
