Heating and Air Conditioning
N:05:01
J
ACCESS VALVE CORE REMOVER AND
REPLACER WITH VALVE CORE
REPLACEMENT FEATURE
CAUTION:
GOGGLES SHOULD BE WORN
WHEN WORKING WITH REFRIGERANTS.
SYSTEM SHOULD BE SHUT OFF AND
PRESSURES EQUALIZED
Fig.
29
1.
Install tool on access valve by tightening
female flare, finger tight.
CAUTION:
Overtightening may distort '0'
rings.
2.
Push in tool shaft fully, then rotate to engage
Schrader valve core.
Note:
Shut off should be unscrewed completely
anti-
clockwise.
3. Apply slight pressure forward, turn the tool
shaft anti-clockwise until the core is removed
— finger pressure will sense this.
4.
Retract the main shaft completely — close shut
off
valve,
by turning fully clockwise till finger
tight.
5. Unscrew top coupling and remove valve core.
(At this point hoses can be connected and
service to the air conditioning system
performed.)
6. Reverse procedure to replace Schrader valve
cores.
7. CAUTION: Remove hose connections slowly
to allow any refrigerant in hose to escape.
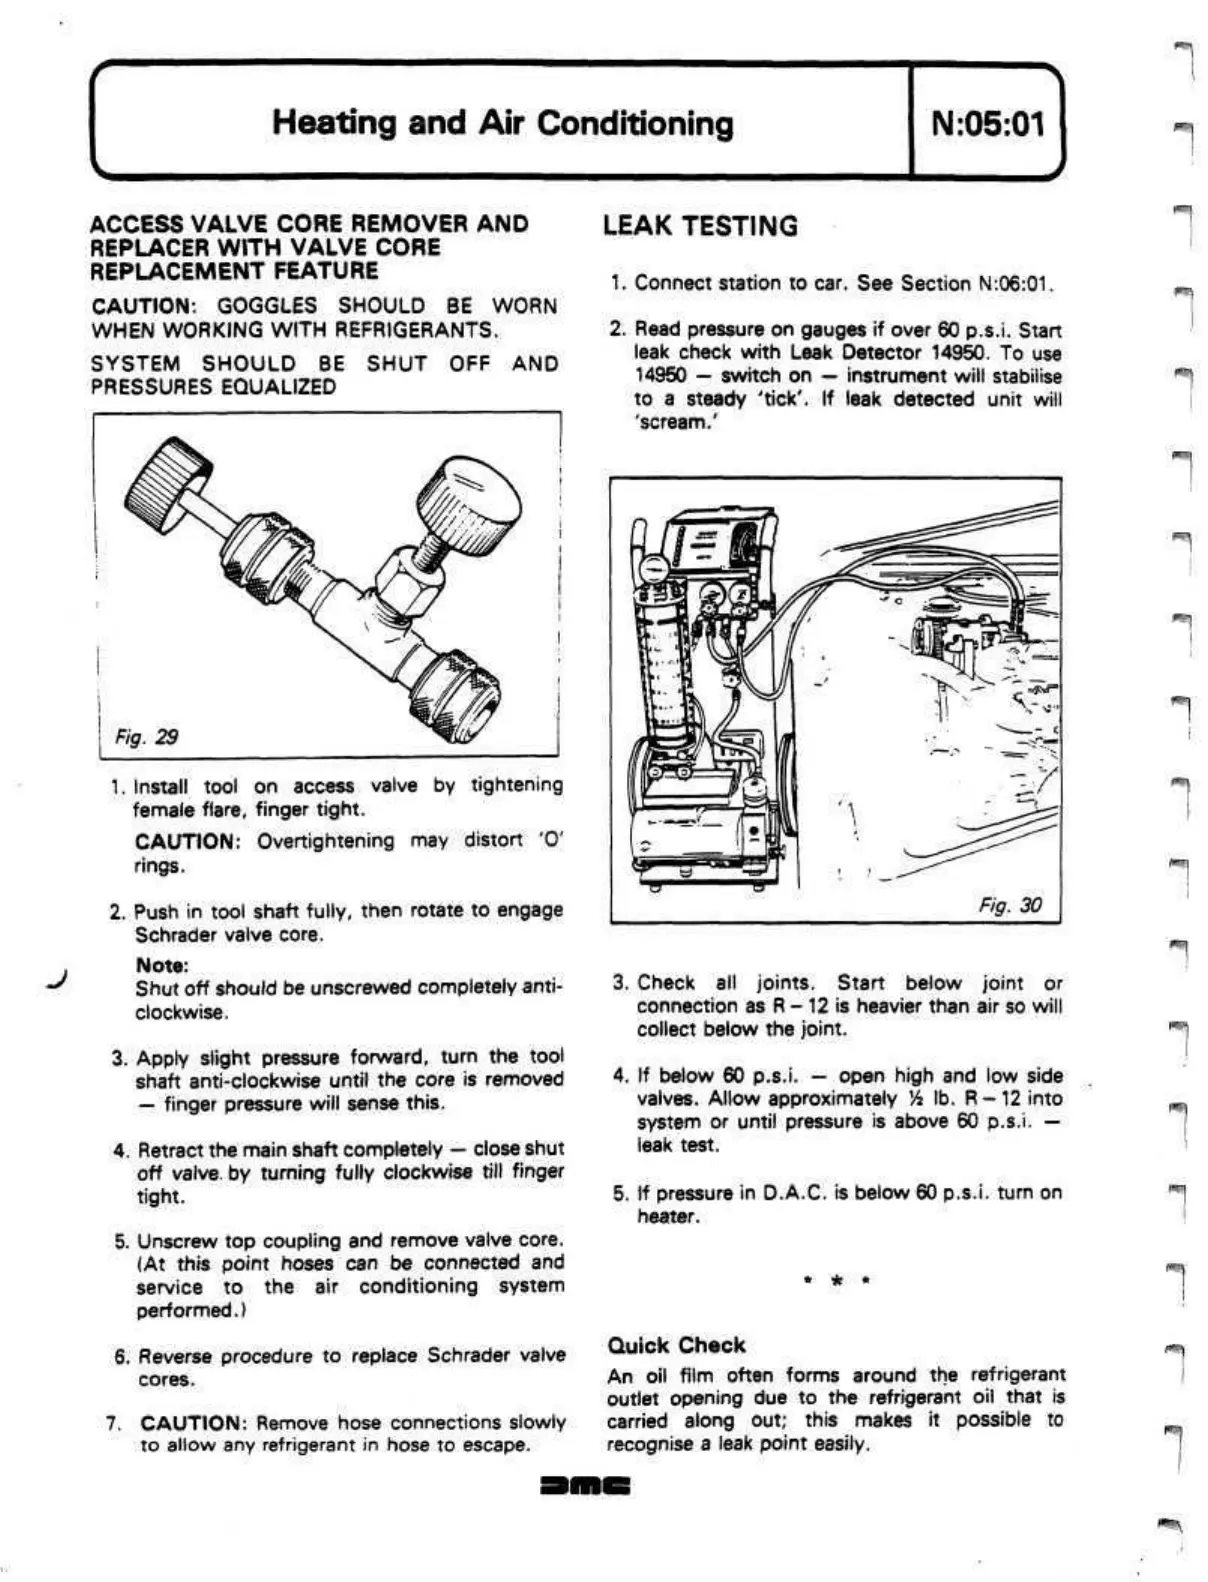
LEAK TESTING
1.
Connect station to car. See Section
N:06:01.
2.
Read pressure on gauges if over 60 p.s.i. Start
leak check with Leak Detector 14950. To use
14950 — switch on — instrument will stabilise
to a steady 'tick'. If leak detected unit will
'scream.'
3. Check all joints. Start below joint or
connection as
R -12
is heavier than air so will
collect below the joint.
4.
If
below 60 p.s.i.
—
open high and low side
valves. Allow approximately
!4
lb.
R
- 12 into
system or until pressure is above 60 p.s.i. —
leak test.
5.
If
pressure in D.A.C. is below 60 p.s.i. turn on
heater.
Quick Check
An oil film often forms around the refrigerant
outlet opening due to the refrigerant oil that is
carried along out; this makes it possible to
recognise a leak point easily.
 Loading...
