EasyManua.ls Logo

Delta Children Logan W103240-374 User Manual

Delta Children Logan W103240-374
34 pages
Go to English
To Next Page IconTo Next Page
Page #1 background imageLoading...
Page #1 background image
To Make Assembly Even
Easier Watch Video Here!
ADULT ASSEMBLY REQUIRED
Due to the presence of small parts during assembly,
keep out of reach of children until assembly is complete.
EN
June 24, 2021, 42111, R0
Toddler Bed
This product is not intended for institutional or commercial use.
Read all instructions
before assembly and use.
KEEP INSTRUCTIONS FOR
FUTURE USE.
Style #:
Lot:
Date:
___________
___________
___________
A
REV
Before contacting Delta Consumer
Experience Center please ensure this
information matches the information
matches the information found on the
label on the Footboard Panel.
For Questions or
to Contact Us:
DeltaChildren.com/Help
If unable to access website, please email
wcs@DeltaChildren.com
Expect longer response times via email.
©2021 Delta Children’s Products Corp.
ASSEMBLY INSTRUCTIONS INSTRUCCIONES DE MONTAJE
Question and Answer IconNeed help?

Do you have a question about the Delta Children Logan W103240-374 and is the answer not in the manual?

Delta Children Logan W103240-374 Specifications

General IconGeneral
BrandDelta Children
ModelLogan W103240-374
CategoryBaby & Toddler Furniture
LanguageEnglish

Summary

Product Overview and Safety Information

Adult Assembly Required

Indicates that adult assembly is necessary due to small parts.

Parts Identification

Check Pre-Assembled Parts

Ensure all pre-assembled parts are securely tightened before proceeding.

Hardware and Tools

Hardware Identification

Identifies all hardware components by letter, description, and part number.

Required Tools and Assembly Advice

Lists necessary tools and provides advice against using power screwdrivers.

Assembly Instructions

Step 3: Joining Side Panels

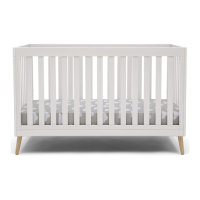
Attaches side panels using specific hardware and components.

Step 7: Installing Cross Slats

Installs three cross slats (Part L) into the assembly as shown.

Step 8: Connecting Major Sections

Connects sections using bolts and barrel nuts, tightening with the Allen wrench.

Step 9: Attaching Headboard Top Panel

Attaches the headboard top panel using dowels, bolts, and barrel nuts.

Step 10: Installing Foot Brackets and Feet

Attaches foot brackets using bolts and barrel nuts, then attaches feet by hand.

Step 11: Attaching Guardrails

Attaches guardrails using bolts and barrel nuts, ensuring proper alignment.

Critical Safety and Usage Guidelines

Entrapment and Strangulation Hazards

Details critical warnings about entrapment and strangulation risks for infants.

Assembly Process Notes

Provides guidance on using screws/bolts and assembling on a soft surface.

Safe Usage Practices

Outlines rules for safe use, including preventing play, climbing, or hanging.

Care and Maintenance Advice

Offers tips on maintaining the finish, cleaning, and avoiding damage.

Product Warranty and Registration

Limited Warranty Details

Outlines the 90-day limited warranty, exclusions, and registration process.

Product Registration and Support

Instructions for registering the product and reporting issues for customer support.

Related product manuals