INSTALLING THE AC CHARGER
1. Drill bolt holes in the wall for the
mounting bracket and the optional cable
hanger.
Note: Follow applicable accessibility
requirements for the mounting position. The
unit shall be mounted at a sufficient height
from grade such that the height of the
storage means for the coupling device is
located between 600 mm (24 inches) and
1.2 m (4 feet) from grade per NEC Article
625.
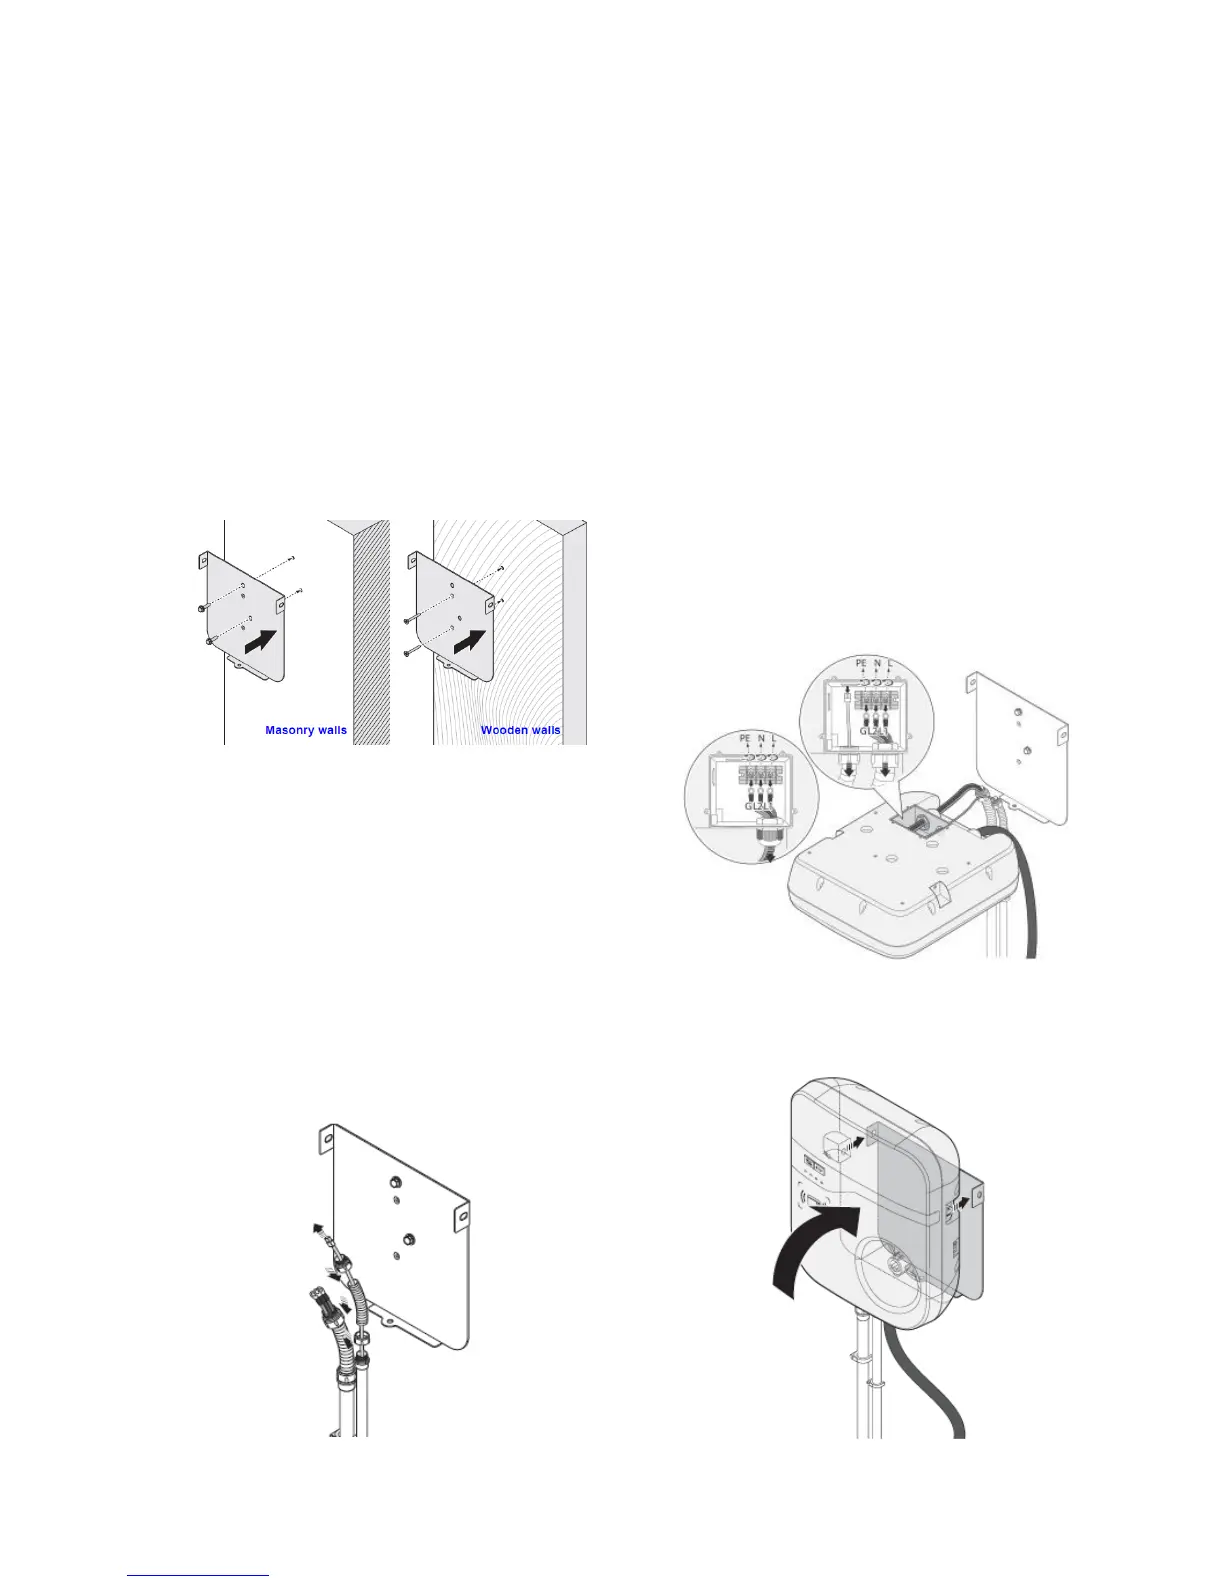
2. Secure the main body mounting bracket
and the optional cable hanger bracket to
the wall with appropriate bolts as
follows:
For masonry walls use 1/4” expansion
bolts and torque to 78 lb·in (8.8 N·m).
For finished walls supported by wood
studs use #8 wood screws of 2” or
above screw length and torque to 26
lb·in (3 N·m).
3. Connect the electrical wiring to the
EVSE. Choose the appropriate conduit
in accordance with all applicable state,
local and national electrical codes and
standards. Use No. 8 AWG, 75ºC or
space before copper wire and torque to
17.7 lb·in (2.0 N·m) when connecting to
input terminal block. When connecting to
RJ45 connector use tubing/sleeving of
R/C (YDPU2/8), R/C (YDPU2)/CSA
Certified, R/C (UZFT2/8) or R/C
(UZFT2)/CSA Certified rated for
minimum 300 V, 200ºC overall to sleeve
data procession wires in the wiring
compartment.
There is a separate opening for the
Ethernet cable
4. Align the screw holes of the mounting
bracket with the AC charger holes.
 Loading...