12
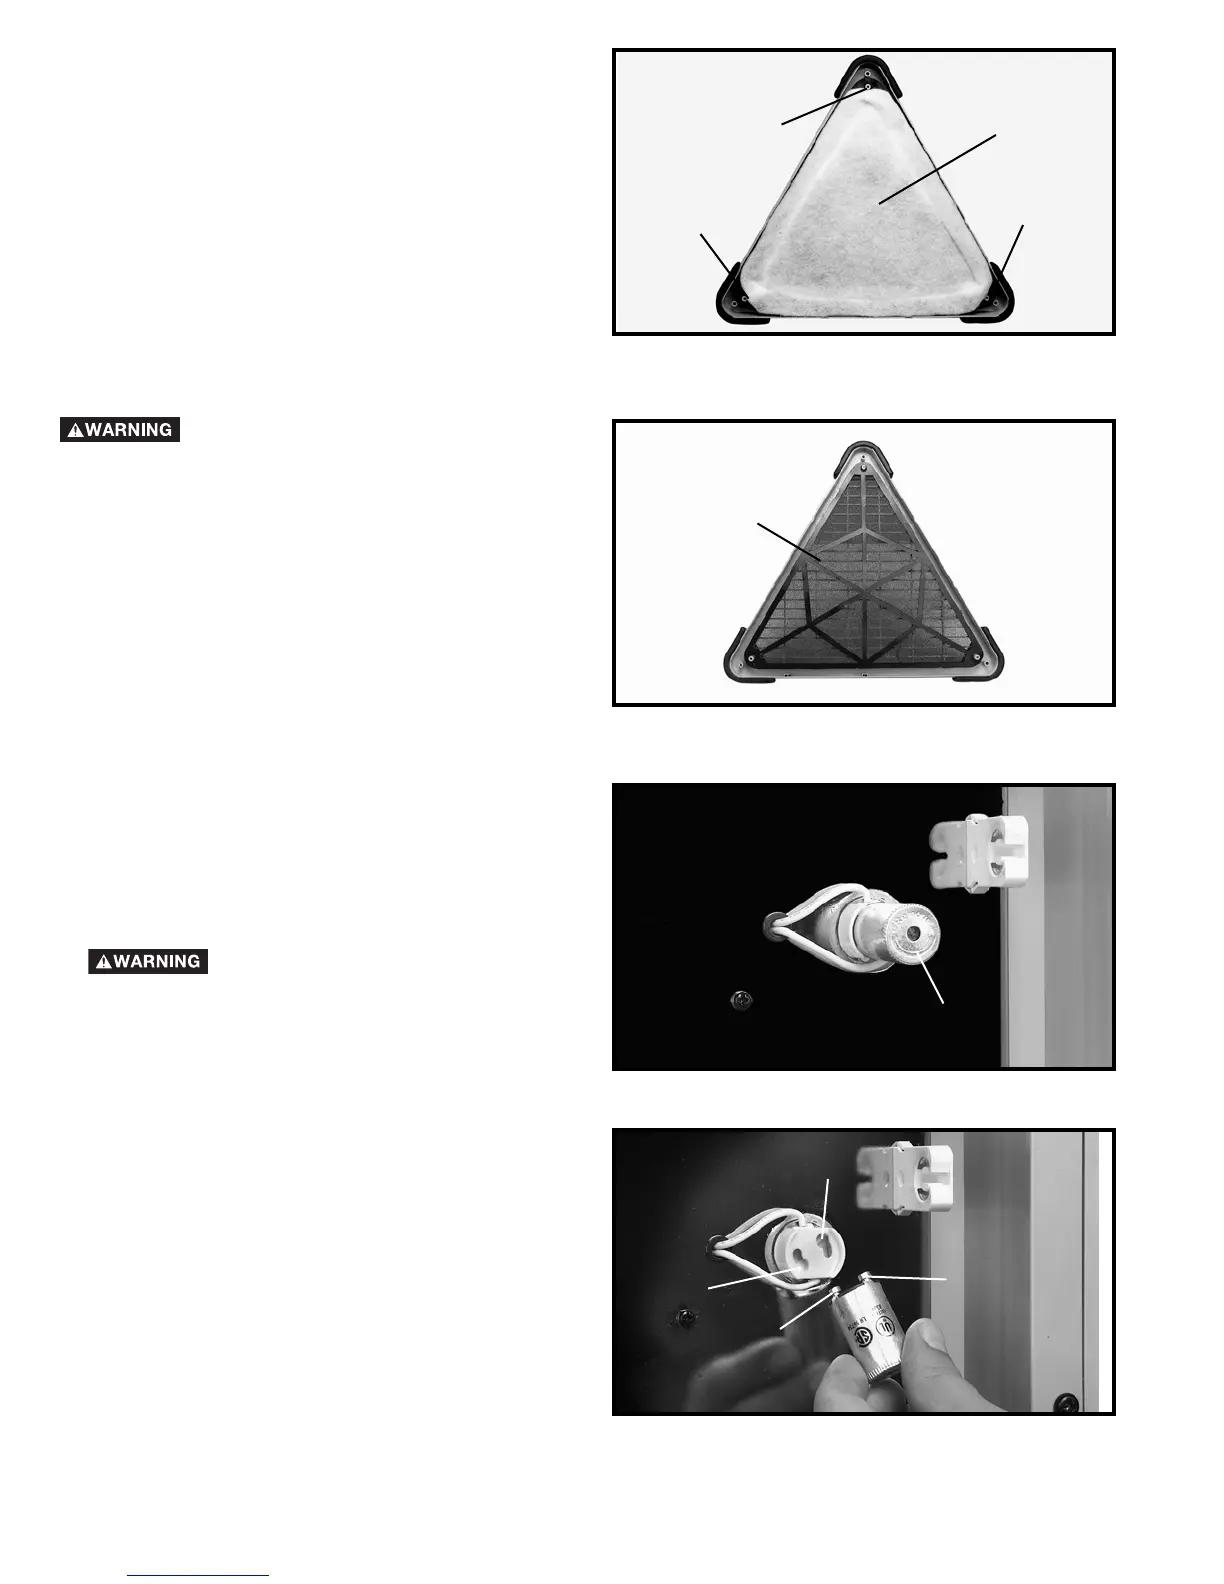
4. Remove the three spring clips (D) Fig. 11.
Fig. 11
D
D
D
Fig. 12
5. Remove the bag filter (E) Fig. 11.
E
6. Remove the pre-filter (F) Fig. 12.
F
7. The filters (E) Fig. 11 and (F) Fig. 12, can be replaced
or cleaned depending on their condition. The filters can
be cleaned in one of two methods: a shop-vac can be
used to remove the dust, or compressed air can be used
to blow the dust out of the filters.
COMPRESSED AIR CAN BE
DANGEROUS. FOR OPERATOR SAFETY, DO NOT
EXCEED 30 PSI OR POINT AIR NOZZLE TOWARD
ANYONE OR AIM AIR NOZZLE AT YOUR OWN BODY.
ALWAYS WEAR SAFETY GLASSES AND DUST MASK
WHEN PERFORMING THIS PROCEDURE.
8. Install both filters in the reverse order in which they
were removed, attach spring clips, and replace the filter
cover.
9. Replace the other filters on the opposite side of the
machine in the same manner.
LIGHT STARTER
NOTE: THE STARTERS SUPPLIED WITH THIS
MACHINE ARE STANDARD FLUORESCENT
STARTERS (FS-2).
1. DISCONNECT MACHINE FROM
POWER SOURCE.
2. To remove the starter (A) Fig. 13, turn the starter (A)
counter clockwise until it stops, and pull starter out.
3. Insert a new starter by aligning the two prongs (B) Fig.
14, in the end of the starter with the two holes (C) in the
starter holder. Turn the starter clockwise until it stops.
4. Replace the other starter in the same manner.
Fig. 13
Fig. 14
A
B
B
C
C