22 23
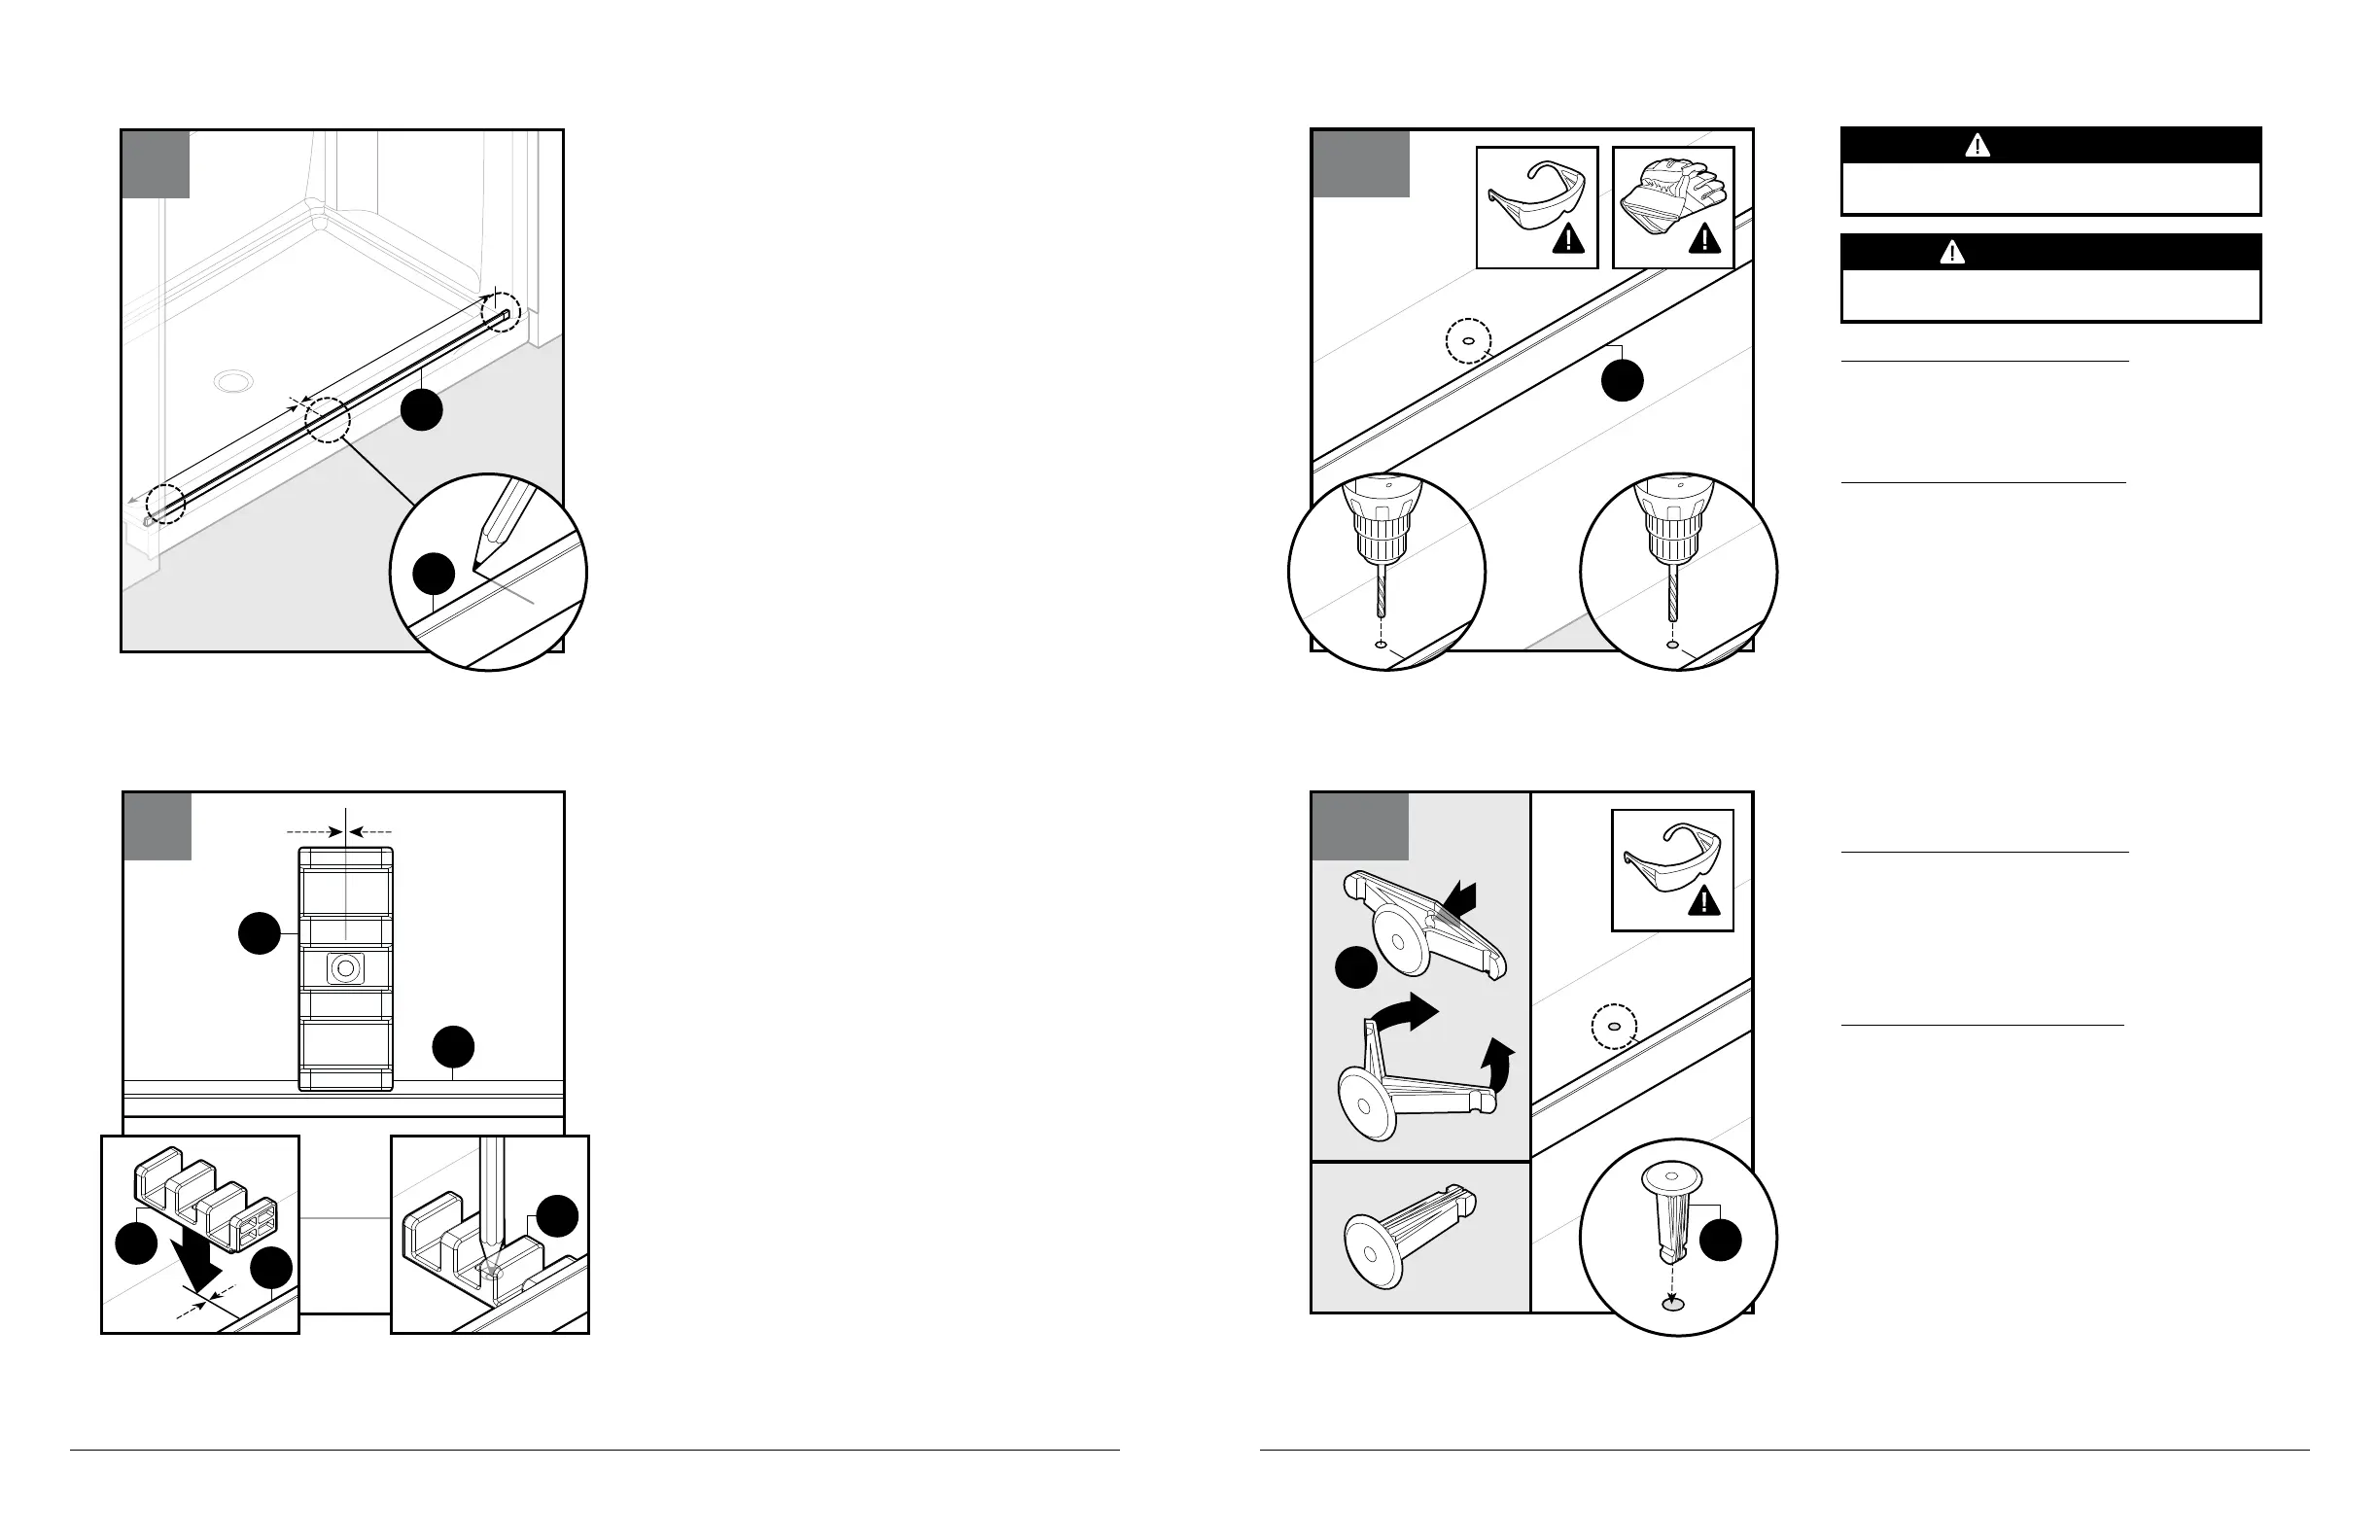
For Acrylic Enclosures Only
Push in the center of the acrylic anchor (Q1) and squeeze
clips together. Insert acrylic anchor (Q1) into hole.
If needed, a rubber mallet can be used to insert acrylic
anchor (Q1).
If needed, use drill to slightly enlarge the opening of the hole.
NOTE: Acrylic anchors (Q1) MUST be used.
Solo para recintos acrílicos
Empuje el centro de los anclaje acrílico (Q1) y apriete las
abrazaderas juntas. Inserte los anclaje acrílico (Q1) en el
orificio.
De ser necesario, puede utilizar un martillo de goma para
insertar los anclaje acrílicos (Q1).
De ser necesario, utilice la broca para ampliar un poco la
abertura del orificio.
NOTA: DEBE utilizar los anclajes acrílicos (Q1).
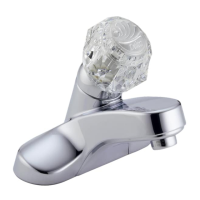
For Acrylic Enclosures Only
After removing center guide (G1), drill a 1/8" pilot hole at
the location marked in the previous step.
Next, re-drill a 5/16" hole to accept the acrylic
anchor (Q1).
Solo para recintos acrílicos
Después de retirar la guía central (G1), taladre un orificio
guía de 1/8" en el lugar marcado en el paso anterior.
Después, vuelva a perforar un orificio de 5/16" para que
acepte el anclaje (Q1).
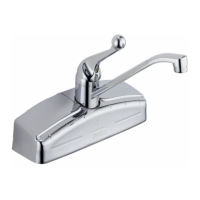
Place center guide (G1) against
inner edge of dam
strip (
B1
) centered on mark made in previous step as
shown in Figure 23.
Using a marking tool, mark the center guide (G1) hole.
For acrylic enclosures, proceed to steps 24a-24b.
For tile enclosures proceed to step 25a-25b.
Coloque la guía central (G1) contra el borde interno de la
barrera de contención de agua (B1) centrada sobre la
marca realizada en el paso anterior, como se muestra en la
figura 23.
Utilizando una herramienta de marcado, marque el orificio
de la guía central (G1).
Para recintos acrílicos, prosiga con los pasos 24a-24b.
Para recintos de baldosas prosiga con los pasos
25a-25b.
Center Guide Installation
Using a measuring tape, locate the center of the
installed dam strip (B1).
U
sing a marking tool, mark the center of the dam strip (
B1
).
Instalación de la guía central
Utilizando una cinta métrica, ubique el centro de la
barrera de contención de agua instalada (B1).
Utilizando una herramienta de marcado, marque el
centro de la barrera de contención de agua (B1).
22
B1
B1
23
1
B1
G1
G1
2
B1
G1
*Top View*
*Vista superior*
24a
B1
CAUTION
PRECAUCIÓN
CAUTION
PRECAUCIÓN
Para evitar el riesgo de lesiones o daños al producto,
asegúrese de perforar en los montantes.
CAUTION
Wear safety glasses and cut resistant gloves with non-slip
grip when drilling or cutting to avoid risk of injury.
PRECAUCIÓN
Use gafas protectoras y guantes anticorte y antideslizantes
al taladrar o cortar para evitar el riesgo de lesiones.
Use cut-resistant gloves with appropriate grip to avoid
risk of injury from sharp edges or corners.
Use guantes resistentes a los cortes con el agarre
apropiado para evitar el riesgo de lesiones por los bordes
y esquinas afiladas.
To avoid risk of injury or product damage, DO NOT remove
corner protectors on the glass panel(s) until the panels are
installed.
Para evitar el riesgo de lesiones o danos al producto NO quite
los protectores de las esquinas en el panel o paneles de vidrio
hasta que estos esten instalados.
1
2
24b
Q1
Q1
3
 Loading...