Do you have a question about the Delta STRYKER and is the answer not in the manual?
Adjusting the eyepiece for clear reticle focus.
Properly fitting the scope to the rifle using suitable mounts.
Details on LRD-1P, LRD-1T, and DLR-1 reticles for PRS and tactical shooting.
Description of the LRD-1P reticle's illuminated point, crosshairs, and measurement features.
Description of the LRD-1T reticle, an extension of LRD-1P with ballistic markers.
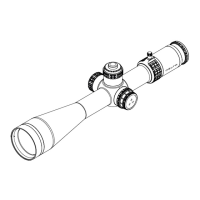
The Delta Optical Stryker HD riflescope is a precision optical instrument designed for long-range sport shooting and hunting. It is available in two main models: the 4.5-30x56 FFP (First Focal Plane) and the 5-50x56 SFP (Second Focal Plane). Both models are engineered to deliver excellent image quality across their entire magnification ranges, thanks to the incorporation of ED (Extra-low Dispersion) lenses.
The primary function of the Stryker HD riflescope is to provide a clear, magnified view of a target, enabling precise aiming and shot placement over varying distances. It achieves this through a sophisticated optical system and a range of adjustable features.
The riflescope features a reticle, which is a pattern of fine lines or markings in the eyepiece that serves as an aiming point. The 4.5-30x56 FFP model offers LRD-1T, LRD-1P, and DLR-1 reticles, which are scaled in milliradians (mrad) and located in the first focal plane. This means the reticle's size changes proportionally with the magnification, allowing for consistent subtension values at all zoom levels. The 5-50x56 SFP model utilizes DLS-1, DLS-2, and DLS-3 reticles, which are placed in the second focal plane and scaled to a magnification of 40x. In SFP reticles, the reticle size remains constant regardless of magnification, meaning subtension values are only accurate at a specific magnification setting.
Both models include an illuminated reticle with variable intensity, offering 11 steps of brightness adjustment. This feature enhances visibility of the aiming point in low-light conditions or against dark targets. The illumination is powered by a 3V CR2032 battery, which is housed in a compartment integrated with the parallax adjustment knob.
Parallax adjustment is a crucial function that allows the user to eliminate apparent movement of the reticle relative to the target when the eye is moved slightly. The Stryker HD riflescopes are equipped with a side parallax adjustment knob. The 5-50x56 SFP model adjusts from 10m to infinity, while the 4.5-30x56 FFP model adjusts from 25m to infinity. This precise adjustment ensures a sharp image and a steady reticle, particularly important for long-distance shooting. An optional larger parallax adjustment wheel is available to increase the precision of settings and distance measurement.
The riflescope features open turrets for windage and elevation adjustments. These turrets allow for precise corrections to the point of impact. The 4.5-30x56 FFP model's clicks are 0.1 mrad (10mm at 100m), while the 5-50x56 SFP model's DLS-1 and DLS-2 reticles have 0.05 mrad (5mm at 100m) clicks, and the DLS-3 reticle has 1/8 MOA (3.5mm at 100m) clicks. The robust 34mm tube provides a substantial adjustment range of 30 MIL (100 MOA).
A key functional feature is the "ZeroLock" mechanism on the vertical adjustment turret. This mechanism allows the user to set a hard stop at the elevation zero position, typically after zeroing the riflescope for a specific shooting distance (e.g., 100m). This prevents accidental over-dialing when returning to zero after making multiple turns for longer shots.
To maximize the enjoyment and effectiveness of the riflescope, several usage procedures are outlined.
Focusing (Diopter Adjustment): This initial adjustment ensures the reticle appears sharply defined to the user's eye. It involves holding the scope about 7-10 cm from the eye and looking through the eyepiece at a featureless, brightly lit area. The adjustment ring at the end of the eyepiece is then turned until the reticle is perfectly clear. If the user wears prescription glasses for shooting, this adjustment should be performed while wearing them.
Mounting: Proper mounting is critical for achieving the best accuracy. High-quality mounts designed for the specific rifle and compatible with the riflescope's 34mm tube and 65.2mm objective are recommended. The scope should be positioned as far forward as possible, with the elevation turret on top. The scope is then pulled to the rear until the full field of view is visible, ensuring maximum eye relief. The reticle's orientation must be vertical, which can be checked using a plumb line. The mounting rings should be tightened evenly, with a recommended torque of 1.7-1.8 Nm to avoid damage. The inner surfaces of the rings must be clean and degreased. It is advised to have the riflescope mounted by an authorized gunsmith to prevent damage that would void the warranty.
Zeroing: This process involves aligning the point of impact with the aiming point at a specific distance. After setting parallax to 100 meters and magnification to the highest power, three rounds are fired at a target 100 meters away. Initial major corrections should be made by adjusting the mount to bring the point of impact within approximately 15 cm of the aim. Subsequently, the windage and elevation turrets are used for fine adjustments. The turrets are initially set to the middle "0" position, and adjustments of about one turn from "0" are recommended to avoid spring blockage or parallax errors.
Turret Locking Mechanism: The turrets are equipped with a locking mechanism to prevent accidental changes to settings. To unlock, the turret is pulled up; to lock, it is pressed down.
Turrets Scale Zeroing: After completing the zeroing procedure, the turret scales can be reset to zero. For lockable turrets, the ring on top of the turret is unscrewed, the scale is carefully removed (without changing the knob's position), and then reset so that the "0" point aligns with the start marker.
Zero-Lock Mechanism: This mechanism allows for setting a hard stop at the elevation zero. After zeroing, the user unscrews the top ring, loosens three lock screws on the side of the "ZeroLock" ring with a 1.5mm Allen key, sets the locking ring, tightens the counter screws, and finally resets the turret scale to "0" before replacing and tightening the top ring.
Power Adjustment: Magnification is changed by rotating the power selector ring, which is located between the eyebell and the riflescope tube. This ring includes an additional lever for user comfort.
Sunshade: Stryker HD riflescopes come with a sunshade that screws into the threaded ring at the end of the lens housing. This accessory enhances aiming comfort in strong sunlight and protects the objective lens from rain splashes.
The Stryker HD riflescope is a robust instrument, but it requires careful maintenance to ensure its longevity and optimal performance.
Cleaning Optical Surfaces: Exposed optical surfaces should be occasionally wiped clean with the provided lens cloth or optical quality lens paper, similar to those used for eyeglasses or camera lenses. Before wiping, any dirt or dust should be blown away or removed with a soft lens brush. It is crucial to avoid unnecessary rubbing or using coarse cloths, as this can permanently damage the lens coatings.
Cleaning Metal Surfaces: To prevent scratching the finish, any dirt or sand on the metal surfaces should be removed with a soft brush. The scope can then be wiped with a damp cloth, followed by a dry cloth. Finally, treating the tube with a silicone-treated cloth will restore luster and protect against corrosion. Care should be taken not to touch the lenses with the silicone cloth.
Storage: The riflescope should be stored in a moisture-free environment. It is important to avoid storing the scope in hot places, such as the passenger compartments of vehicles on hot days, as high temperatures can adversely affect lubricants and sealants. A vehicle's trunk, a gun cabinet, or a closet is preferable. The scope should never be left where direct sunlight can enter the objective or eyepiece lens, as this can cause damage due to the concentration (burning glass effect) of the sun's rays. Protective lens covers should be kept in place when the scope is not in use.
Repairs: The riflescope is a precision instrument and should not be disassembled or cleaned internally by the user. If repairs or adjustments are needed, the device should be returned to the distributor where it was purchased. Damage caused by incorrect mounting is not covered by the warranty.
| Objective Lens Diameter | 56 mm |
|---|---|
| Tube Diameter | 34 mm |
| Eye Relief | 90 mm |
| Waterproof | Yes |
| Fogproof | Yes |
| Shockproof | Yes |
| Illumination | Yes |
| Diopter Adjustment | Yes |
| Total Elevation Adjustment | 30 MIL |
| Reticle | DSMR |
| Parallax Adjustment | 10 m - ∞ |
| Adjustment per Click | 0.1 MRAD |