Do you have a question about the Denon DTR-80P and is the answer not in the manual?
Advisory about continuous power consumption by the microcomputer and battery removal.
Warnings regarding electric shock, fire, and proper use of plugs and outlets.
Instructions for setting the correct voltage for the unit using the selector knob.
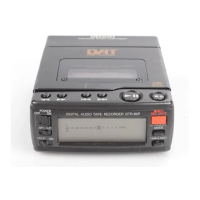
Highlights of the DAT recorder's capabilities, including sound quality and portability.
Explanation of how audio data and sub-codes are stored on DAT tapes.
Details on connecting the AC adapter and ensuring correct voltage supply.
Guidelines for avoiding damage from environmental factors and physical impact.
Procedure to follow if moisture condensation occurs on the unit's components.
Instructions for cleaning the exterior and heads, and avoiding abrasive materials.
Diagram identifying the liquid crystal display, cassette holder, and control panel elements.
Numbered labels for all buttons and input/output jacks on the unit.
Explanation of POWER, MODE, HOLD, REC/REC MUTE, and TIME/LIGHT buttons.
Details on Rewind, Fast Forward, Search, and Play/Pause buttons.
Explanation of INPUT Selector, Analog In selector, and Volume Controllers.
Step-by-step guide for connecting and using the AC adapter for power.
Cautionary notes and important information regarding the use of the AC adapter.
Procedure for inserting alkali batteries into the battery pack.
Information on the low battery indicator and additional safety precautions.
Instructions for physically connecting and disconnecting the battery pack.
Explanation of the automatic power-off feature and how to disable it.
Information on using rechargeable Ni-cd battery pack and car battery adapter.
Diagrams showing MIC/LINE, LINE OUT, and DIGITAL IN/OUT jacks.
Illustrations for connecting the DTR-80P to a stereo system for playback.
Diagrams for digital coaxial, digital optical, and analog recording setups.
How to connect a microphone using a stereo mini-plug or adapter.
Guide for connecting headphones and adjusting volume using the dedicated control.
Step-by-step instructions for inserting a DAT cassette into the unit.
Note that the cassette holder will not open during playback or recording.
Procedure for safely removing a DAT cassette from the unit.
Precautions for DAT tapes and a table of recording/playback times for different tape types.
Steps to configure the unit for 48 kHz SP analog audio recording.
Steps to configure the unit for 32 kHz LP analog audio recording.
Instructions for setting up 44.1 kHz SP analog recording using specific button presses.
Explanation of the different sampling frequencies (48, 44.1, 32 kHz) used in DAT recording.
How to connect line or microphone sources to the DTR-80P.
Steps to load tape, set input, and initiate recording, including REC PAUSE.
How to use the INPUT LEVEL controller to set optimal recording levels.
Instructions for starting recording and entering REC PAUSE or stopping the operation.
Guidance on adjusting the recording level to prevent distortion and achieve peak performance.
How to use the MIC/LINE selector to manage loud microphone inputs.
How to select recording modes for 32 kHz sampling frequency.
Steps to connect digital sources and start the digital recording process.
How to enter REC PAUSE and exit the recording operation for digital signals.
Notes on record prohibit messages, sampling frequency issues, and input selector changes.
Using cue/review to find the desired point and ensuring ABS time is displayed.
Procedure to enter REC PAUSE and start recording at a specific point on the tape.
Explanation of the monitor function for listening to input signals without a tape.
Steps to connect sources and activate the monitor function for AD/DA signal monitoring.
Procedure to create a gradual increase in volume at the start of a recording.
Procedure to create a gradual decrease in volume at the end of a recording.
How to adjust the fade-in/fade-out time in seconds (1-10).
Explanation of how sub-codes are recorded separately from audio data.
Overview of ABS Time, Start ID, Program Number, End ID, and TOC sub-codes.
Distinction between recorded blanks (sub-code only) and non-recorded blanks (no data).
Importance of avoiding non-recorded blanks for correct ABS time tracking.
Procedures for creating 4-second, shorter, or longer recorded blanks between selections.
Purpose of Start IDs for high-speed search and automatic program number increment.
How the AUTO-ID function automatically registers Start IDs based on silence.
How to manually register Start IDs during recording or playback.
Steps to search for and delete a specific Start ID from the tape.
Important considerations after deleting a Start ID, including program number disruption.
Procedure to renumber program numbers after editing Start IDs.
Notes on minimum time between Start IDs for correct renumbering.
Explanation of TOC data, R-TOC, and U-TOC types.
Procedure to register U-TOC data by renumbering the tape.
Instructions for initiating playback and stopping or pausing the tape.
Details on how the pause mode is automatically cancelled after a set period.
How to use fast forward and rewind, including blank detection and End ID behavior.
Using cue and review to listen to tape contents at increased speeds.
How to skip forward or backward to specific selections using the search function.
Instructions for repeating all selections or a single selection on the tape.
How to set the unit to repeat a single selection up to 15 times.
Procedure to stop repeat play operations for the entire tape or specific selections.
How the unit automatically rewinds to the beginning after reaching an End ID.
Steps to search for and play specific selections using program numbers and TOC data.
How to select and adjust the desired program number for playback.
Procedure to start playback of the selected program number after display.
How to cycle through ABS, PGM, REM, and TOC displays using the TIME/LIGHT button.
Explanation of the ABS display showing total elapsed time from tape beginning.
How PGM time is displayed for selections and its relation to Start IDs.
Explanation of the REM display showing time left on the tape.
How to view total programs and recording time, and behavior with non-recorded sections.
Explanation of SCMS limits on digital copying and copyright protection codes.
Restrictions on recording from CDs, pre-recorded DAT, and analog sources with protection.
Solutions for issues like no power, unresponsive controls, and recording failures.
Troubleshooting for sampling frequency mismatches, PROHB messages, and program number errors.
Explanation of messages like 'DEW', 'BATT', 'HOLD', and 'AD/DA' on the display.
Details on tape type, speed, recording time, and drum speed.
Information on sampling frequencies, quantization, SN ratio, and dynamic range.
Specifications for input/output terminals, power supply, and consumption.
Physical dimensions, weight, and included accessories for the DTR-80P.
Guidelines on radio frequency energy use and interference correction.
Note regarding digital apparatus noise emissions according to Canadian regulations.
List of overseas service centers for follow-up service consultation.
Contact information for the manufacturer, NIPPON COLUMBIA CO., LTD.
| Brand | Denon |
|---|---|
| Model | DTR-80P |
| Category | Recording Equipment |
| Language | English |