EasyManua.ls Logo

Denver ACT-1301 MK2 - User Manual

Denver ACT-1301 MK2
2 pages
Print Icon
To Next Page IconTo Next Page
Loading...
ACT-1301 MK2 Quick Start Guide
Appearance and key introduction
Key/Indi
cator
Function
Power
On/Off
Power the camera on or off. When opening the
menu, switch over between normal (effect
parameters and replay of image, video) and
setup menu.
Shutter
In recording video mode, it is used to start/stop
recording. In capture mode, it is used as a
shutter. In replay mode; it is used to play the
video. When operating the menu, it is used to
confirm the selection.
Up key
Digital zoom in (capture/video mode); menu
selection (after opening the menu); pause,
continue playing (when playing and recording
video in replay mode).
OK key
Open/exit from menu. Stop playing (when
replaying video).
Down key
Digital zoom out (capture/video mode); menu
selection (after opening the menu).
Mode
switch
Switch over among modes of capture, video and
replay.
Operation
indicator
The upper one is
a charging
indicator.
In power-off state, it keeps
constant lighting when the
charger is connected for
charging.
The lower one is
an operation
indicator.
It flashes once during
capturing, and it keeps
constant lighting when
connected with computer
portable disk.
Start Use
1. Charge built-in lithium battery
In power-off state, when the camera is connected with computer,
charging begins. At this time, the charger indicator lights and it turns off
when charged full. Generally, it costs 2-4 hours to charge full.
2. Use memory card
1. Follow the instructions carved by slot of the memory card, it is to insert
FT card into the card slot till entirely inserted.
2. To take the FT card out, after gently pressing the end of the memory
card inwards, the card will reject out.
Please notice: UHS (ultra highspeed) cards doesn’t work, as they
are not 100% backward compatible
Note: The camera is not equipped with a built-in memory, and thus
a memory card is required.
3. Power On/Off:
3.1 Power-on: If to press and hold POWER key for 3 seconds, the
screen starts up and the camera enters startup state.
3.2 Power-off: In idle state of the camera, if to click POWER key, the
camera turns off.
Automatic power-off: When idle time set for the camera reaches, it
automatically turns off to save power. The default time of the
system automatic power-off is 5 minutes;
3.3 Power-off due to low battery: In case of extremely low battery, the
icon ”appears on the LCD screen. Please timely
charge the battery. When the icon turns red and flashes, the
camera will automatically power off.
4. Functional mode switchover
The camera is equipped with three modes: capture, video and replay
mode. After power-on, the modes can be switched over with MODE
switch.
5. Indicators
Operation indicator: When the camera works (e.g. recording video,
capturing or automatic screen turn-off), the
operation indicator lights.
Charger indicator: Constant lighting is to remind user that the
camera is being charged.
6 Video mode
( With maximum 29 minutes video recording per sequence)
When pushing Mode switch to video mode, click shutter in
preview state to start recording video; to stop video recording,
it is to click it again. It will also automatically stop recording in
case that no free room left in the memory card or the battery is
over low:
1 00:00:01: time-meter, indicating 1 second left for recording
(indicating 1 second recorded during recording).
2 : mode icon: indicates the current mode is video
recording.
3 : loop recording video time icon: indicates the current loop
video recording time is 3 minutes.
4 : movie size: indicates the current movie size is 720P.
5 : indicates currently a memory card is inserted.
6 : magnification of digital zoom: press Up and down key to
adjust zoom among 1x-4x.
7 : battery icon: indicates current battery level.
8 : white balance icon: indicates the current white balance
mode is automatic.
9 metering icon: indicates it is currently the pan overall
perspective metering.
Video menu setup
In video mode, press OK key to open menu, and then press Up and
Down key to select menu. When selecting menu, background of the
selected item will be highlighted. Press Shutter to enter sub-menu. In
sub-menu, press Up and Down key for selection, press Shutter for
confirmation and back to main menu. In the main menu, press OK
USB Cable
Capture mode: Take pictures.
Video mode: Record video and
driving (5min, 3min and 1min).
Replay mode: Picture and video
file playback.
Mode switch:
-Photograph
-Video
-Replay
Power
On/Off
Shutter
Charging indicator
Operation indicator
Up key
OK key
Down key
LCD TFT
Question and Answer IconNeed help?

Do you have a question about the Denver ACT-1301 MK2 and is the answer not in the manual?

Overview

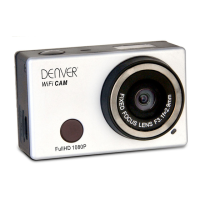
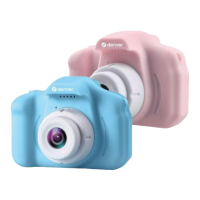
This document describes the ACT-1301 MK2, a portable camera device designed for capturing photos and videos, with additional features for playback and system management.

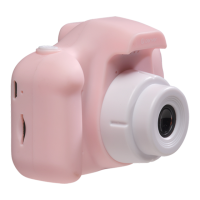
The device features a straightforward interface, including a Mode switch, Power On/Off button, Shutter button, Up key, OK key, and Down key. Visual feedback is provided through an LCD TFT screen, a Charging indicator, and an Operation indicator. A lens is prominently featured on the front of the device.

Function Description

The ACT-1301 MK2 operates in three primary modes: Capture, Video, and Replay. These modes can be easily switched using the Mode switch.

  • Power On/Off: To power on the camera, press and hold the POWER key for 3 seconds. The screen will start up, and the camera will enter its startup state. To power off from an idle state, simply click the POWER key. The camera also features an automatic power-off function, which turns off the device after a set idle time (defaulting to 5 minutes) to conserve power. A low battery icon (a red, flashing icon) will appear on the LCD screen when the battery is critically low, prompting the user to charge the device.

  • Shutter Button: This button serves multiple functions depending on the active mode. In video recording mode, it initiates and stops recording. In capture mode, it acts as the shutter for taking pictures. During replay, it is used to play videos. When navigating menus, it confirms selections.

  • Up Key: This key is used for digital zoom in during capture and video modes. In menu navigation, it allows for upward selection. During video playback in replay mode, it functions as a pause/continue button.

  • OK Key: This key opens and exits menus. During video replay, it stops playback.

  • Down Key: This key is used for digital zoom out in capture and video modes. In menu navigation, it allows for downward selection.

  • Mode Switch: This switch allows the user to toggle between the Capture, Video, and Replay modes.

  • Indicators:

    • Charging Indicator: This indicator, located on the upper part of the device, lights up constantly when the charger is connected and the device is in a power-off state, signaling that the battery is charging.
    • Operation Indicator: This indicator, located on the lower part of the device, flashes once during capturing and lights up constantly when connected to a computer or portable disk, indicating active operation.

Usage Features

The ACT-1301 MK2 offers several features to enhance the user experience:

  • Capture Mode: In this mode, the camera is used to take still pictures. The LCD screen displays a counter indicating the quantity of pictures available to be taken, the mode icon, movie size options (1M/3M/5M), and an icon indicating if a memory card is inserted. Digital zoom (1x-4x) can be adjusted using the Up and Down keys. Other displayed information includes battery level, self-timer mode (if set), white balance mode (automatic by default), and metering mode (pan overall perspective metering).

  • Video Mode: The camera can record video sequences with a maximum duration of 29 minutes per sequence. To start recording, switch to video mode and click the Shutter button. Click it again to stop recording. Recording will also automatically stop if the memory card runs out of free space or the battery is critically low. The LCD screen in video mode displays a time-meter (indicating recording duration), the video mode icon, a loop recording time icon (defaulting to 3 minutes), movie size (720P), memory card insertion status, digital zoom magnification, battery level, white balance mode (automatic by default), and metering mode.

    • Video Menu Setup: To access video settings, press the OK key to open the menu. Use the Up and Down keys to navigate selections, with the selected item highlighted. Press the Shutter button to enter a sub-menu. Within sub-menus, use the Up and Down keys for selection and the Shutter button for confirmation. Press the OK key to exit the main menu.
  • Replay Mode: This mode allows for playback of captured pictures and recorded videos. After switching to replay mode, the screen displays the replay mode icon, the number of files in the current folder, an icon indicating if the current folder is locked, and an icon identifying the current file as a video file.

    • Playing Movie Clips: During replay, press the Shutter button to play a video. The Up key can be used to pause, and the Shutter key again to stop playback.
    • Deleting Files: To delete a file, select it in replay mode, open the menu, and choose "Delete." You can choose to delete "One" file or "All" files. After confirming "Yes" to delete, the file is removed. Press the OK key to exit the menu.
  • Digital Zoom: The Up and Down keys allow for digital zoom adjustment from 1x to 4x in capture and video modes.

  • Battery Management: The camera displays a battery icon indicating the current battery level. When the battery is extremely low, a red, flashing icon appears, signaling the need for charging.

Maintenance Features

  • Charging: The camera features a built-in lithium battery. To charge, connect the camera to a computer via the USB cable while the camera is powered off. The charging indicator will light up and turn off when fully charged. A full charge typically takes 2-4 hours. The charger indicator provides constant lighting to remind the user that the camera is being charged.

  • Memory Card Usage: The camera requires a memory card as it does not have built-in memory. Follow the instructions carved by the memory card slot to insert the FT card until it is fully seated. To remove the card, gently press the end of the memory card inwards, and it will eject.

    • Important Note: UHS (ultra highspeed) cards are not 100% backward compatible and may not work with this device.
  • Environmental Considerations: The manual includes warnings about the lithium battery, advising against opening the product, and avoiding exposure to heat, water, moisture, or direct sunlight. It also provides information on the proper disposal of electric and electronic equipment, emphasizing that it should not be disposed of with household waste but should be taken to designated collection points for recycling.

The ACT-1301 MK2 is designed for ease of use, offering essential functionalities for basic photography and videography, with clear indicators and straightforward controls.

Denver ACT-1301 MK2 Specifications

General IconGeneral
Digital zoom4x
Internal memory32 MB
Sensor TypeCMOS
Screen size2.0"
External memoryMicroSD, up to 32 GB
Image Resolution2592 x 1944
Display Size2 inch
StorageMicroSD (up to 32 GB)
BatteryBuilt-in rechargeable battery
Megapixel5 MP
Effective Pixels5 MP

Related product manuals