CONNECTOR B
1. REAR RIGHT SPEAKER (+)
2. REAR RIGHT SPEAKER (-)
3. FRONT RIGHT SPEAKER (+)
4. FRONT RIGHT SPEAKER (-)
5. FRONT LEFT SPEAKER (+)
6. FRONT LEFT SPEAKER (-)
7. REAR LEFT SPEAKER (+)
8. REAR LEFT SPEAKER (-)
Maintenance
FUSE REPLACEMENT
If the fuse blows, check the power connection and replace the
fuse. If the fuse blows again after the replacement, there may
be an internal malfunction. In this case, consult your nearest
repairing center.
Warning
Use the specied amperage fuse for each lead. Use of a higher
amperage fuse may cause serious damage.
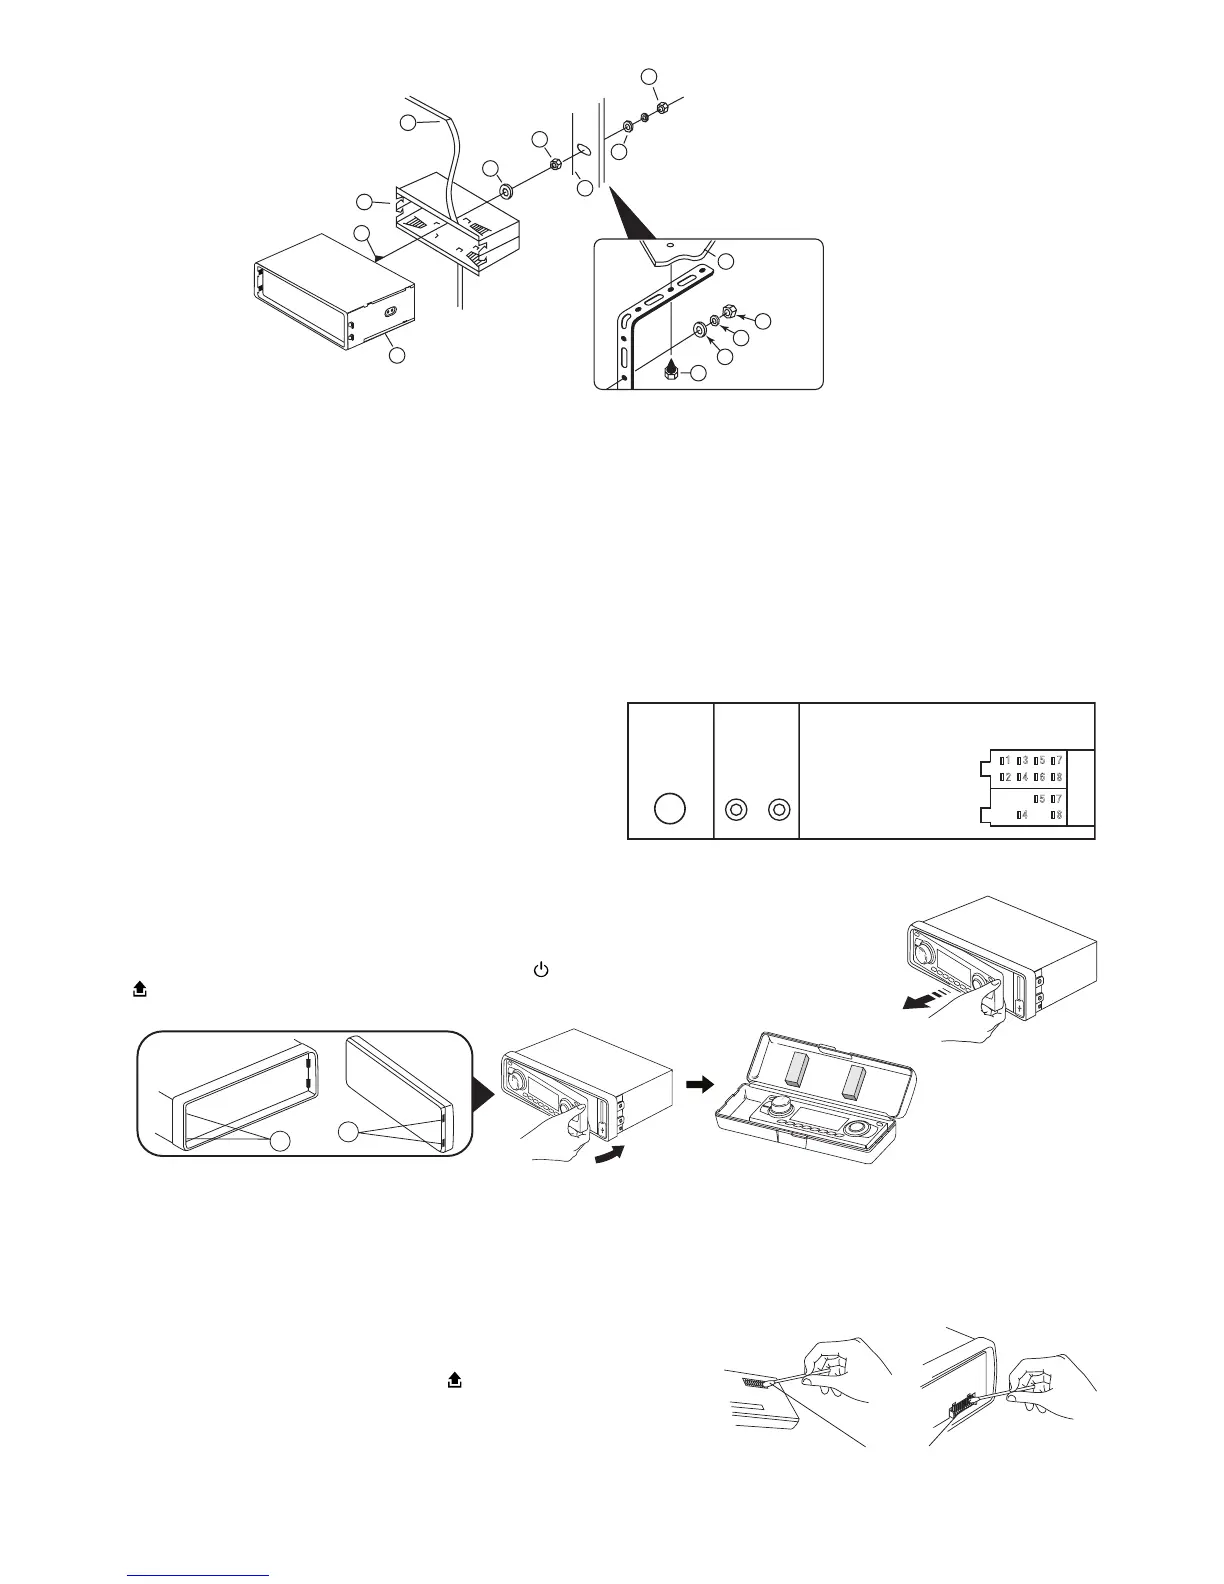
Detaching and attaching the front panel
The front panel of this unit can be detached in order to prevent the unit from being stolen.
DETACHING THE FRONT PANEL
Before detaching the front panel, be sure to press the OFF button rst. Then press the button (16)
and detach the panel by pulling it towards you as illustrated.
Note: Be sure not to drop the panel when detaching it from the unit.
Notes:
• Make sure that the front panel is the right way up when attaching it to the unit as it cannot be attached upside down.
• Do not press the front panel hard against the unit when attaching it. It can be easily attached by pressing it lightly against the
unit.
• When you carry the front panel with you, put it in the supplied front panel case.
• Do not press hard or give excessive pressure to the display window of the front panel when attaching it to the unit.
CLEANING THE CONNECTOR
The unit may not function properly if the connectors between the unit and the
front panel are contaminated with dirt. In order to prevent this from happen-
ing, detach the front panel by pressing the button and clean the connector
from time to time.
Clean the connector with a cotton swab together with contact cleaner as
illustrated. Be sure to clean them carefully pin by pin and make sure not to
damage the connecting points.
 Loading...