EasyManua.ls Logo

Denver WCM-8010MK2 - User Manual

Denver WCM-8010MK2
7 pages
Print Icon
To Next Page IconTo Next Page
Loading...
DENVER WCM-8010MK2
Wild kamera
Quick Start Guide
Overview
1) 2 inch color LCD Display
2) Shot button
3) OK button
4) Power Switch
5) USB connector
6) Micro SD card slot(not inclu)
7) Replay button
8)Menu button
9)Left button
10)Up button
11)Down button
12)Right button
13)Microphone
14)SIM card slot(not inclu)
The camera has 3 basic operation modes:
1. OFF mode: Power switch is at OFF position.
2. ON mode: Power switch is at ON position.
3. TEST mode: Power switch is at TEST position.
In the above three modes, the OFF mode is the specified safe mode when replacing the microSD or batteries and transporting the camera.
A. There are 3 modes under system setting for your selection.
a. Camera
It only takes photos at a time.
b. it only takes videos at a time.
c. Camera &Video.
It takes photo firstly, then takes videos.
B. There are also 2 ways to take photos or videos.
a. Manually to press the SHOT button
After sliding power switch to ‘TEST’, without any menu on the screen, press Shot to take photos or videos.
b. Automatically
After sliding power switch to ON, the LED blinks 15s, then the camera takes photos or videos when the movement is detected.
C. To view the photos or videos on the camera, please turn off the camera, slide power switch to Test, press OK button to enter
view model.
a. Photos viewing
Press up or down button to view the previous of next photo.
Question and Answer IconNeed help?

Do you have a question about the Denver WCM-8010MK2 and is the answer not in the manual?

Overview

This document describes the DENVER WCM-8010MK2 Wild Camera, a device designed for capturing photos and videos, with additional features for remote communication via 2G/GSM/MMS/GPRS networks.

Function Description:

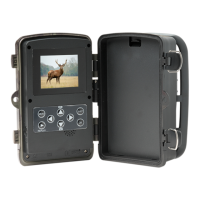
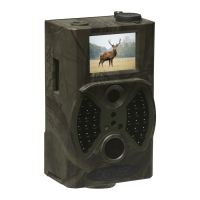
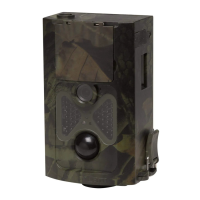
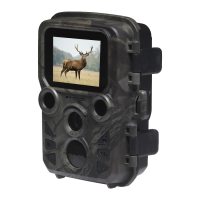
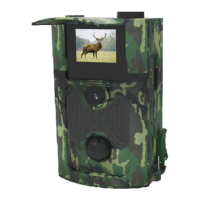
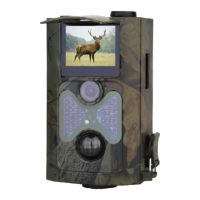
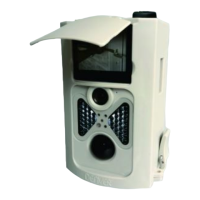
The DENVER WCM-8010MK2 is a wild camera primarily used for surveillance and wildlife monitoring. It can operate in three main modes: OFF, ON, and TEST. The OFF mode is a safe mode for replacing the microSD card or batteries and for transporting the camera. In ON mode, the camera automatically captures photos or videos when movement is detected, indicated by an LED blinking for 15 seconds. The TEST mode allows for manual operation and configuration. The camera features a 2-inch color LCD display for viewing settings and captured media. It supports both photo and video capture, with options to capture photos only, videos only, or a sequence of a photo followed by a video.

Important Technical Specifications:

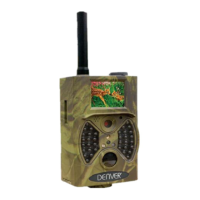
The camera utilizes a 2-inch color LCD display. It requires a Micro SD Card (32GB, not included) for storage and 8x AA batteries (not included) for power, or a 12V external power supply. For remote communication, it supports 2G/GSM/MMS/GPRS networks. The operating frequency range is 850-1900MHz, with a maximum output power of 2W. The camera includes a USB connector for PC connection and a SIM card slot (not included) for network functionality.

Usage Features:

The camera offers flexible capture modes:

  • Camera Mode: Takes photos only.
  • Video Mode: Takes videos only.
  • Camera & Video Mode: Takes a photo first, then records a video.

There are two ways to capture media:

  • Manual Capture: In TEST mode, without any menu on the screen, pressing the SHOT button will take photos or videos.
  • Automatic Capture: In ON mode, the camera automatically captures photos or videos when motion is detected.

Viewing captured media on the camera: To view photos or videos, the camera must be turned off, then the power switch slid to TEST. Pressing the OK button enters the view mode.

  • Photos Viewing: Use the up or down buttons to navigate through photos.
  • Videos Viewing: Press the Replay button to start a video and press it again to stop. Press OK to return to the screen.

Remote Communication (MMS/GPRS Setting Steps):

The camera supports sending images via 2G/GSM/MMS/GPRS. This requires:

  1. A 2G/GSM Mobile Operator Service.
  2. A formatted 2GB+ microSD card.
  3. A computer with Windows Vista, 7, or 8.
  4. A SIM card without PIN lock, capable of sending images via 2G/GSM/GPRS/MMS network.
  5. 12V power (8 AA Batteries or 12V input power supply).
  6. The MMSCONFIG Program from the included CD.
  7. Provider-specific 2G MMS data (APN+account+password, MMSC+IP+PORT) and 2G GPRS data for SMTP setting (APN+account+password).
  8. Sender Email server info (server+port+email+password).

MMS Setting Steps:

  1. Insert the microSD card and SIM into the camera, and install batteries.
  2. Turn the camera to TEST mode. Verify signal bar and "SIM" icon on the screen.
  3. Connect the camera to a PC using the USB cable.
  4. Insert the CD into the computer, open, and double-click "MMSCONFIG".
  5. In the MMSCONFIG software, choose "Mode" -> "Camera or Mode" -> "MMS table" -> "MMS MODE" -> "Manual".
  6. Insert "Gprs Setting" and "Server Setting" details.
  7. Fill in "Phone Setting" (Phone1) and/or "Email Setting" (Email1).
  8. Go to "Smtp Setting", choose "SMTP ON/OFF" or "OFF".
  9. Click "Save" and save as "Parameter.dat" to the microSD card.
  10. Unplug the USB cable from the camera.
  11. In the camera menu, navigate to "MMS" -> "MMS ON/OFF", "Country", "Operator", "MMS APN" and verify settings match those configured in the software.
  12. Turn the camera to ON mode.

GPRS Setting Steps:

  1. Insert the microSD card and SIM into the camera, and install batteries.
  2. Turn the camera to TEST mode. Verify signal bar and "SIM" icon on the screen.
  3. Connect the camera to a PC using the USB cable.
  4. Insert the CD into the computer, open, and double-click "MMSCONFIG".
  5. In the MMSCONFIG software, choose "Mode" -> "Camera or Mode" -> "SMTP table" -> "SMTP MODE" -> "Manual".
  6. Insert "Gprs Setting" (APN, Account, Password) and "Server Setting" (Type, Server, Port, Email, Password) details.
  7. Fill in "Email Setting" (Email1).
  8. Go to "MMS table", choose "MMS ON/OFF" or "OFF".
  9. Click "Save" and save as "Parameter.dat" to the microSD card.
  10. Unplug the USB cable from the camera.
  11. In the camera menu, navigate to "SMTP" -> "SMTP ON/OFF", "Country", "Operator", "SMTP APN" and verify settings match those configured in the software.
  12. Turn the camera to ON mode.

SMS Command List:

MMS/SMTP mode must be set to 'on' before using SMS commands.

  • *500*: Take a picture (works in both MMS and SMTP mode). The SIM in the camera will send the picture to the phone set in the parameter.
  • *505*: Take a picture and send it to the mobile that sent the SMS. The SIM in the camera will send the picture to the inserted Mobile ID and/or email, regardless of MMS or SMTP mode. However, if the camera is only in MMS mode, images will be sent via MMS.
  • *520*: Check picture quantity and battery status (works in both MMS and SMTP mode). The SIM will respond with "Total Jpg: Free Space: Battery Level:".
  • *530*: Turn on the sensor (works in both MMS and SMTP mode). The SIM will respond with "Start OK".
  • *531*: Turn the sensor to sleeping mode (works in both MMS and SMTP mode). The SIM will respond with "Stop OK".

Maintenance Features:

  • Battery and Storage Replacement: The OFF mode is specifically designed as a safe mode for replacing the microSD card or batteries.
  • Troubleshooting Note: Heavy rain, fog, and drizzle, especially in the dark, may result in white photos without a clear subject. This is not an error with the camera.
  • Disposal: The product and its batteries contain materials that can be hazardous if not handled correctly. They should not be disposed of with household waste but must be disposed of separately at designated collection points or recycling stations in accordance with local regulations. This ensures proper recycling and prevents harm to the environment.

General Information:

All products are subject to change without notice. The manufacturer reserves the right for errors and omissions in the manual. The device complies with Directive 2014/53/EU. The full EU declaration of conformity can be found on the manufacturer's website by searching for model number WCM-8010.

Denver WCM-8010MK2 Specifications

General IconGeneral
BrandDenver
ModelWCM-8010MK2
CategoryScouting Camera
LanguageEnglish

Related product manuals