3
104004
INSTALLATION INSTRUCTIONS
14. Secure wires into the appropriate plas-
tic wire clips (see Figure 6).
15. Plug in blower power cord.
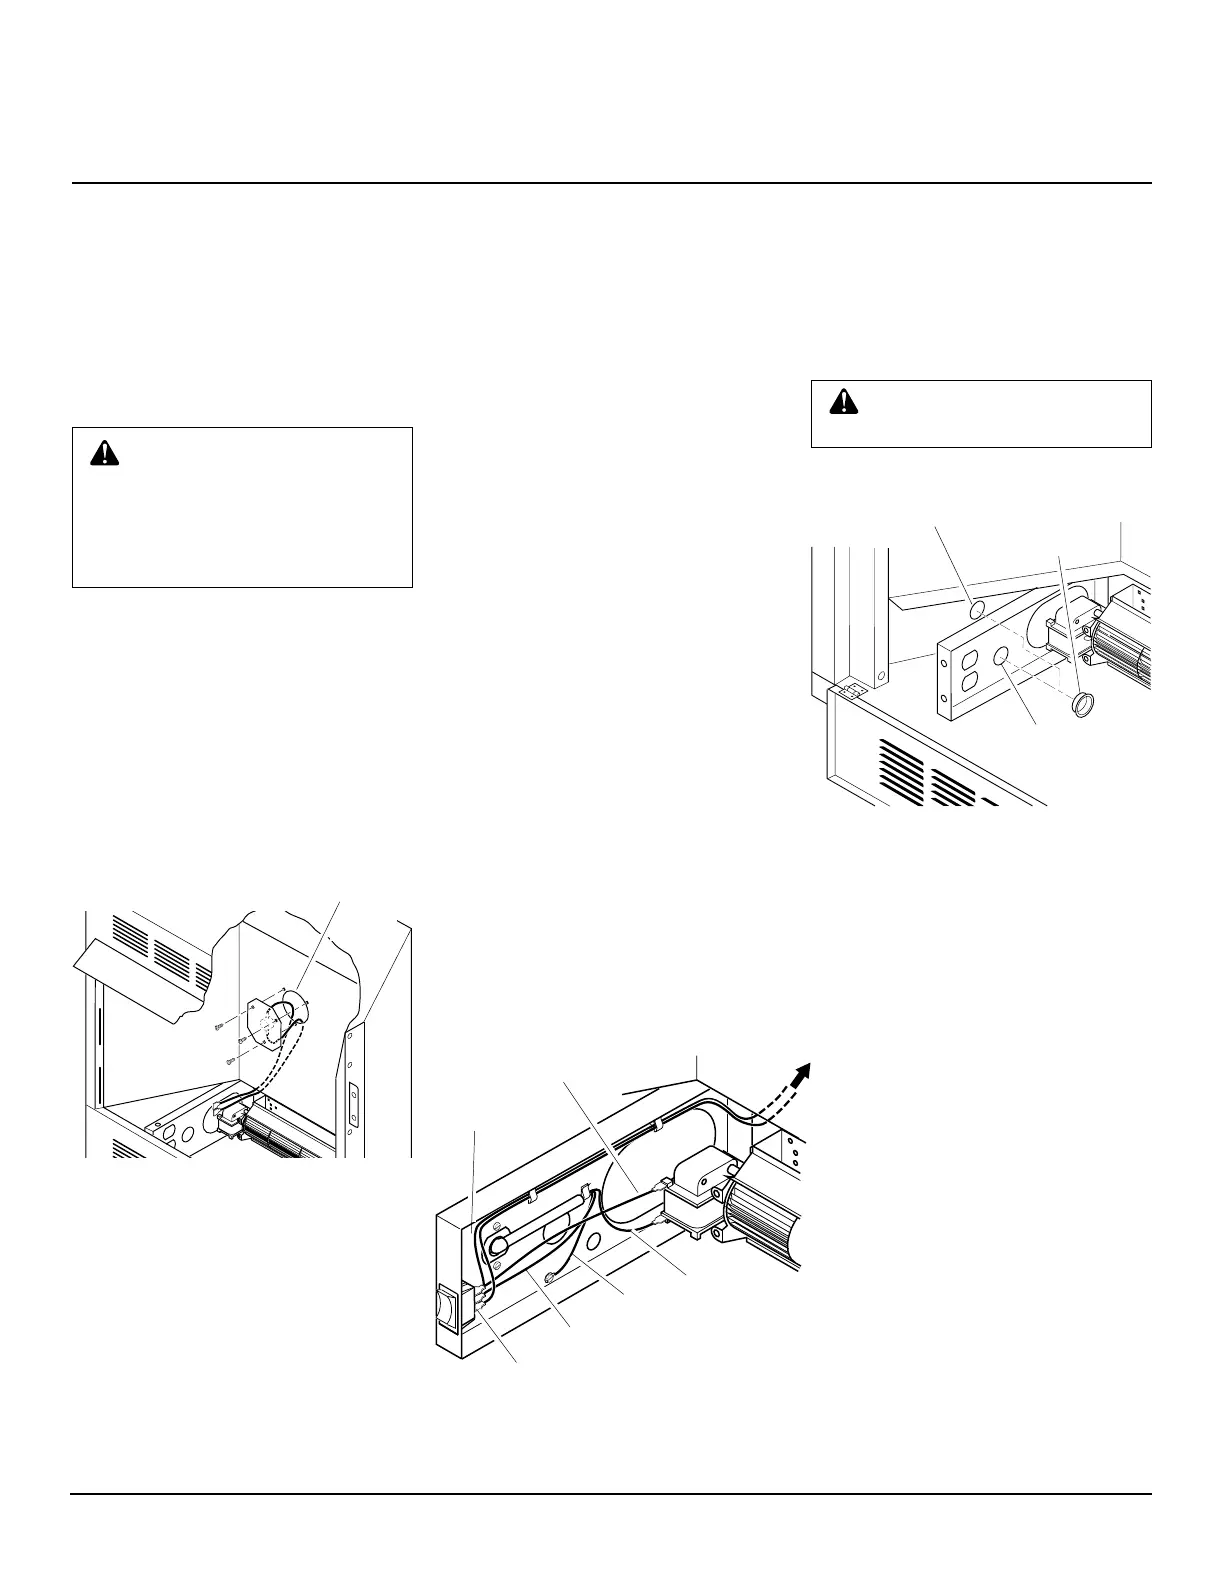
a. If your fireplace system is installed
as a freestanding unit with an ac-
cessory mantel, install one plastic
bushing (provided) into the 1.5" hole
in the lower left side of the outer cas-
ing (see Figure 7). Route power cord
through plastic bushing. Plug the
power cord into a properly grounded
three-prong wall receptacle near the
firebox.
b. If your fireplace system installation
is recessed, install one plastic bush-
ing provided into the 1.5" hole near
the middle of the left floor support
bracket (see Figure 7). Route power
cord through plastic bushing. Plug the
power cord into a properly installed
duplex outlet. (If an outlet is not in-
stalled in your fireplace, the accessory
model GA3555 Outlet Kit with cover
can be installed in your fireplace. This
will supply a convenient three-prong
grounded electrical outlet for your
blower. Refer to the installation
manual provided with the model
GA3555 accessory for instructions on
wiring the duplex outlet.)
Note:
A qualified installer must make
all electrical connections.
16. Check to make sure that the power cord
and wires are completely clear of the
blower wheel and that there are no other
foreign objects in blower wheel. Turn
blower on by pushing the selector switch
to the on position and check for opera-
tion. Turn blower off before continuing.
Figure 6 - Wire Attachment
Figure 5 - Installing Switch and Cover
Assembly
Figure 7 - Installing Bushings
Bushing Location
for Recessed
Installation
Bushing Location for
Freestanding Installation
Note:
To prevent short circuit, white wire
MUST be connected to motor.
12. Attach green ground wire ring termi-
nal to floor support bracket using #10
sheet metal grounding screw provided
(see Figure 3, page 2). Tighten screw
firmly.
13. Attach all five remaining wiring termi-
nals to the appropriate switch or motor
terminal. Carefully note the correct
color coding (see Figures 6 and 8, page
4). Push female wire terminals fully
onto male terminal.
Plastic Bushing
WARNING: Failure to connect
all wires properly as indicated
may cause electrical short circuit
or personal injury. A qualified
electrician should check that all
connections are made properly.
Switch and
Cover Assembly
AUTO
OFF
ON
3
2
1
Blue Wire
Red Wire
Green Wire
Black Wire
White Wire
Blue Wire
To Switch and
Cover Assembly
WARNING: Never touch the
blower wheel while in operation.
INSTALLING
GA3650T/GA3700T/
FA3700T BLOWER
ACCESSORY IN A
32" FIREBOX
Continued
Continued
 Loading...