1.2
DETECTOR TEST PROCEDURE
NOTE
Prior to testing, the detector viewing window
should be cleaned following the guidelines in the
detector instruction manual.
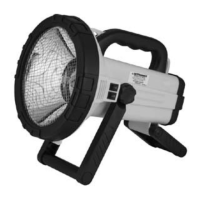
Aim the W8067S on the center viewing axis of the
detector. Refer to Figure 4. Note that any deviation
from the center line will reduce the maximum test range
as shown in Table 1. For IR or UV/IR detectors, center
the beam on the IR sensor. Then, while carefully aiming
the beam on the IR window, slightly wobble* the test
lamp just enough to induce a slight flicker effect on
the detector, but not so much that the beam no longer
covers the detector window(s). (If the test light is
momentarily removed from the detector window, the
detector’s signal processing will start over, resulting in a
longer response time.)
*NOTE
A slight wobble of the test lamp is required to
meet the “icker” requirements of the IR detection
circuitry, but is not required for the UV side of a UV/
IR detector, since UV detectors do not utilize icker
detection circuitry.
Response of the detection system will depend upon the
distance between the test lamp and the detector, the
angle of the test lamp relative to the detector, and the
sensitivity programmed into the detection system. It
may be necessary to decrease the distance between
the detector and the test lamp in order to obtain a
response. Typical response time is 5 to 15 seconds.
NOTE
The maximum recommended battery charge level
is required for maximum test range capability.
SERVICE PROCEDURES
BATTERY MAINTENANCE
The battery must be charged and stored properly to
ensure satisfactory performance. Always store the
battery in a fully charged condition. Disconnect the
charger from the battery. Store in a cool place.
Internal Battery. Charge the battery for at least 15
hours and never over 24 hours — initially and
immediately after each discharge. Never leave the
battery discharged. Recharge at least every 3 months.
Internal Battery Replacement. Care should be taken
when releasing the spade connectors, we strongly
suggest refraining from pulling on the wires as a
method of removal. Refer to Figure 5 for recommended
removal.
W1212 Battery. Charge for 36 hours initially and for
24 hours after each discharge. Recharge for 24 hours
every eight weeks when not in use.
TROUBLESHOOTING
If the test lamp fails to light:
– Check battery charge.
– Check battery connections if using W1212.
– Check internal battery for correct installation.
If the battery fails to charge, check:
– Charger connections.
– Input power to charger.
– Charger should be warm when plugged in. If not,
replace the charger.
– If all above checks out, replace the battery.
If the battery has been charged and the test light
becomes dim within the first 30 seconds, the battery
must be replaced.
3
95-8626
Figure 4—Recommended Test Lamp Position
DEVIATION FROM PERCENTAGE OF
CENTER LINE MAXIMUM RANGE
0° 100%
15° 80%
30° 50%
45° 25%
Table 1—Detector Response to W8067S at Various Angles
Relative to Center Line
A2444
PUSH DOWN ON THE TINY LEVER,
THEN PULL FOR EASY RELEASE OF
THE SPADE CONNECTORS
NOTE: PRIOR TO
REMOVING THE OLD
BATTERIES, BE SURE
TO T AKE NOTE OF
THE WIRING
Figure 5—Spade Connector Removal on Internal Battery for W8067S
 Loading...