Use of the PA system
If you want to set up the system, follow the next steps to ensure that you connect all elements of this product
properly.
1. The unit exists of the following parts:
– Speaker (2x)
– Rear compartment for cables (installed on the speaker)
– Mixer panel (installed on the speaker)
2. Unlock both attached panels, by unlocking the mechanism. This can be done by sliding the grooved
mechanism to the left.
3. Detach both compartments. You now have 2 speakers and 2 seperate panels, of which one contains the
mixer and the other is for cables.
4. Place the mixer panel on a solid surface, such as a table.
5. Place the speakers on a solid surface (such as a floor, table or speaker stands) and tighten the knobs on
the rear if needed (only for installation on a speaker stand).
6. Open the cable lid and take the speaker cables out. These are the long cables with the straight plugs, also
known as 6.35 mm (¼ inch) jack TS plugs. Please make sure that the mixing panel is turned off when
connecting or disconnecting the speakers!
Plug the connectors into the speakers and also into the speaker outputs of the mixer panel. Please be
cautious when plugging the connectors into the mixing panel, as these cables can only be connected to the
speaker outputs. The speaker outputs are installed directly into the top housing of the mixer panel and a
sticker shows you where to connect the speaker cables to.
7. Connect the included power cable of your choice to the power input of the mixer panel. Do not switch on
the device immediately. Connect the corresponding end connector to a power outlet (Schuko or UK).
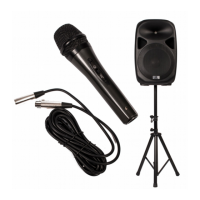
8. Connect your auxiliary devices and microphones to the mixing panel. Please check the sticker on the lid of
the cable compartment to be sure that you connect the right audio product to the right audio input.
If you use monitor speakers or headphones, also use the right connections to connect them properly.
9. Turn on the mixing panel by pressing the switch next to the power input. The device will now be turned on.
Please check if you have connected condenser microphones. If so, please turn on the 'Phantom power'
button to enable +48V Phantom Power.
Practical information
Use the tips below to ensure perfect audio quality and optimal use of the system:
– Do not turn up the volume and EQ knobs all the way up. Start with a small signal and turn the volume
slightly up when needed. Especially when using several audio inputs, it is likely that one source will sound
louder than the other. Please keep the EQ knobs as much as possible on the central 0-point. This will usually
ensure the best audio quality. Only if required you can adjust the EQ.
– Keep the peak LEDs in mind and perform the necessary actions if they light up. If the peak LEDs only light
up slightly during use, it will not be a problem for audio quality. The trick is to keep the audio levels just
underneath the peak LED activation, to ensure the best audio quality and signal strength.
– Keep the master level VU meters in mind and do not drive the speakers with a stronger signal than
Any information and illustrations shown in this user manual are subject to change without further notice.
User manual version: 2.0 Creation date + author initials: 29-09-2015 RV Revision date + author initials: 18-02-2017 RV

 Loading...