Do you have a question about the DeWalt D25133 and is the answer not in the manual?
Provides key specifications like voltage, frequency, power input, speed, and energy for various models.
Critical safety warnings and instructions for safe operation of the power tool. Covers general hazards.
Safe practices for electrical connections, including plug and cord usage.
Precautions for operator safety, including alertness, PPE, and preventing accidental starts.
Instructions for tool use, specific safety rules for rotary hammers, and residual risks.
Details the package contents and provides a description of the tool's parts.
Specifies intended applications, torque limiting clutch, and electrical safety requirements.
Guides on inserting accessories, fitting handles, selecting operating modes, and using extension cables.
Instructions for setting drilling depth and proper hand positioning for safe operation.
Covers switching the tool on/off, hammerdrilling, rotary drilling, and screwdriving.
Instructions for chiselling operations and replacing SDS Plus tool holders/chucks.
Guidelines for tool maintenance, cleaning, and environmental disposal.
Information on optional accessories, service contacts, and environmental protection.
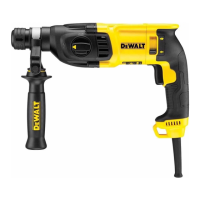
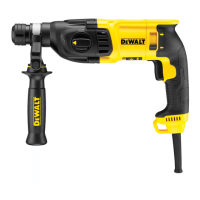
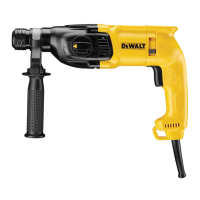
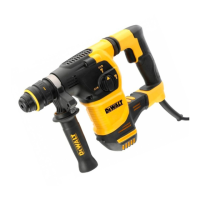
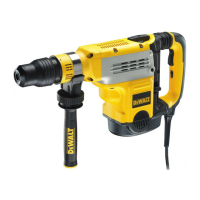
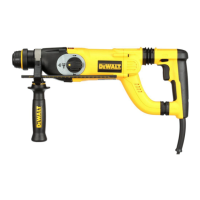
This document provides instructions and safety guidelines for the DEWALT Heavy-Duty Rotary Hammerdrill models D25032, D25033, D25133, D25134, D25144, and D25263. These tools are designed for professional use in drilling, hammerdrilling, screwdriving, and light chipping applications.
The DEWALT Heavy-Duty Rotary Hammerdrill is a versatile power tool designed for various tasks. Its primary functions include:
The tool features a variable speed switch (a) that allows the user to control the tool's speed based on the pressure applied. For continuous operation, the switch can be pressed and held down.
A key safety feature is the Torque Limiting Clutch. All rotary hammerdrills are equipped with this clutch, which reduces the maximum torque reaction transmitted to the operator if a drill bit jams. This also prevents the gearing and electric motor from stalling. The clutch is factory-set and cannot be adjusted.
For models D25134 and D25144, the tool holder can be replaced with a keyless chuck (n) for standard drilling applications.
Operating the rotary hammerdrill involves several steps and considerations:
Selecting the Operating Mode (fig. 2): To change the operating mode, press the mode selector button (e) and rotate the mode selector switch (d) until it aligns with the desired symbol (rotary drilling, hammerdrilling, or hammering only). Always ensure the mode selector switch is locked in place before operation and never attempt to change the mode while the tool is running.
Indexing the Chisel Position (fig. 2): For chiselling tasks, the chisel can be indexed and locked into different positions. This is done by pressing the mode selector button (e), rotating the mode selector switch (d) to the "bit rotation/hammerdrilling" position, rotating the chisel to the desired position, and then setting the mode selector switch (d) to the "hammering only" position. The chisel will then lock into place.
Inserting and Removing SDS Plus Accessories (fig. 3): The tool uses SDS Plus accessories. To insert a bit, clean and grease the shank, then push it into the SDS Plus tool holder (f) and turn it slightly until it fits into the slots. Pull on the bit to confirm it is properly locked. The hammering function requires the bit to move axially within the tool holder. To remove, pull back the tool holder sleeve (j) and pull out the bit. Always wear gloves when changing accessories, as exposed metal parts can become very hot.
Fitting the Side Handle (fig. 4): The side handle (h) is crucial for safe operation and can be adjusted for both right-handed and left-handed users. It must be properly assembled and tightened before using the tool. Never operate the tool without the side handle.
Setting the Drilling Depth (fig. 6): The depth adjustment rod (g) allows for precise control of drilling depth. Insert the drill bit, press and hold the depth rod button (i), adjust the rod to the desired depth, and then release the button.
Reversing Lever (fig. 7): The forward/reverse lever (c) controls the rotation direction, useful for backing out fasteners or freeing jammed bits in drill-only mode. When reversing to clear jammed bits, be prepared for strong reactive torque.
Fitting the Chuck Adapter and Chuck (Optional Accessory for D25032, D25033, D25133, D25263): For standard drilling, a chuck can be screwed onto a chuck adapter and then inserted into the SDS Plus tool holder. Never use standard chucks in hammerdrilling mode.
Replacing the SDS Plus Tool Holder with the Keyless Chuck (D25134, D25144) (fig. 8): To switch to a keyless chuck, turn the locking collar (m) to the unlocking position and pull off the SDS Plus Tool Holder (f). Then push the keyless chuck (n) onto the spindle and turn the locking collar (m) to the locking position. The process is reversed to re-attach the SDS Plus tool holder.
Replacing the Dust Cover (fig. 1): The dust cover (k) prevents dust from entering the mechanism. It should be replaced immediately if worn.
Proper Hand Position (fig. 9): Always hold the tool firmly with both hands – one on the side handle (h) and the other on the main handle (b) – to anticipate sudden reactions and maintain control.
Side Handle Work Light (D25144, D25263) (fig. 5): Some models include a battery-powered work light (o) on the side handle, operated by an on/off button (q). Batteries (CR2032 x 2) can be replaced by removing the battery door screw (p).
Proper maintenance ensures the long-term satisfactory operation and safety of your DEWALT power tool.
General Maintenance: The tool is designed for minimal maintenance. Continuous satisfactory operation depends on proper tool care and regular cleaning.
Service Intervals: This machine is not user-serviceable. It should be taken to an authorised DEWALT repair agent after approximately 40 hours of use. If problems occur earlier, contact an authorised DEWALT repair agent.
Motor Brushes: The tool uses an advanced brush system that automatically stops the drill when the brushes wear out, preventing serious motor damage. New brush assemblies are available at authorised DEWALT service centres, and identical replacement parts must be used.
Lubrication: Your power tool requires no additional lubrication. However, accessories and attachments used with the SDS Plus fitment should be regularly lubricated.
Cleaning: Regularly blow dirt and dust out of the main housing with dry air, especially from around the air vents. Always wear approved eye protection and a dust mask during this procedure. Never use solvents or harsh chemicals for cleaning non-metallic parts, as these can weaken the materials. Use a cloth dampened with water and mild soap. Prevent any liquid from entering the tool and never immerse any part of the tool in liquid.
Accessory Care: Slightly worn chisels can be resharpened by grinding. Do not recondition bits yourself; this should be done by an authorised specialist to prevent injury.
Safety Recommendations: Always turn off the unit and disconnect it from the power source before installing/removing accessories, adjusting setups, or performing repairs. Ensure the trigger switch is in the OFF position to prevent accidental start-up. Never lay the tool down until the bit has come to a complete stop to avoid injury. Do not strike jammed bits with a hammer to dislodge them, as metal fragments or material chips could cause injury. Keep the power cord away from the rotating bit and never wrap it around any part of your body.
Environmental Protection: This product must not be disposed of with normal household waste. It should be collected separately for recycling. DEWALT provides facilities for the collection and recycling of its products at the end of their working life.
| Type | Hammer Drill |
|---|---|
| Power Source | Corded |
| Voltage | 230V |
| Max Drilling Capacity (Concrete) | 26 mm |
| Max Drilling Capacity (Wood) | 30 mm |
| Max Drilling Capacity (Metal) | 13 mm |
| Tool Holder | SDS-Plus |
| Impact Energy | 2.6 J |
| Power Input | 800 W |